
More About Tern Bike Riding Comfort
A well-adjusted saddle improves riding efficiency and reduces pain and strain on your muscles and joints. It’s the king of bike-adjustments, so make sure to get it right. We’ve created this short guide to help. For more detailed and tailored advice, you’ll want to talk to your Tern dealer.
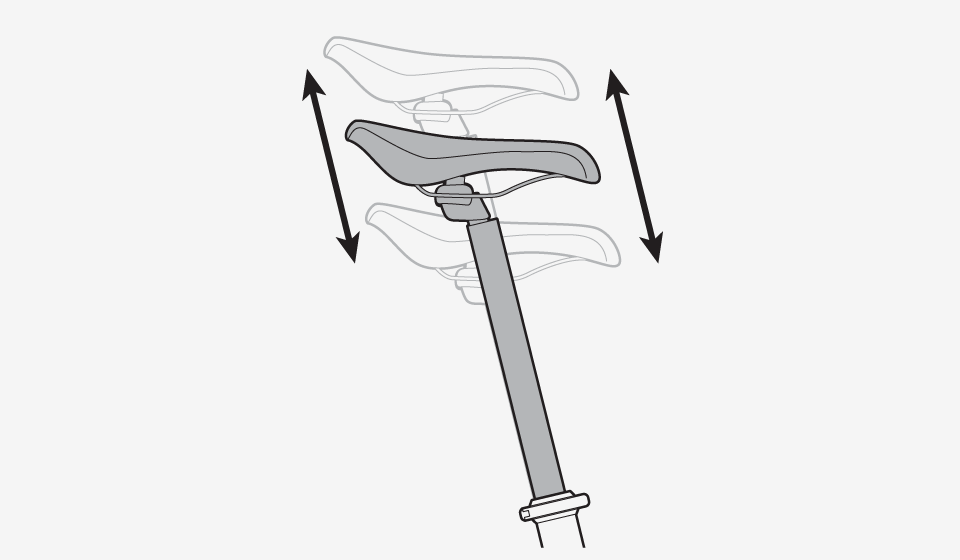
Saddle Height
A Saddle is one of the three contact points your body has with your bike (along with the Handlebars and Pedals), and the bearer of the most overall weight. Let’s start by finding your right Saddle height. Follow these steps:
 1
1
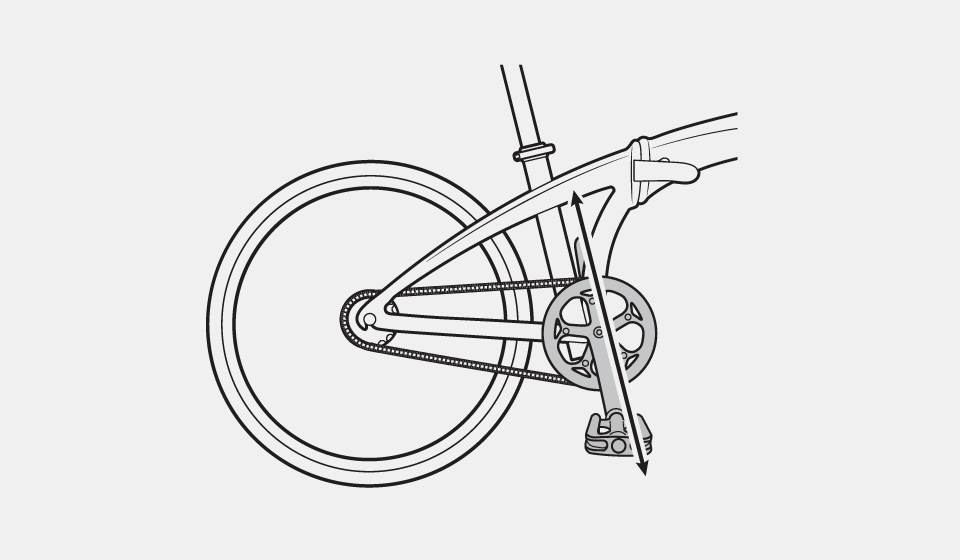
Place the Right Pedal in the down position so that the Pedal Cranks are parallel to the Seat Tube.
 2
2
Raise or lower the Saddle height to an approximately correct position. You’re aiming to set the Saddle high enough so that, when you sit on the bike, the ball of your right foot can just touch the right Pedal with a slight bend in the knee.
 3
3
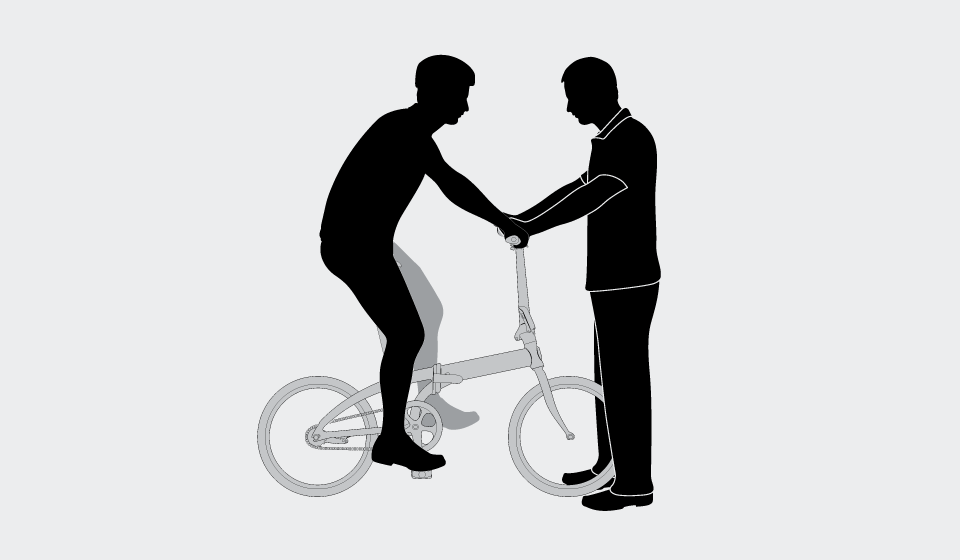
Wearing comfortable riding shoes, sit on the Saddle with your left foot hanging free and your hips square and level. Place your right foot on the right pedal. You’ll need a friend to hold the bike steady for you while you do this; your friend should face you, straddling the Front Wheel and holding the Handlebar to keep you steady.
 4
4
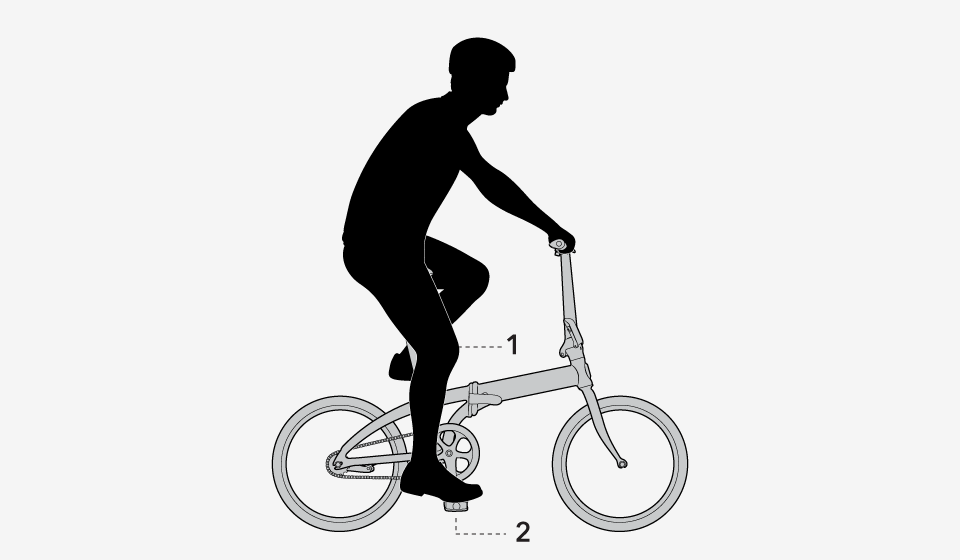
Check that there is some bend in your knee. You should be within 80-90% of full leg extension. If not, keep adjusting the Saddle height until you find the right position.
- Slight bend in knee
- Ball of the foot on Pedal Spindle
TIP!
Once you’ve found the perfect height, check the Seatpost marking and make a mental note of it so that you can always set your Seatpost to the correct height.
Saddle Position
Adjusting a Saddle is delicate business, because it deals with your delicate business. You can move your Saddle forward and backward. You can also angle it up and down. A badly fitted Saddle can injure nerves and blood vessels. So, play around with your Saddle position to find the most comfortable fit.

Tilt
In general, the Saddle should be parallel to the ground, but if it’s not comfortable for you, you can tip the Saddle Nose down to relieve pressure on the crotch or up to distribute your weight over a greater area of the Saddle. Follow these steps below to find the right tilt.
- Use an Allen Key to loosen your Saddle
- Adjust the tilt
- Use your Allen Key to tighten it up
- Test it for comfort
- Repeat until you find the perfect tilt
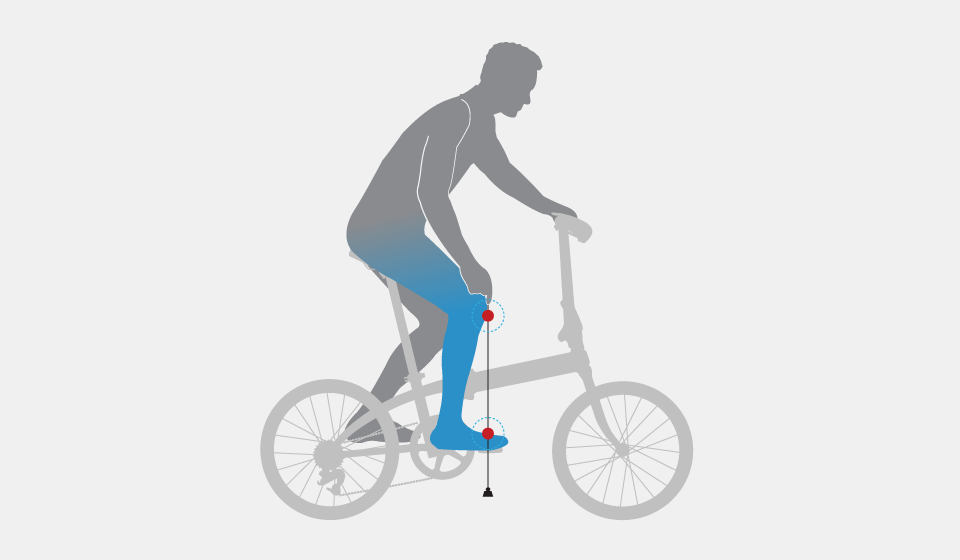
Front-Back Position
For this, you’re going to want to use a plumb line. It’s easy to make at home. It’s just a string with a weight—such as a metal washer—tied to one end. Once you have one, follow these steps. Again, you’ll need a friend to hold the bike steady.
- With the Crank Arms parallel to the ground, sit on the Saddle and place your right foot on the forward/right Pedal
- Hang a plumb line from the top of your knee
- Check to see if the line is running from your knee straight through the ball of your foot
- If not, use an Allen Key to loosen your Saddle and adjust the front-back position accordingly
- Use your Allen Key to tighten up the Saddle
Handlebar Stem Height and Angle
The Stem height and angle determine how far you have to bend over and stretch your arms to reach the Handlebar.
Ideally, you should aim for a 45° degree angle in your back. However, this will depend on the riding style you’re going for. For a comfortable position with a nice view of the scenery, you may want to sit a bit more upright. For a faster, more aerodynamic position, you may want to have more bend at your waist.
Try riding with different positions over a few days or weeks to find the best position for you. When adjusting your Handlebar Stem, be sure that…
- There’s a slight bend in your arms to absorb any shocks
- You can easily reach Shifters and Brake Levers
- The Brake Levers face forward and 45° downward (To adjust this, loosen your Handlebar stem and twist the Handlebar)
Many of our bikes come with Adjustable Stems, making it easy for you to find just the right fit. Check out this article or the videos below to find out more information about how to adjust your bike to fit you best.