Get Surfing Done: Carrying a Surfboard on the Tern GSD Cargo Bike
Heads up!
This article mentions third-party products that are not manufactured by Tern. Please note that product designs might change, and that their manufacturers may choose to maintain the same product name even after the design has changed.
For your safety, always consult with your bike dealer, or with the product manufacturer or reseller, to make sure you have the right components to safely ride the bike.
Have you ever considered the idea that GSD might also stand for “get surfing done”?
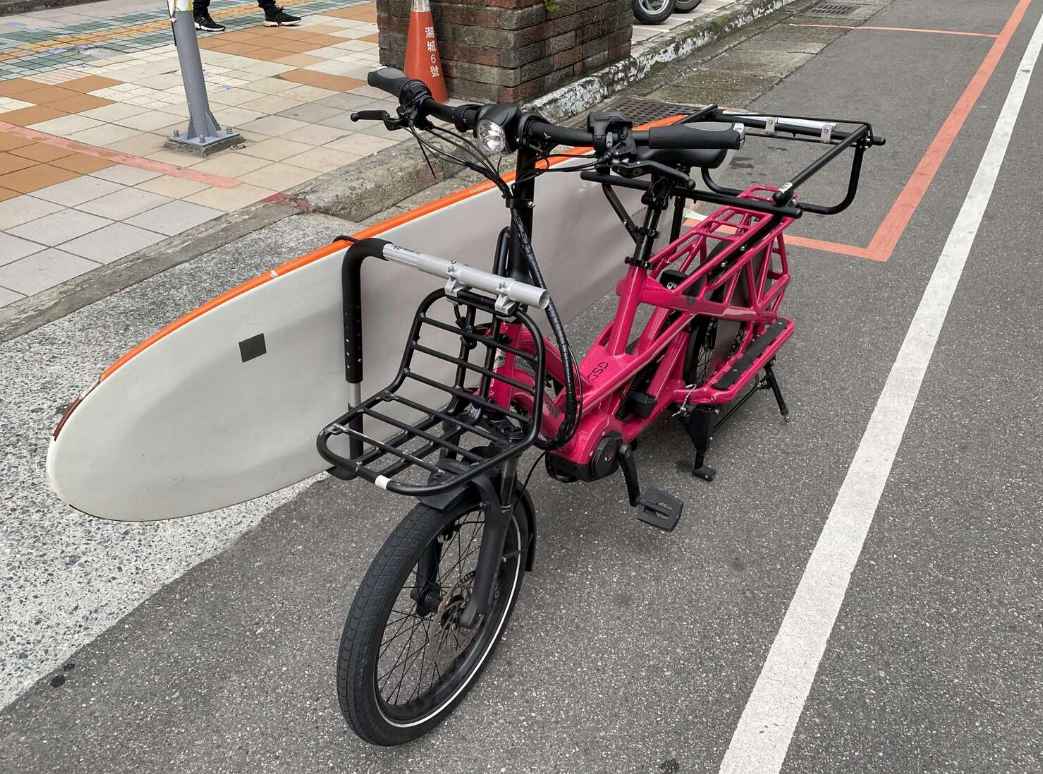
Tern’s very own graphic designer and recreational surfer Zeke Smith tested the Moped Rack by Moved By Bikes (MBB), a company dedicated to creating simple products to get people to do more on their bikes… including carrying a surfboard! Since the Tern team also prioritizes having our riders make the most out of their bikes, we decided to tinker with the Moped Rack on a GSD, which proved successful.
So, if you love surfing as much as e-biking, read on to learn more about how to install the MBB Moped Rack and carry a surfboard on the GSD!
Contents
- First things first
- Option 1: Installing the Moped Rack directly on the GSD frame
- Option 2: Installing the rack on the Clubhouse
- Option 3: Installing the rack on the Hauler Rack and Clubhouse
- Option 4: Installing the rack on the Transporteur Rack and Captain's Chair
- General recommendations
First things first
After a bit of experimenting with the MBB Moped Rack on the GSD, Zeke in California and the Tern team in Taiwan can recommend four ways to install the rack. Zeke used a GSD Gen 1, and the Taiwan team a Gen 2, and all four options work on both bikes.
Whichever option you choose, please read each step of MBB’s manual carefully and note that you will need to make some adjustments to the U-shaped tubes. Please also consider testing the surfboard setup before you hit the road.
But before you start your DIY project, you might want to read Zeke’s advice!
How does carrying a surfboard on an e-bike affect your balance and control when riding? Does the surfboard get in the way of pedaling?
There’s no interference with pedaling. The board does block one entire side of the bike, so you must get on/off the bike from the other side only. If you’re riding in windy conditions, the board would definitely be a factor. Ground clearance will be somewhat affected, so avoid leaning too much when cornering. Also, slow down very carefully when approaching a speed bump as you don’t want the board to hit the ground. Be extra careful mounting and dismounting the bike—be aware of your extra length!
Is it possible to carry a surfboard and a passenger?
It is possible, but I would NOT recommend it.
Option 1: Installing the Moped Rack directly on the GSD frame
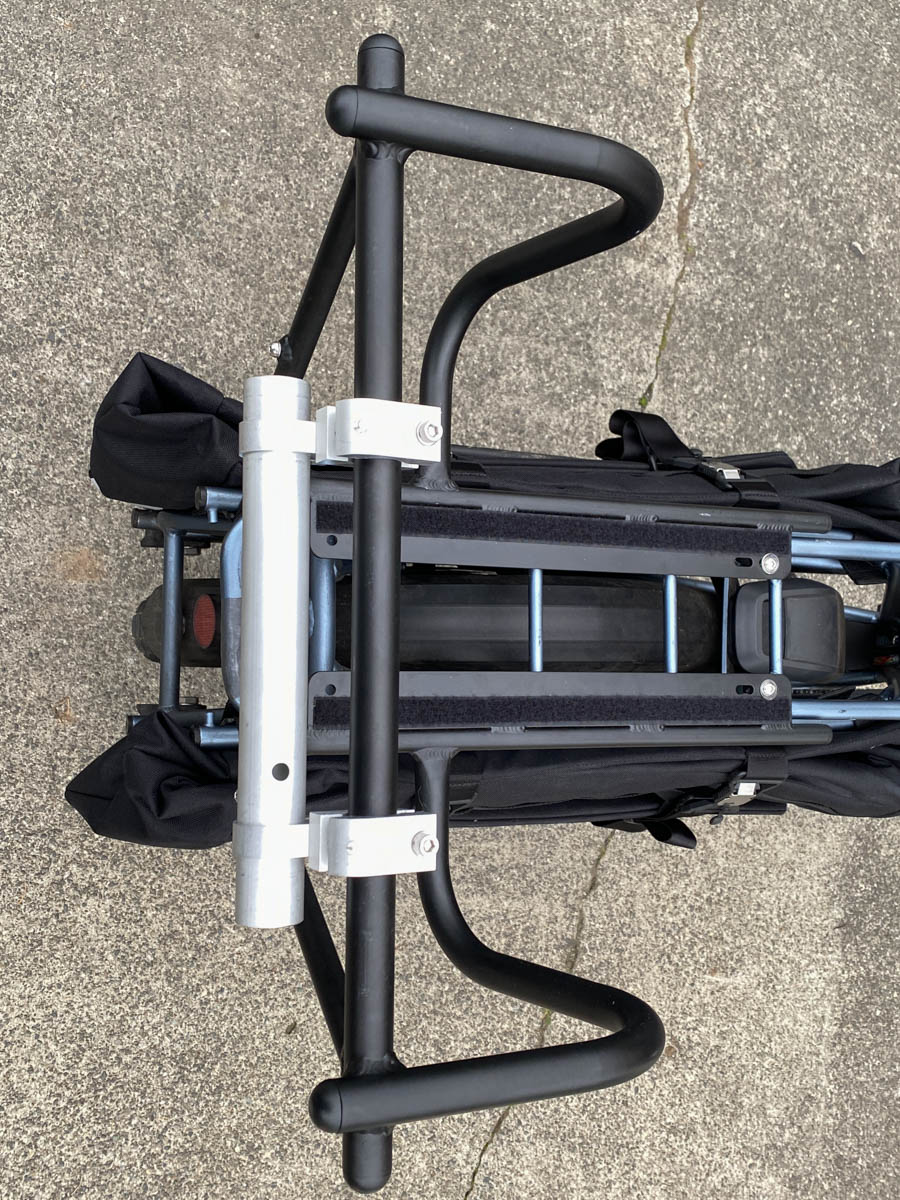
1. Separate the lower part from the upper part of the U-shaped tubes and remove 60 mm of the rubber part.
2. Insert the lower part back into the upper part and set it to the highest position. This step is crucial to leave enough clearance between the surfboard and the road, particularly when making a turn. A clearance of 18 cm (7.2 in) between the U-shaped tube and the ground is recommended.
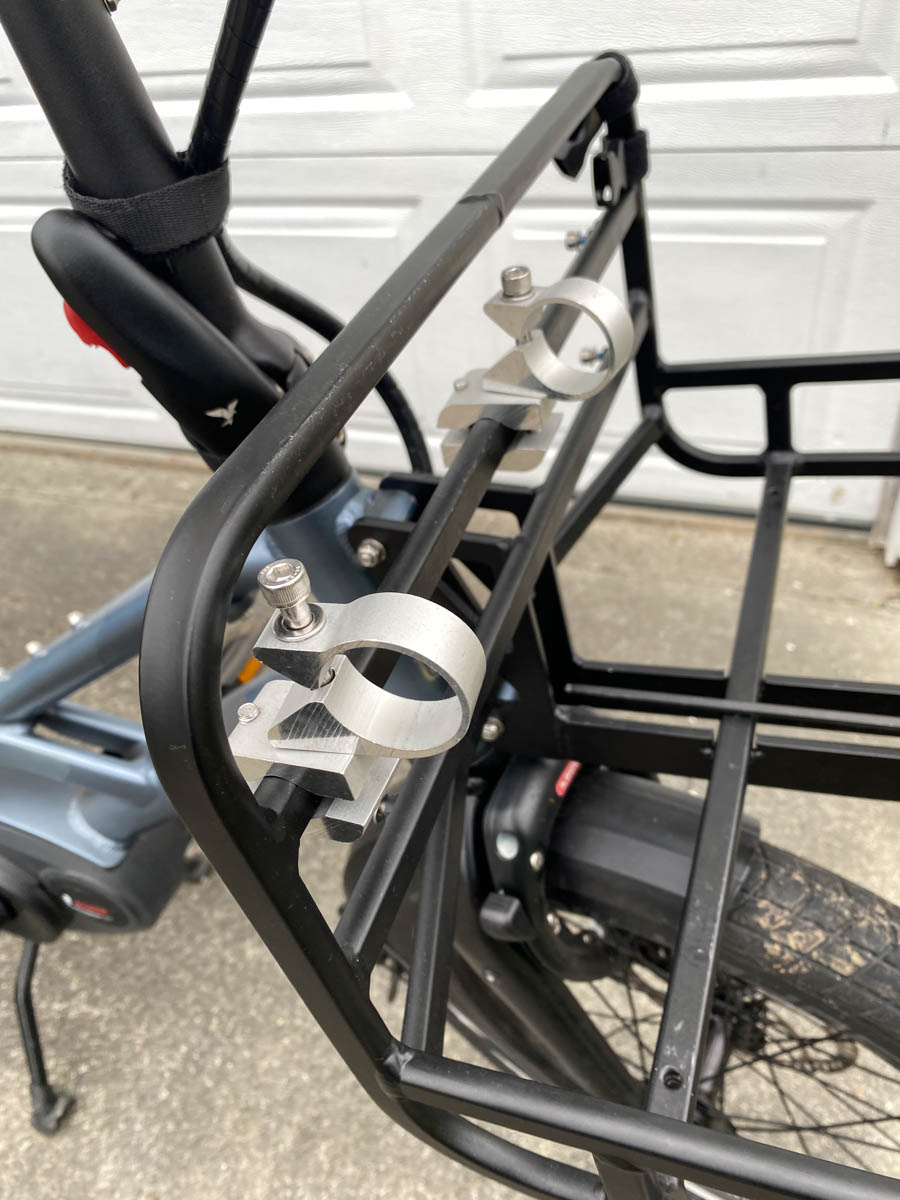
3. Install the mounted tubes on the frontmost and rearmost bars of your bike’s rear rack. To do this, follow the steps described in MBB’s manual under “Install the mounted tubes to your moped/scooter”. Important: Please leave a 10 mm (0.39 in) clearance between the bolts and the edge of the rear rack.
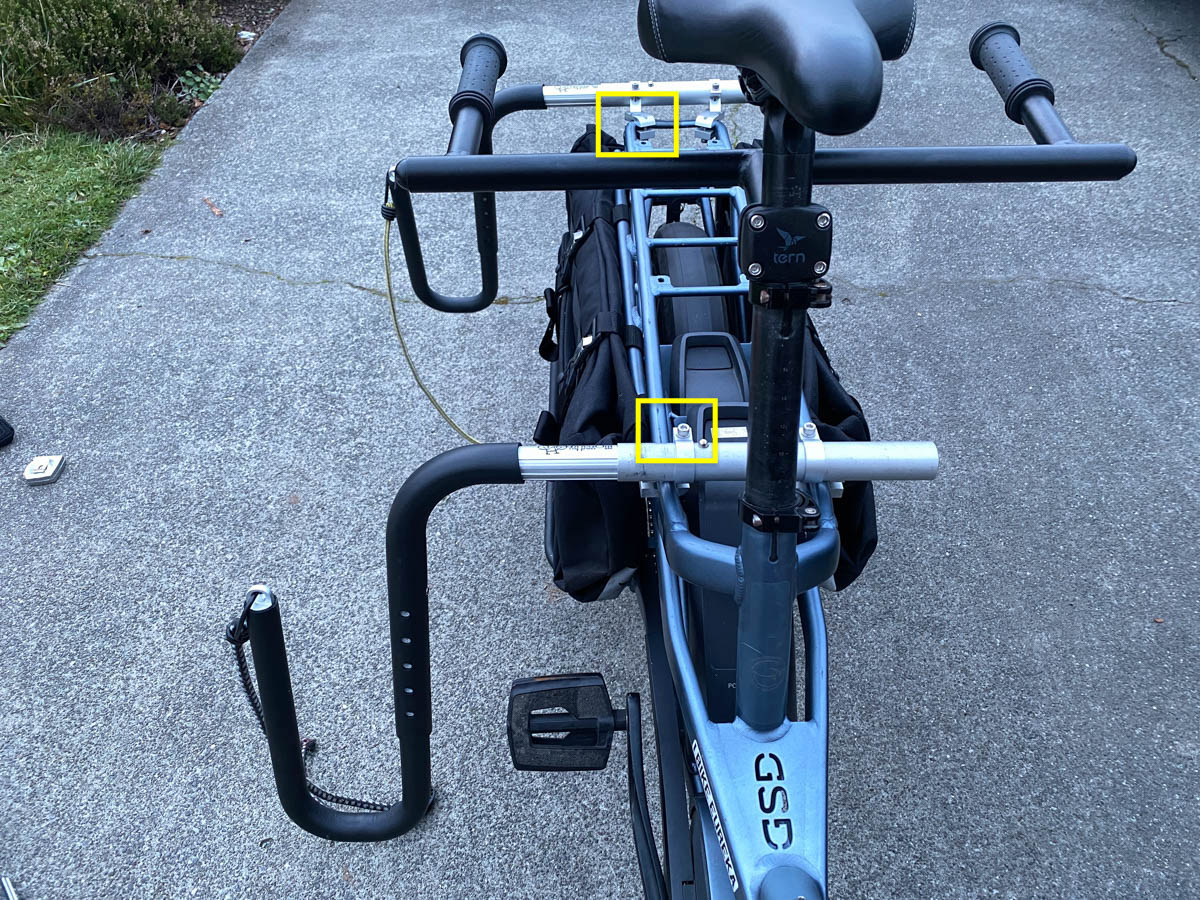 Above: Leave a 10 mm clearance between the bolt and the edge of the rear rack
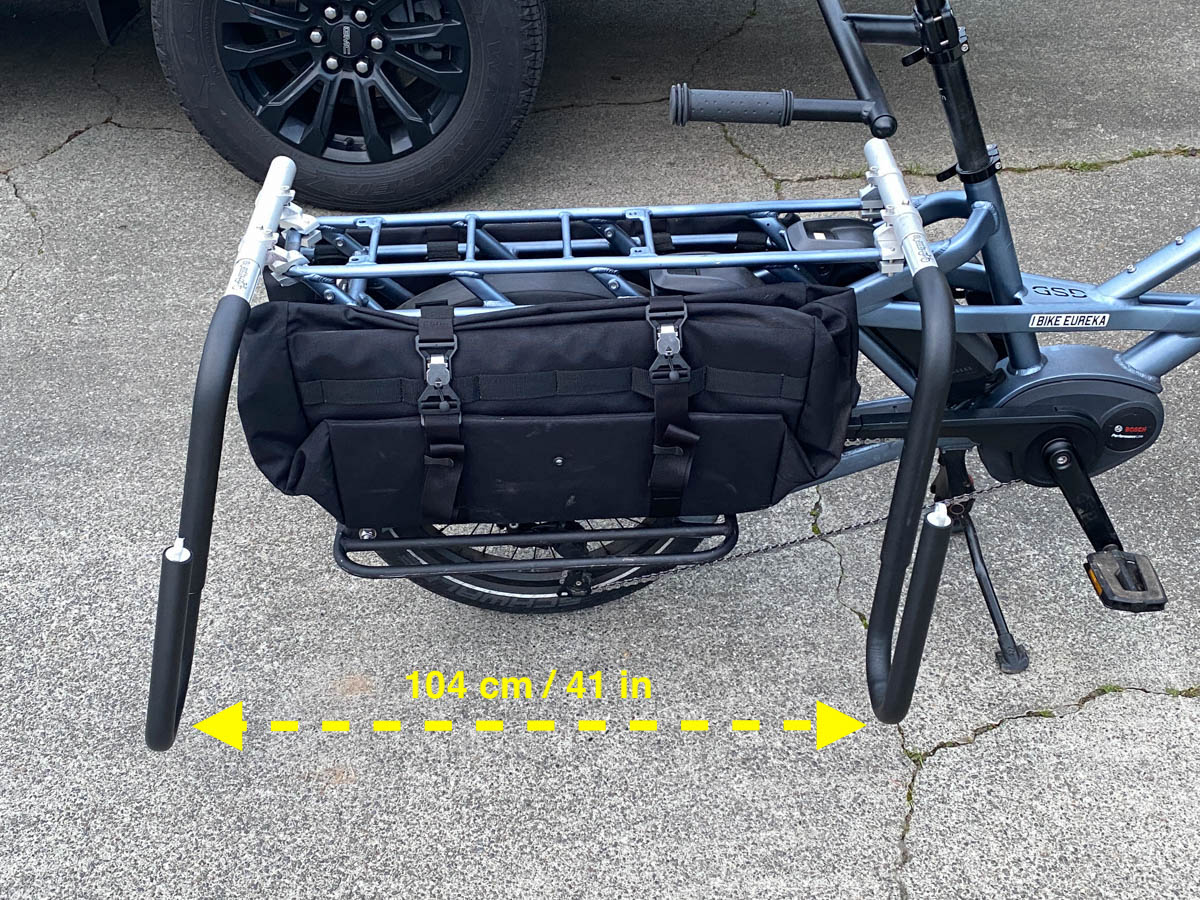
4. Ensure that the distance between the bottom part of the U-shaped tubes is 104 cm (41 in).
5. Finally, remove any excess length of the tubes as you see fit.
Option 2: Installing the rack on the Clubhouse
While you may be familiar with the Clubhouse as a versatile frame for securely holding child seats and cargo, you’ll now discover that they’re also well-suited for transporting a surfboard. The following instructions apply to both Clubhouse Gen 3 and Clubhouse+ frames.
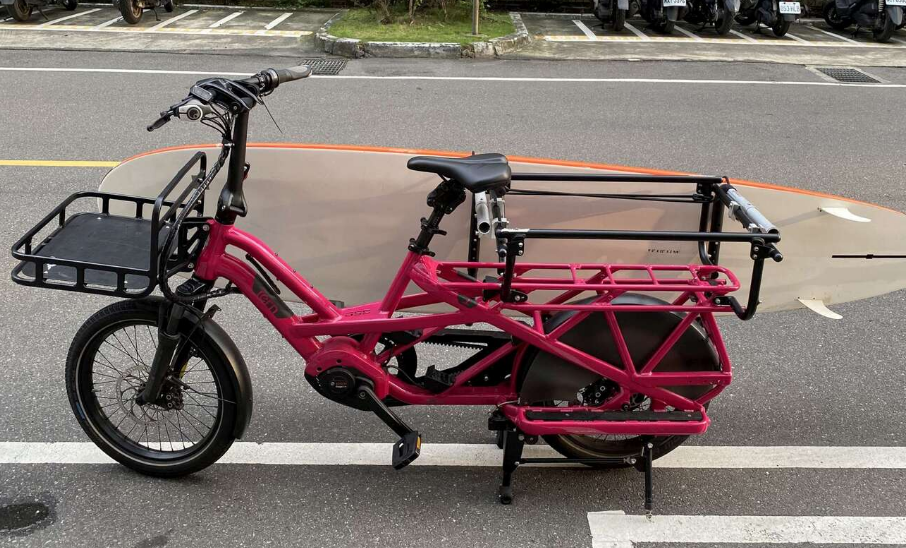
A surfboard on the MBB Moped Rack, installed on a Clubhouse+
1. Remove 60 mm of the rubber part of the U-shaped tubes for road clearance.
2. Install the mounted tubes on the foremost and rearmost bars of the Clubhouse. To do this, follow the steps described in MBB’s manual under “Install the mounted tubes to your moped/scooter”. Important: Please remember to leave a 10 mm clearance between the bolt and the edge of the Clubhouse.
3. Ensure that the distance between the bottom part of the U-shaped tubes is 104 cm (41 in).
4. Remove any excess length of the tubes as you see fit.
Option 3: Installing the rack on the Hauler Rack and Clubhouse
Please note that the following instructions apply to both Clubhouse Gen 3 and Clubhouse+ frames.
Ever thought that the Hauler Rack could haul a surfboard?
1. Remove 60 mm of the rubber part of the U-shaped tubes for road clearance.
2. Install the rear U-shaped tube on the foremost bar of the Clubhouse. To do this, follow the steps described in MBB’s manual under “Install the mounted tubes to your moped/scooter”. Important: Please remember to leave a 10 mm clearance between the bolt and the edge of the Clubhouse.
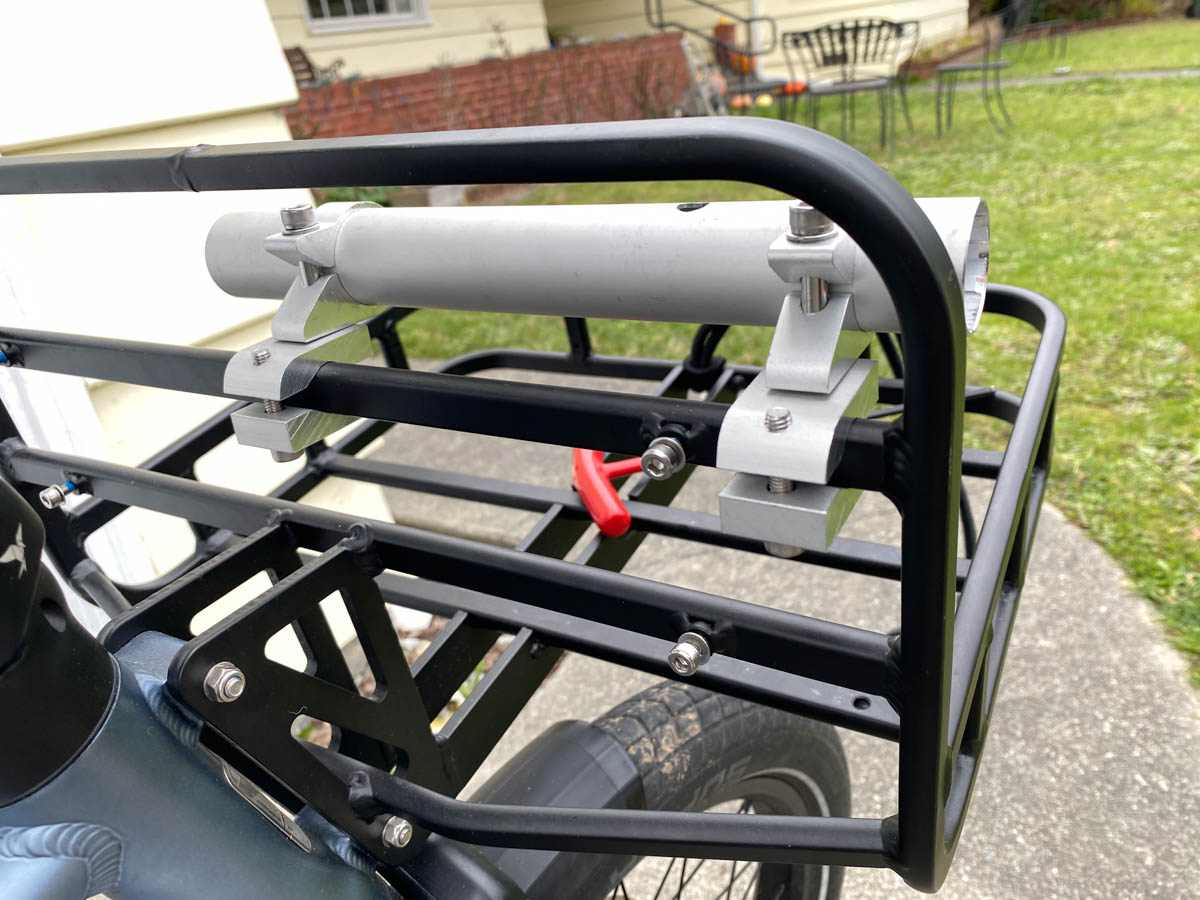
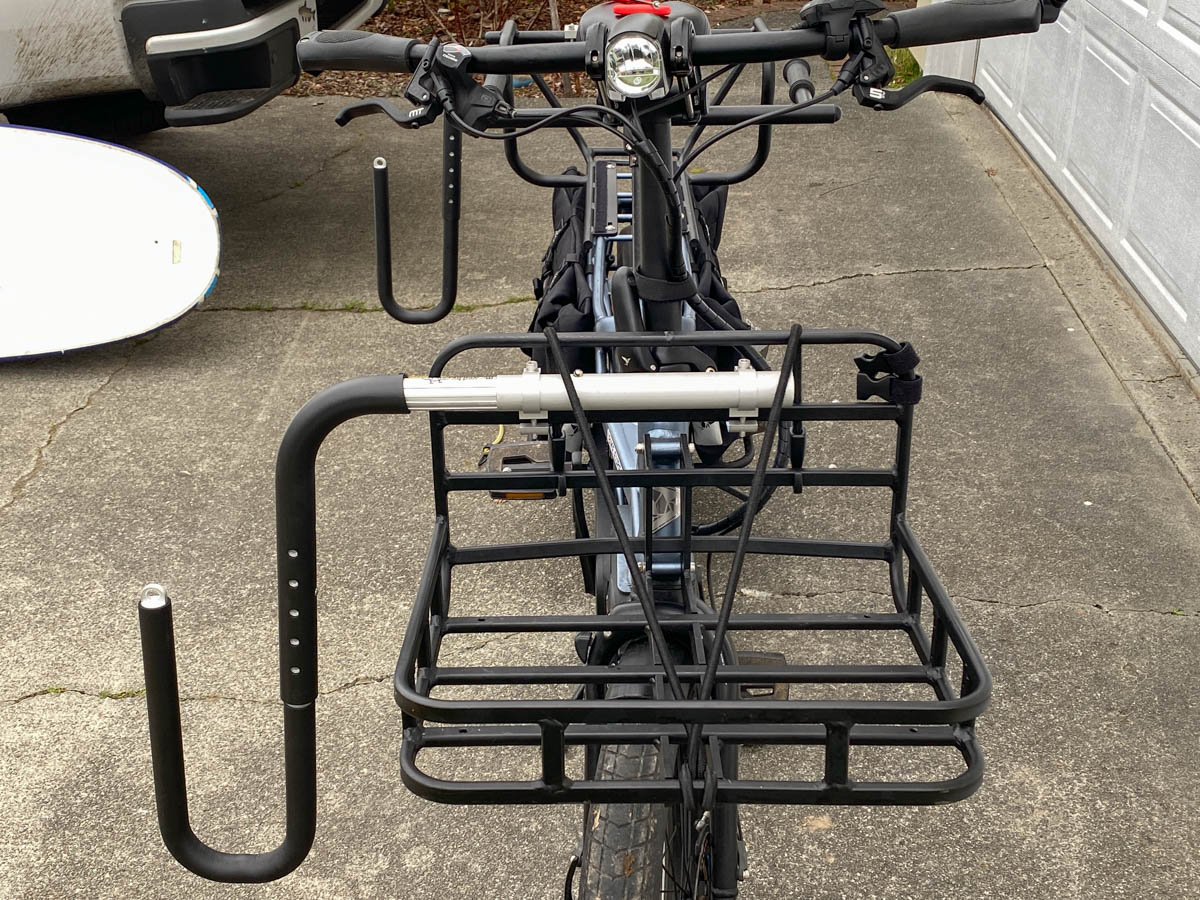
3. When installing the front U-shaped tube on the Hauler Rack, please make sure that the clamps are mounted on the rack’s upper tube, as shown in the photo above.
Option 4: Installing the rack on the Transporteur Rack and Captain's Chair
For this setup, it is possible to use both the Captain’s Chair Gen 1 and Gen 2. The following will refer to both generations unless otherwise indicated.
1. Remove 60 mm of the rubber part of the U-shaped tubes for road clearance.
2. Remove the backrest and seat pad from the Captain’s Chair.
3. Fasten the two clamps on the Captain’s Chair’s top horizontal bar and attach the U-shaped tubes there. If you have a Captain’s Chair Gen 2, please remember to fasten the clamps upside down.
4. When installing the front U-shaped tube on the Transporteur Rack, please make sure that the clamps are mounted on the rack’s middle tube.
Removing the backrest and seat pad helps prevent damage
Moped Rack clamps on the Transporteur Rack
Rear view
Front view
General recommendations
- Please note that the Moped Rack is designed to carry one surfboard only.
- If your surfboard is around 213 cm (7 feet) long, we recommend installing the Moped Rack bars on the same part of the bike (i.e., both bars on the rear rack or on the Clubhouse).
- Alternatively, if your surfboard is around 244 cm (8 feet) long, we recommend installing one tube on the rear of the bike and the other on the front (e.g., one on the Clubhouse and the other on the front rack).
- Either way, ensure that the board is fastened securely with a bungee cord or strap, and remember to remove the surfboard leash from the board and carry it separately.
- We do not recommend carrying a passenger AND a surfboard.
Carrying a surfboard on a bike requires some time and patience. If you’re new to this, seek out a quiet area for practice. Start small, ride slowly, and gradually carry more stuff so you can find your balance at your own pace… then carry your surfboard.
Enjoy the ride!