How to Fit a Tern Link or a Verge into the AirPorter Slim
This article refers to Verge and Link bikes.
Parts needed
- Tern FlightSuit™
Tools needed
- 15 mm Crescent Wrench
- 5 mm Hex Key
Step 1: Remove both pedals using 15 mm crescent wrench.
Step 2: Remove both wheels. For wheels with nuts, use 15 mm crescent wrench.
Step 3: Insert dropout protectors into front and rear dropouts.


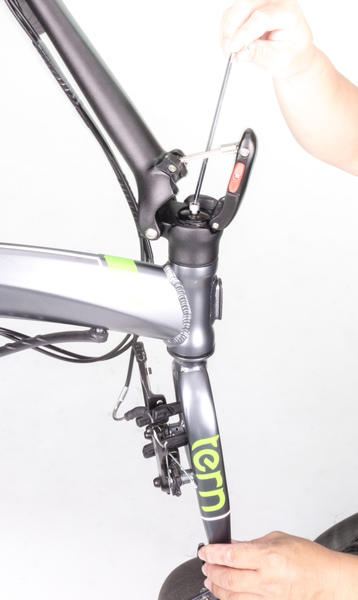
Step 4: Open Physis Handlepost lever. Remove Top Cap and loosen Top Cap Bolt.

Step 5: Loosen both Steerer Clamp Bolts using 5 mm Hex Key.

Step 6: Detach Physis Handlepost from frame.


Step 7: Put Top Cap, then Top Cap Bolt back onto steering tube and tighten.

Step 8: If bike has rack or front fender, remove them. Remove seat post. Lay out all parts on floor.

Step 9: Fold frame and put handlepost and handlebar socks over handlepost and handlebar.


Step 10: Place AirPorter Slim on floor, open cover, and lay buckles on outside.

Step 11: Place QR skewers into designated slots.

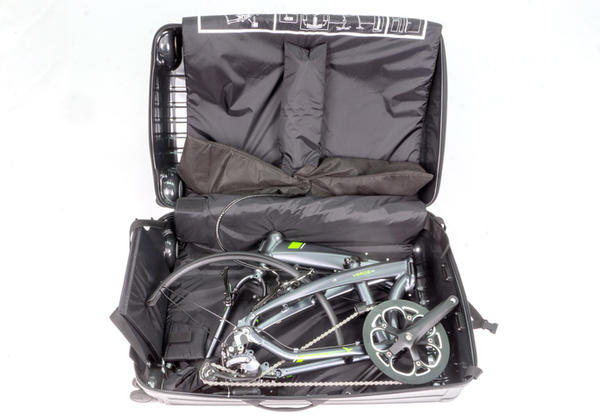
Step 12: Place frame on top of padding with front frame half underneath rear frame half. Lay handlebar assembly on upper section of Airporter Slim. Rotate crank as shown below.

Step 13: Place pedals in pedal bag. Then place as shown below.

Step 14: Place padding on seatpost. Then place as shown below.

Step 15: If bike has front fender, place it inside as shown below.

Step 16: If bike has rear rack, place it inside as shown below.

Step 17: Place handlebar assembly onto frame.

Step 18: Fold padding over.

Step 19: Place Rear Wheel on padding with cassette facing padding.

Step 20: Place Front Wheel on padding partially overlapping Rear Wheel.

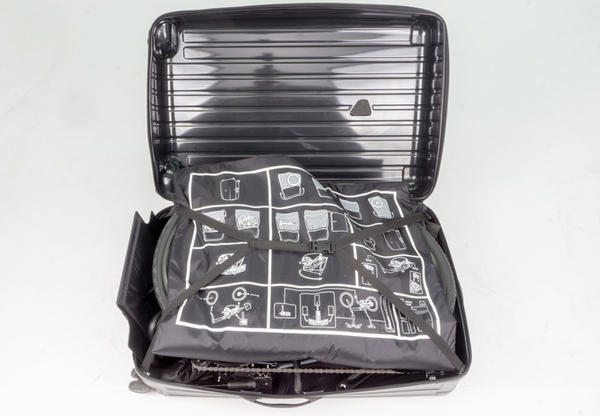
Step 21: Fold padding over wheels.

Step 22: Clasp buckles shut and cinch tightly.

Step 23: Align top and bottom halves of Airporter Slim.

Step 24: Pull zipper to close.

Please Note
This article only provides the general steps for specific Tern bicycle models. Some steps may vary by year and model.
This article is intended to serve as a helpful resource for Tern bicycle owners. It is for informational and educational purposes only. Use this information at your own risk. Consult with your authorized Tern dealer for professional advice and assistance.