How to Install the Tern GSD Lockstand Protector Gen 2
As a GSD Gen 2 rider, you may have experienced issues with your Lockstand ("kickstand"). Dirt, pebbles, salt, and other road debris may find their way into the Lockstand’s small moving parts, which can prevent proper functioning. This debris can get stuck in the locking mechanism and physically block it from fully engaging. This article explains how to prevent such a blockage by installing the Lockstand Protector Gen 2.
What is the Lockstand Protector Gen 2?
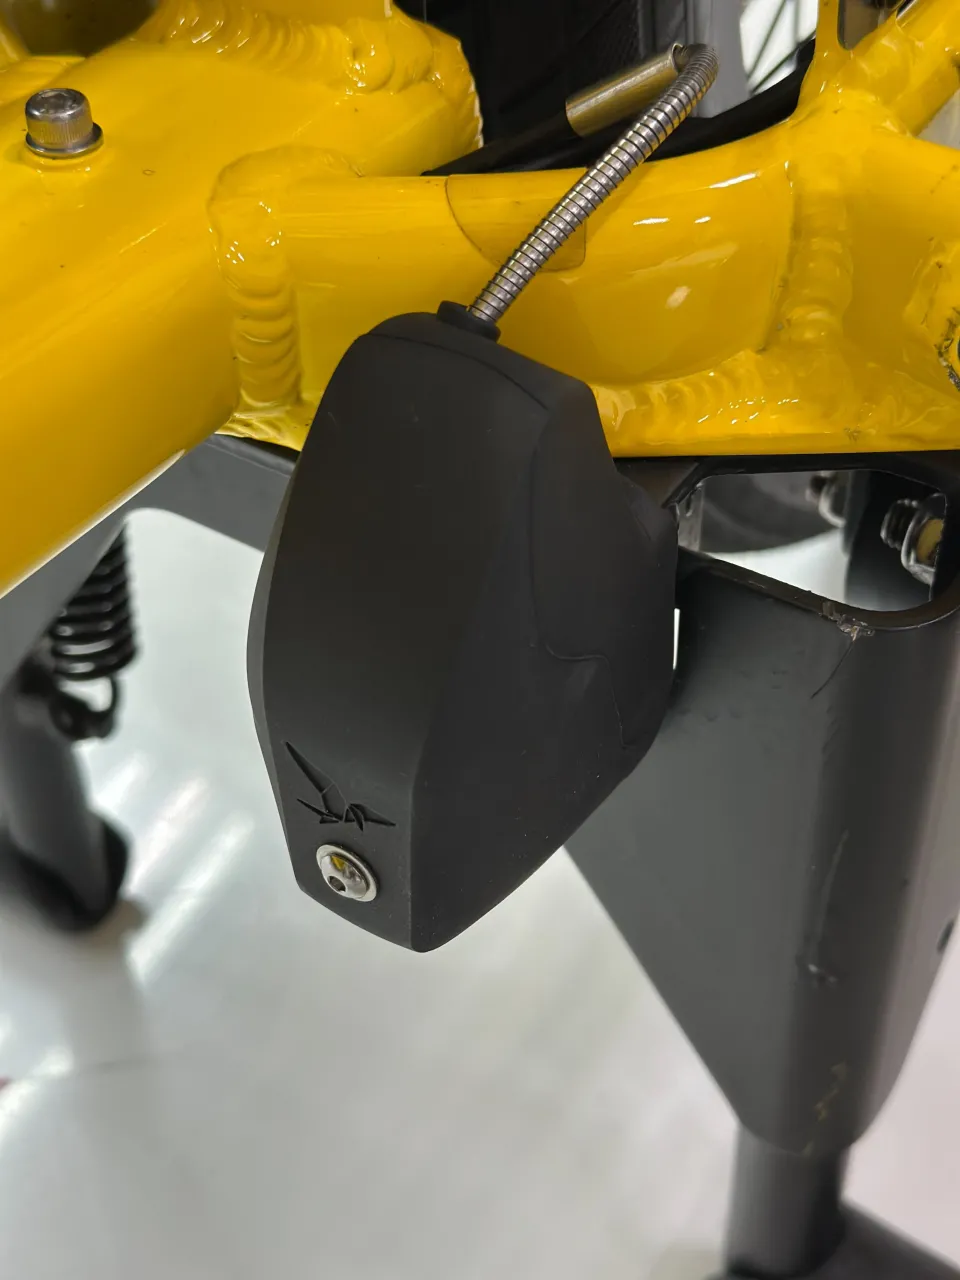
The Lockstand Protector Gen 2 is a small, durable cover that fits on the GSD Lockstand’s latch to protect it from debris. Inside the Lockstand Protector is a magnet that connects to the kickstand plate. This is what it looks like:


What do I need to install the Lockstand Protector Gen 2?
- Your GSD Gen 2
- A Lockstand Protector Gen 2*
*Contact your Tern dealer to get one for free. Please note that the item may not be immediately in stock, and that availability and delivery will depend on several factors.
Safety Warning
The GSD's Atlas Lockstand is spring-loaded. The force of the spring is powerful enough to allow the Lockstand to move freely underneath a fully loaded GSD. Failure to follow the directions carefully could result in serious injury.
In particular, please ensure that:
- Before starting installation, park your GSD on a flat, stable surface.
- When deploying the Lockstand, keep fingers, clothing, and loose items clear of the mechanism to prevent pinching.
Installation Steps
Step 1: Deploy your GSD’s Lockstand (”kickstand”) and park the bike horizontally on level ground.
Step 2: Inspect the kickstand locking mechanism for dirt or debris, and clean it if needed—check out the instructions here.
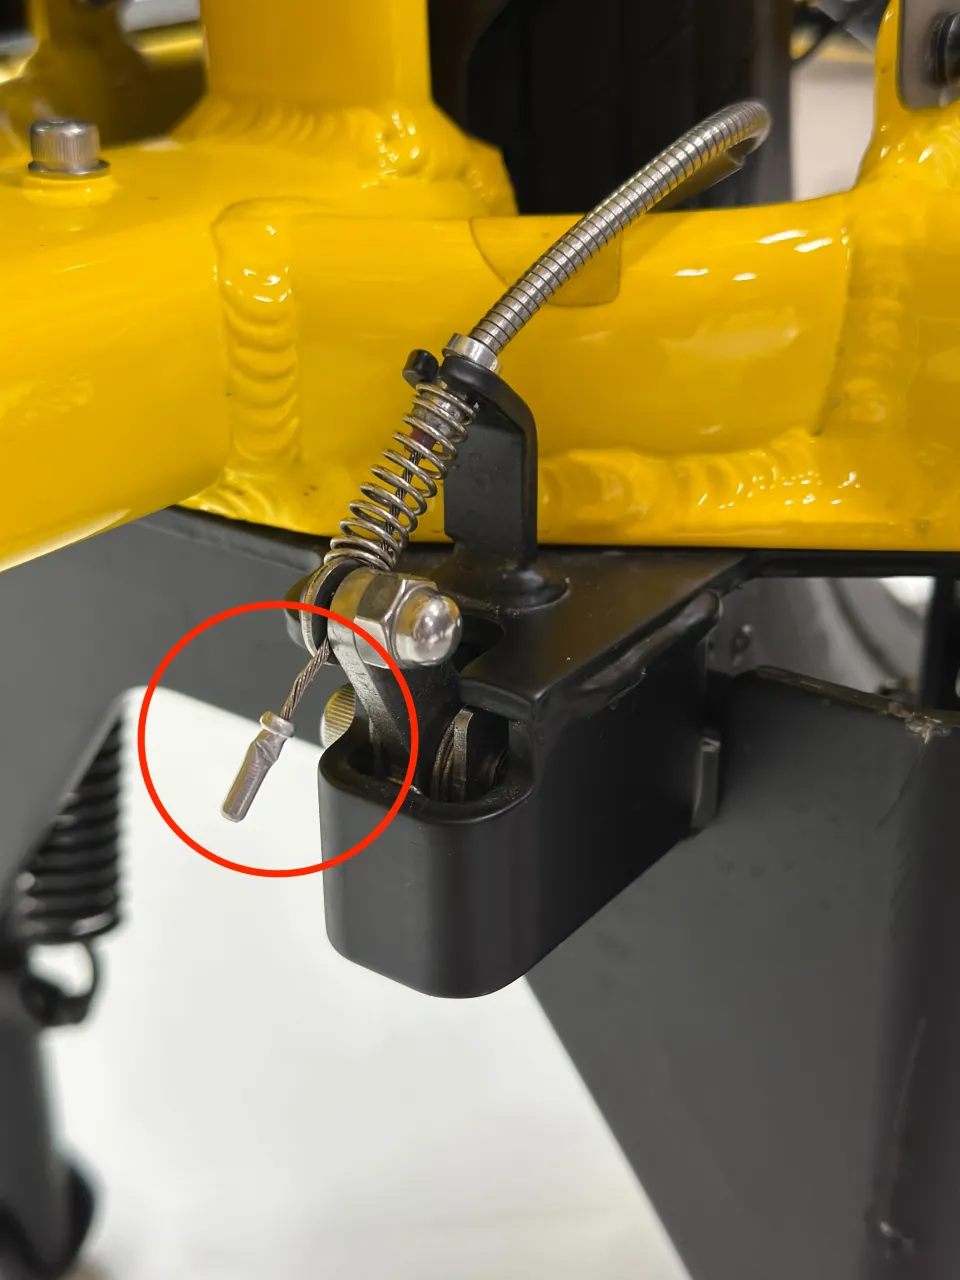
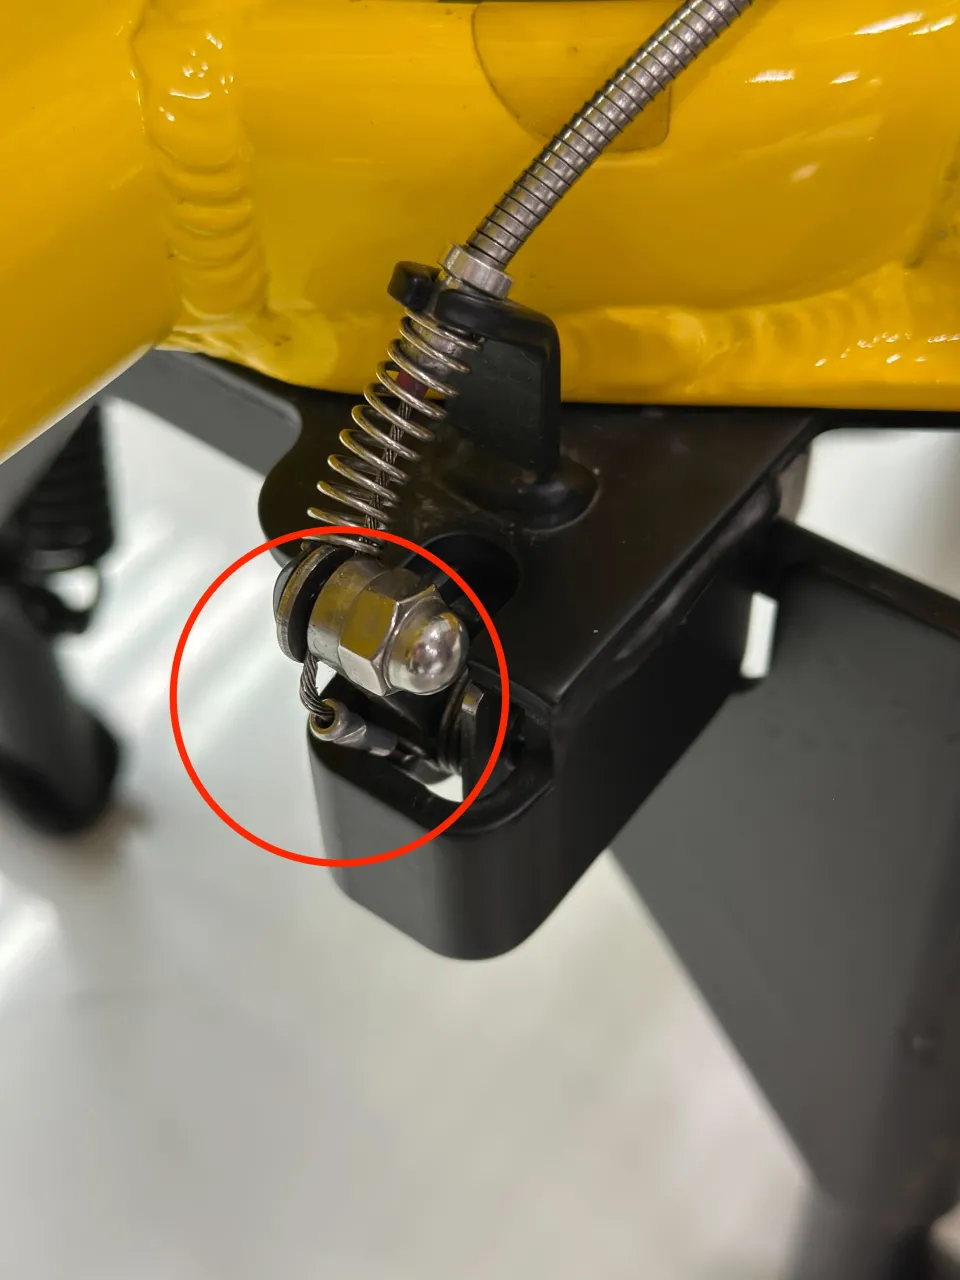
Step 3: Insert the cable end into the small gap in the kickstand’s base plate, as highlighted in the images below.
Step 4: Place the Lockstand Protector over the locking mechanism.
Make sure it fully covers the Lockstand's latch and that the magnet securely attaches to the kickstand's base plate. Done!