How to Tighten the OCL Hinge Shaft
This article refers to bikes with an OCL Joint.
Please check the tightness of the OCL Joint Hinge Shafts on a weekly basis if you ride the bike frequently. If you ride only occasionally, checking once a month is sufficient.
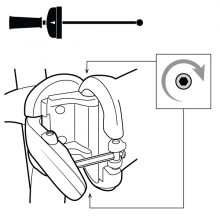
Hinge Shaft Location on OCL Joint. The OCL Joint has two (2) Hinge Shafts: one on top and one on the bottom.
Tools Needed
Torque Wrench or 5 mm Hex Key
Instructions
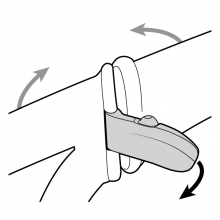
1. Open the OCL Frame Lever

2. Remove the Hinge Shaft Plug if present. Both the upper and lower Hinge Shafts should be tightened with a Torque Wrench to a value of 10-12 Nm. Tighten the Hinge Shaft all the way down to achieve required torque value. Depending on the condition of the bike, tightening the Hinge Shaft may require force greater than 10-12 Nm. Please ensure that both Hinge Shafts are tightened so that they are fully seated and can no longer rotate.

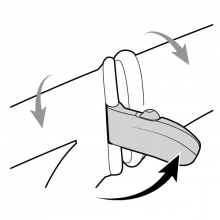
3. Close the OCL Frame Lever.

Note: Please check that the Adjustment Bolt is properly adjusted to achieve a closing force of 60 – 80 N. To understand how to adjust the Frame Lever, please refer to this video
If you are unsure how to do this operation, please take your bike to your local dealer for help.
If you find that the Hinge Shaft rotates freely without resistance, please stop riding and bring your bike to your dealer for a service inspection.