
How to Clean and Maintain Your GSD Atlas Lockstand
The Atlas Lockstand on your GSD (Gen 2) contains some small moving parts—and those parts have a big job to do. The parts must be consistently clean, securely tightened, and properly aligned for the locking mechanism to work correctly time after time (and load after load).
If you’ve run into issues with your Lockstand—for example, if your Lockstand won’t stay locked—there a few likely culprits, including:
- Debris stuck inside the latch,
- Loose bolts, or
- A misaligned latch.
This article will explain how to fix all three problems.
Before we get started, a quick (but critical!) safety warning.
Safety Warning
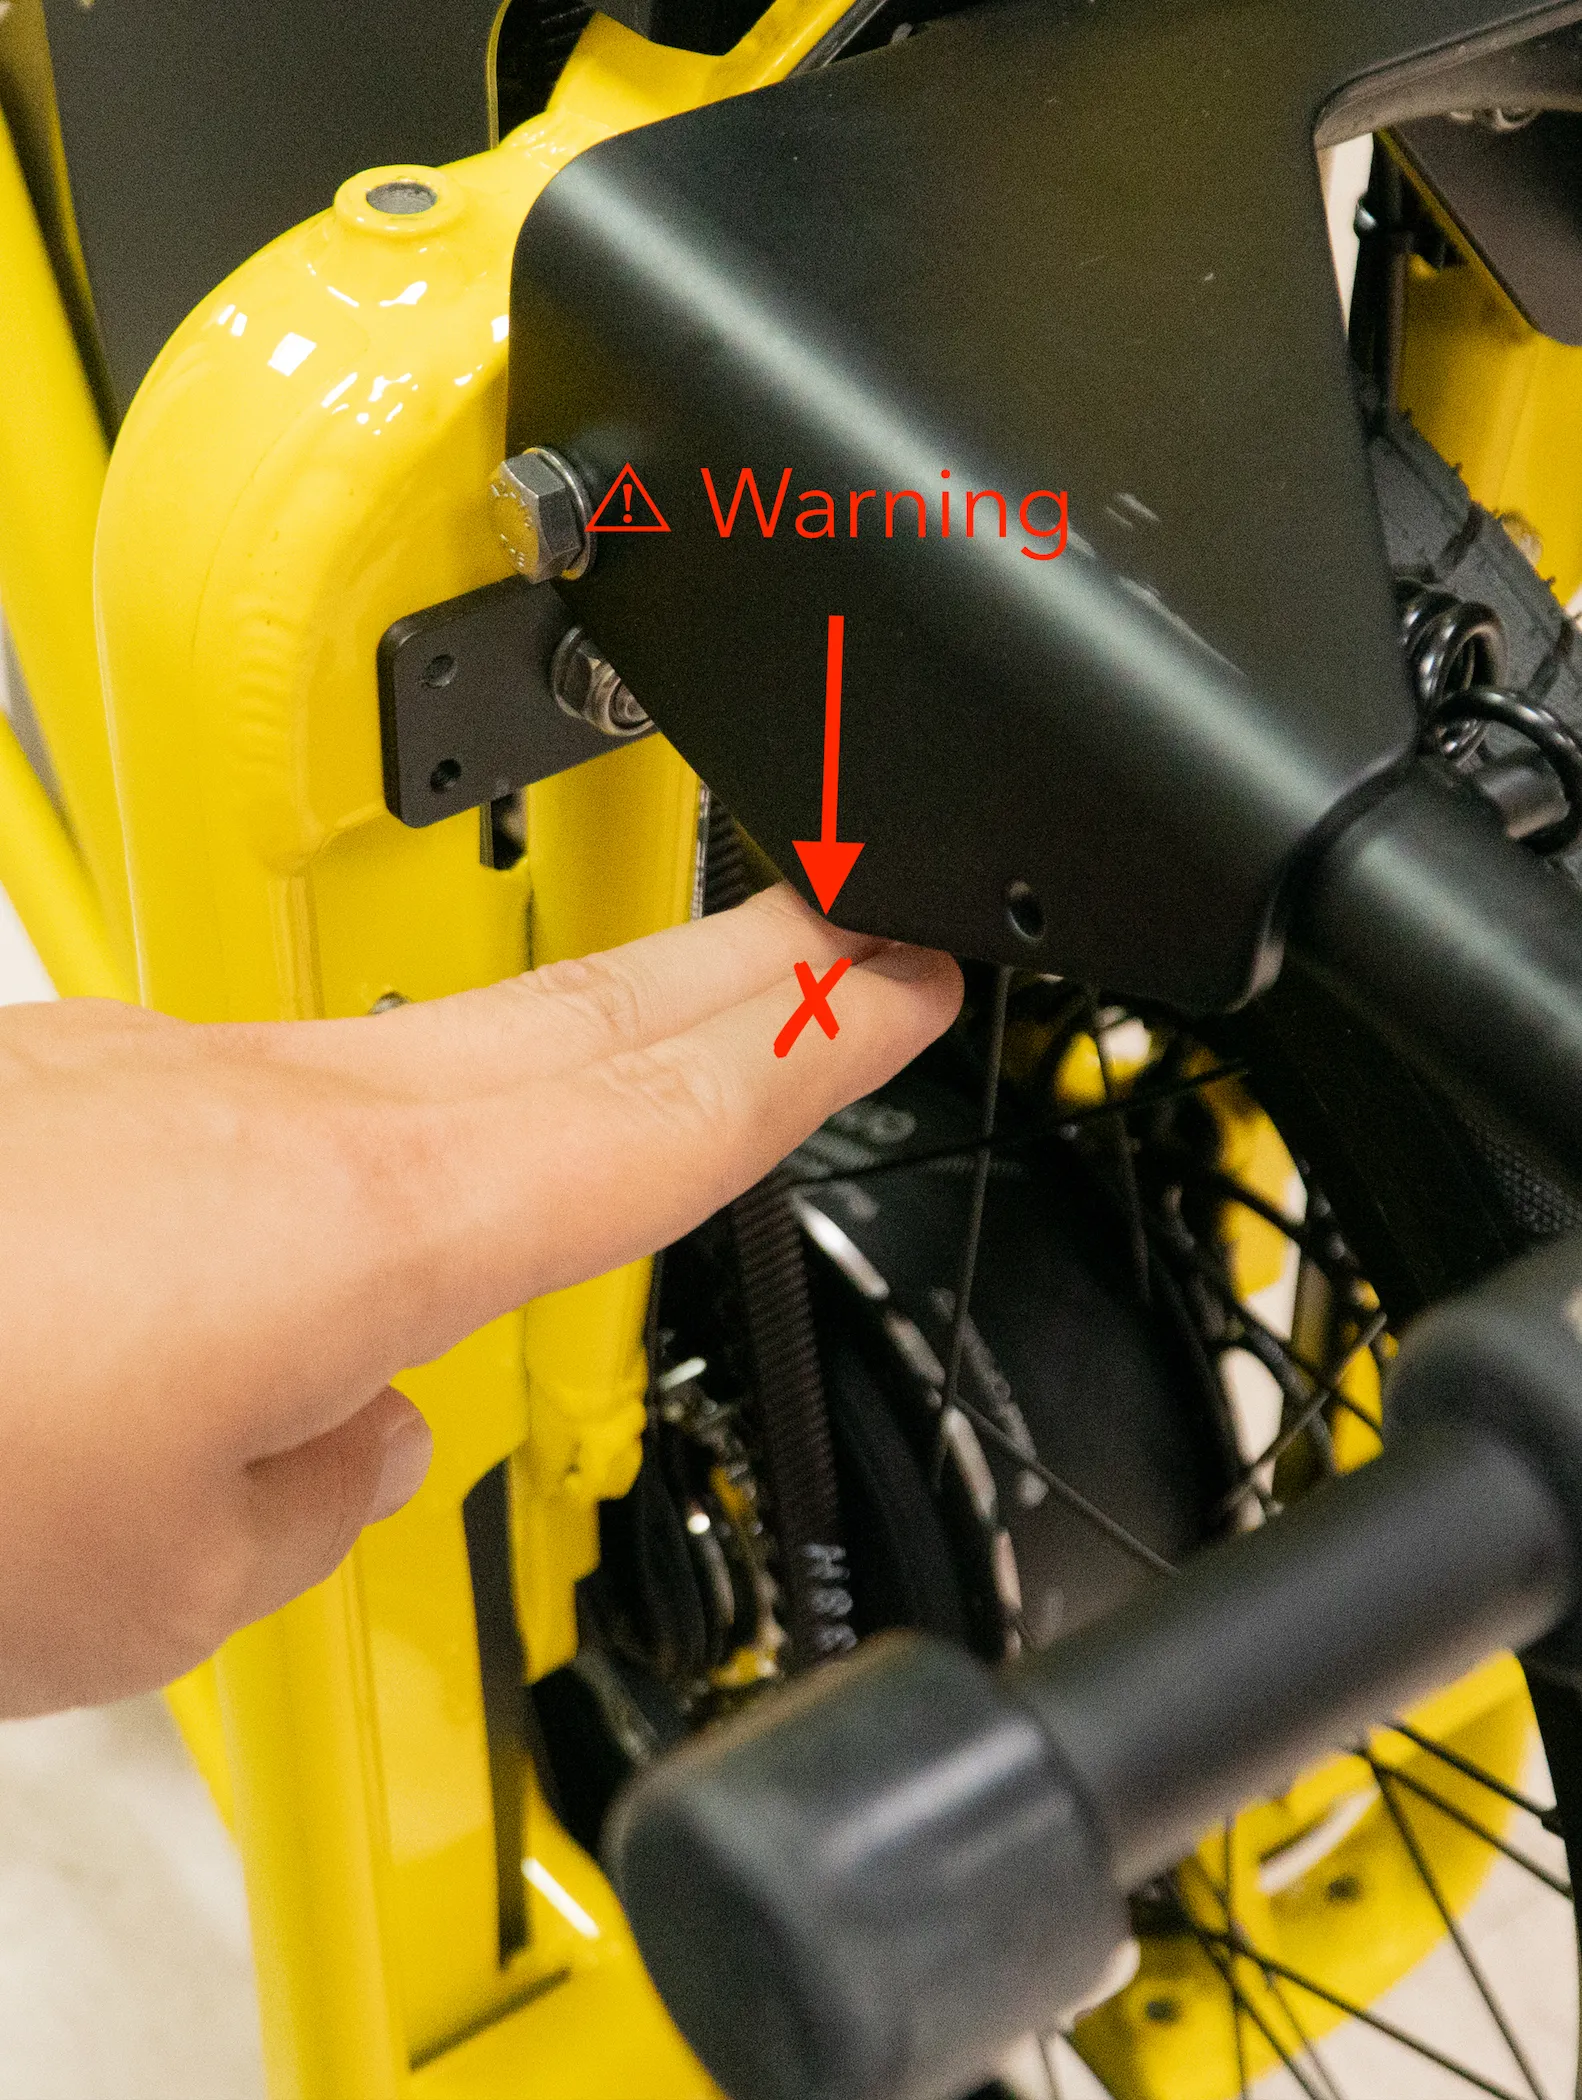
All three solutions we're about to describe require you to vertically park your GSD and work with the Lockstand’s parts. Use caution when doing so.
The Atlas Lockstand is spring-loaded. The force of the spring is powerful enough to allow the Lockstand to move freely underneath a fully-loaded GSD. Failure to follow the directions carefully could result in serious injury.
In particular, ensure that you:
- Press the Remote Unlock lever and put up the Atlas Lockstand with your bike in the horizontal position. Do not vertically park your GSD to begin working on it until you’ve put up the Lockstand.
- Do not attempt to work on the Lockstand with your GSD in the horizontal position.
- Do not deploy (meaning, release or bring into the locked position) the Lockstand until the instructions indicate that you must do so.
- When the instructions indicate you should deploy the Lockstand, you must use one hand to hold one of the Lockstand's legs while deploying it. This minimizes the risk of catching your hand in the Lockstand’s parts, which could cause serious injury.
- Do not put your hand below the Lockstand's legs while cleaning or working on the stand.
Now that we've got safety covered, read on to learn how to get your Lockstand working smoothly again.
Contents
- Safety Warning
- Solution #1: Clean Debris from Your Lockstand (and Keep it Clean)
- Solution #2: Fix Recurring Loose Bolts with Spring Washers
- Solution #3: Fix a Misaligned Latch
Solution #1: Clean Debris from Your Lockstand (and Keep it Clean)
If dirt, small rocks, salt, or other road debris find their way into the stand’s locking mechanism, they could prevent proper functioning. For example, debris could get stuck in the locking mechanism and physically block it from fully engaging.
You should check your Lockstand’s locking mechanism for debris and clean it (if needed) at the following times:
- Every time you ride on unpaved roads, snow or ice, or in particularly wet conditions,
- If your Lockstand won’t fully engage and you don’t know why.
Here’s how:
What You’ll Need
- Water & cleaning brush OR hose with a pressurized sprayer
- A light lubricant
Pressurized Water Warning
If using pressurized water to clean your Lockstand, direct the spray away from your GSD’s Bosch motor. It’s okay if the motor casing gets wet, but a direct high-pressure spray could damage the motor.
Safety Warning
Before you get started, make sure to re-read the Safety Warning from the beginning of the article.
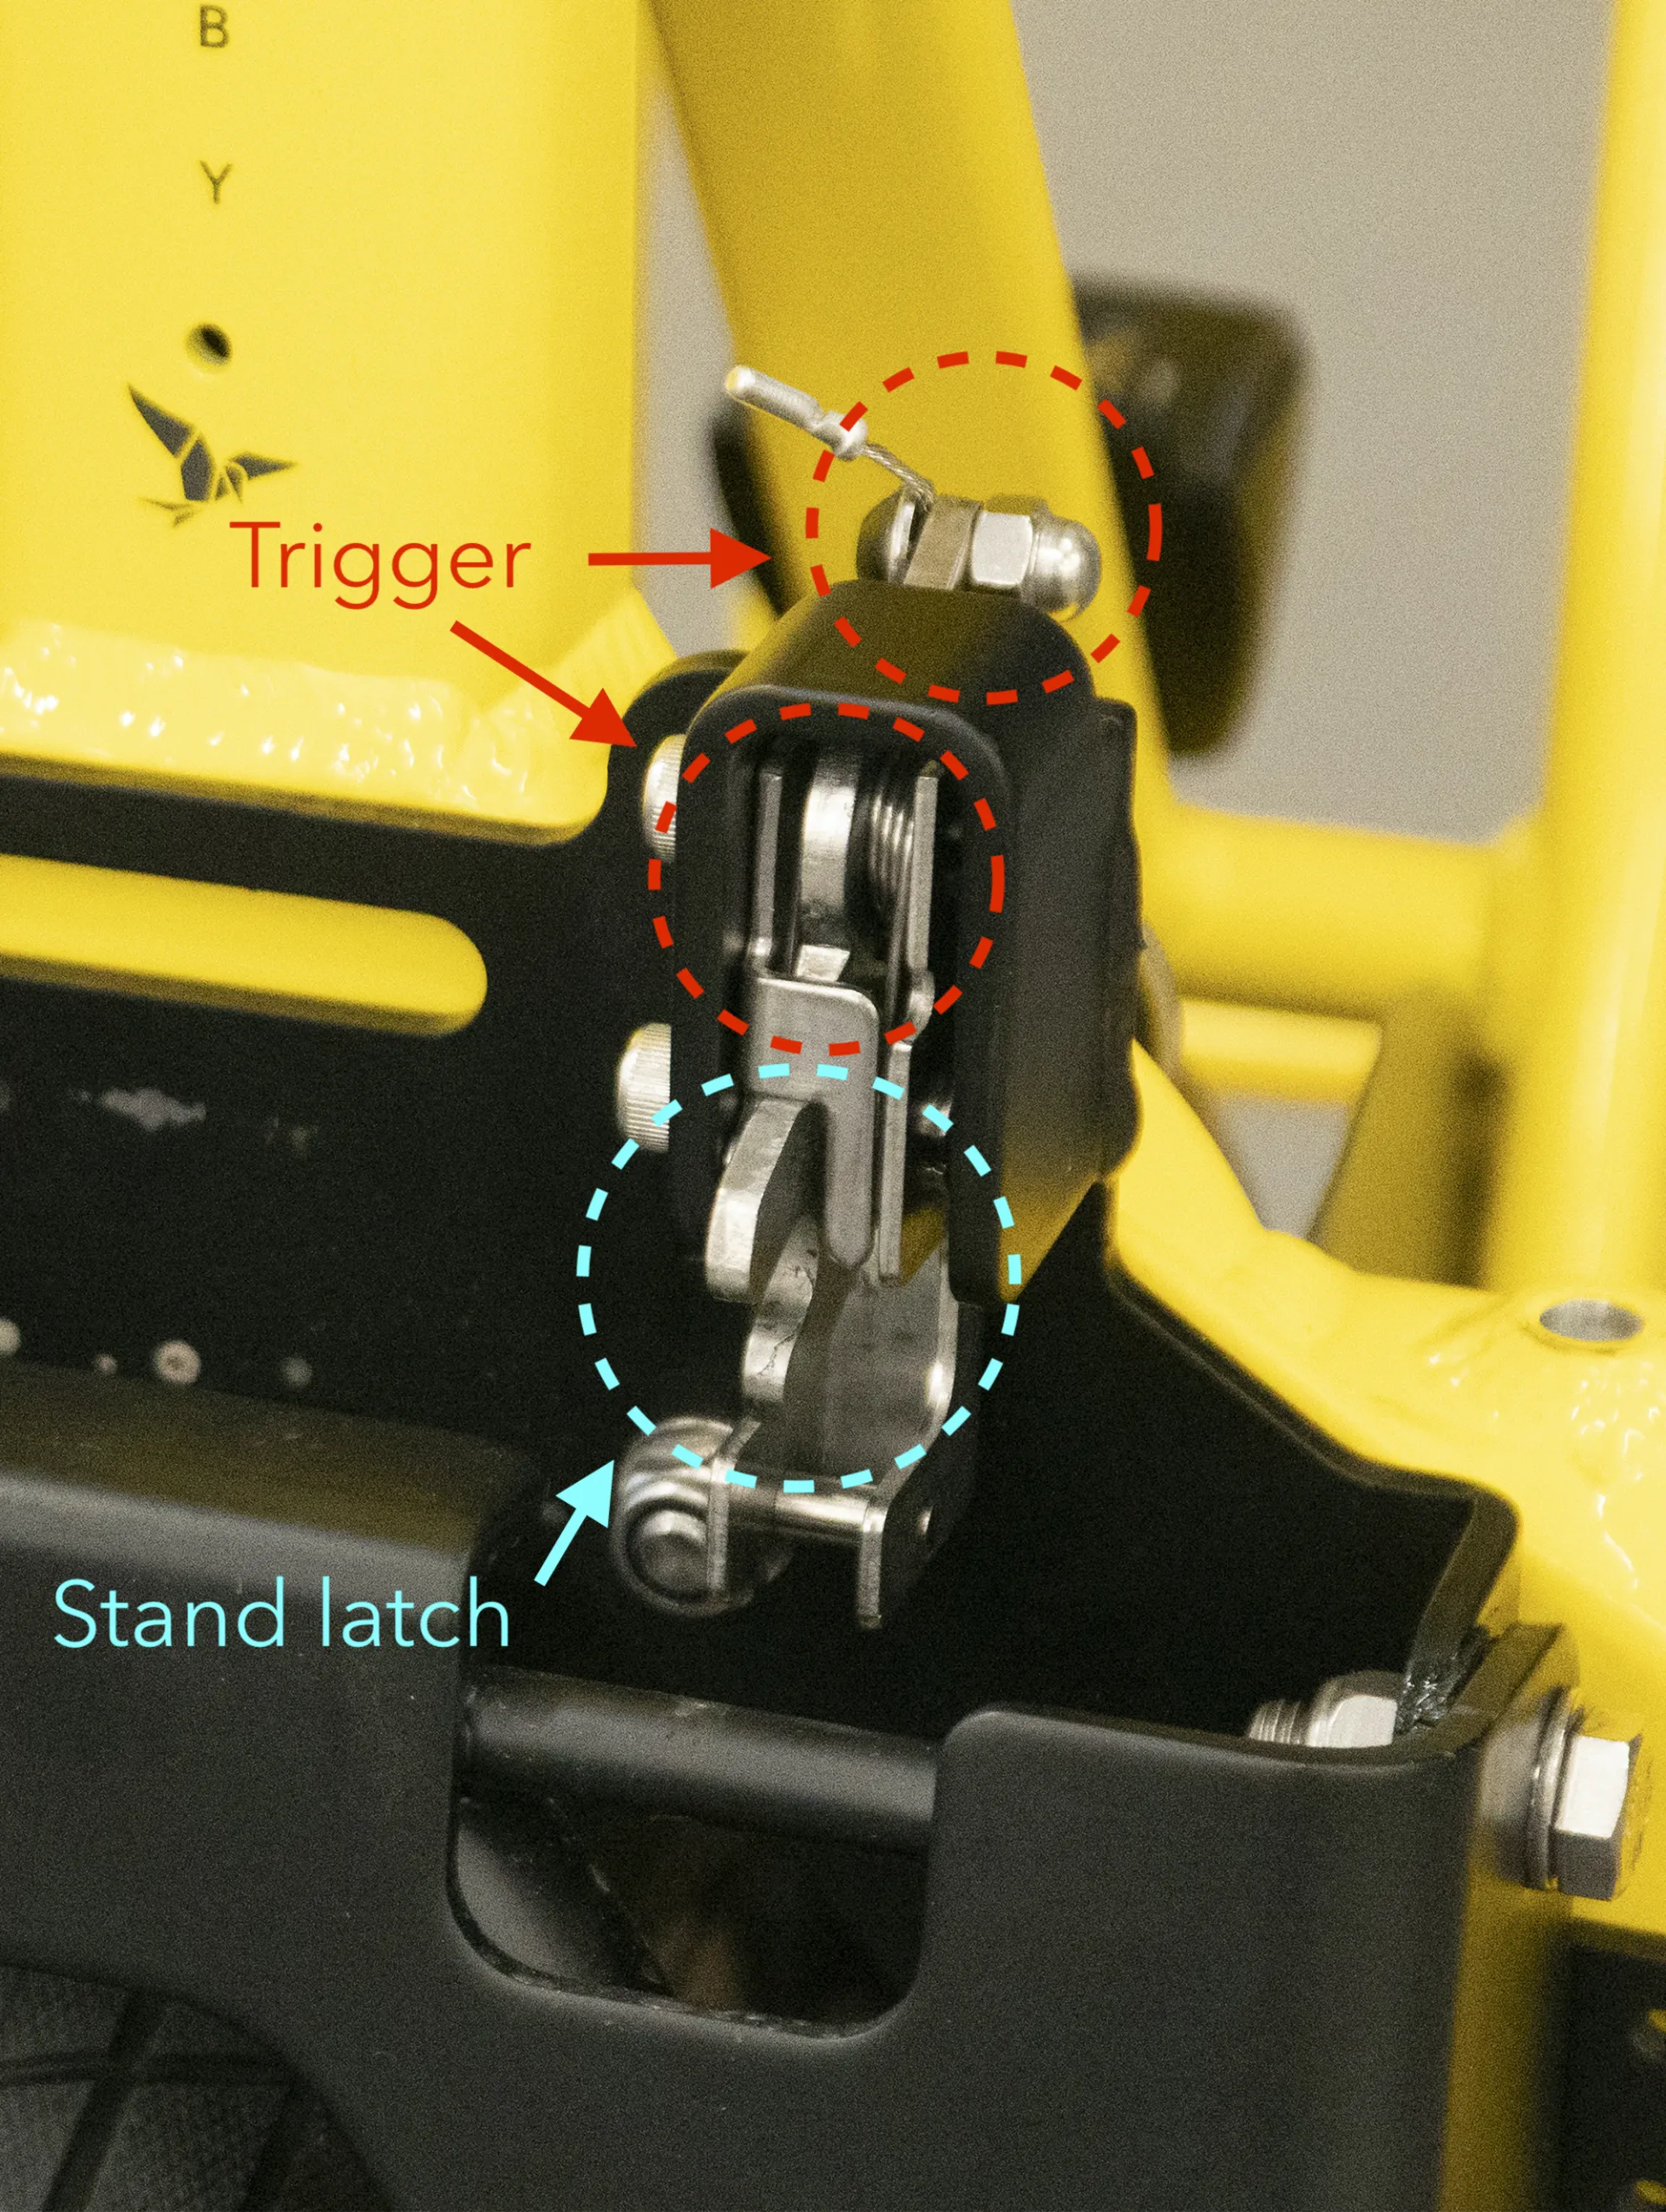
Key Parts to Know
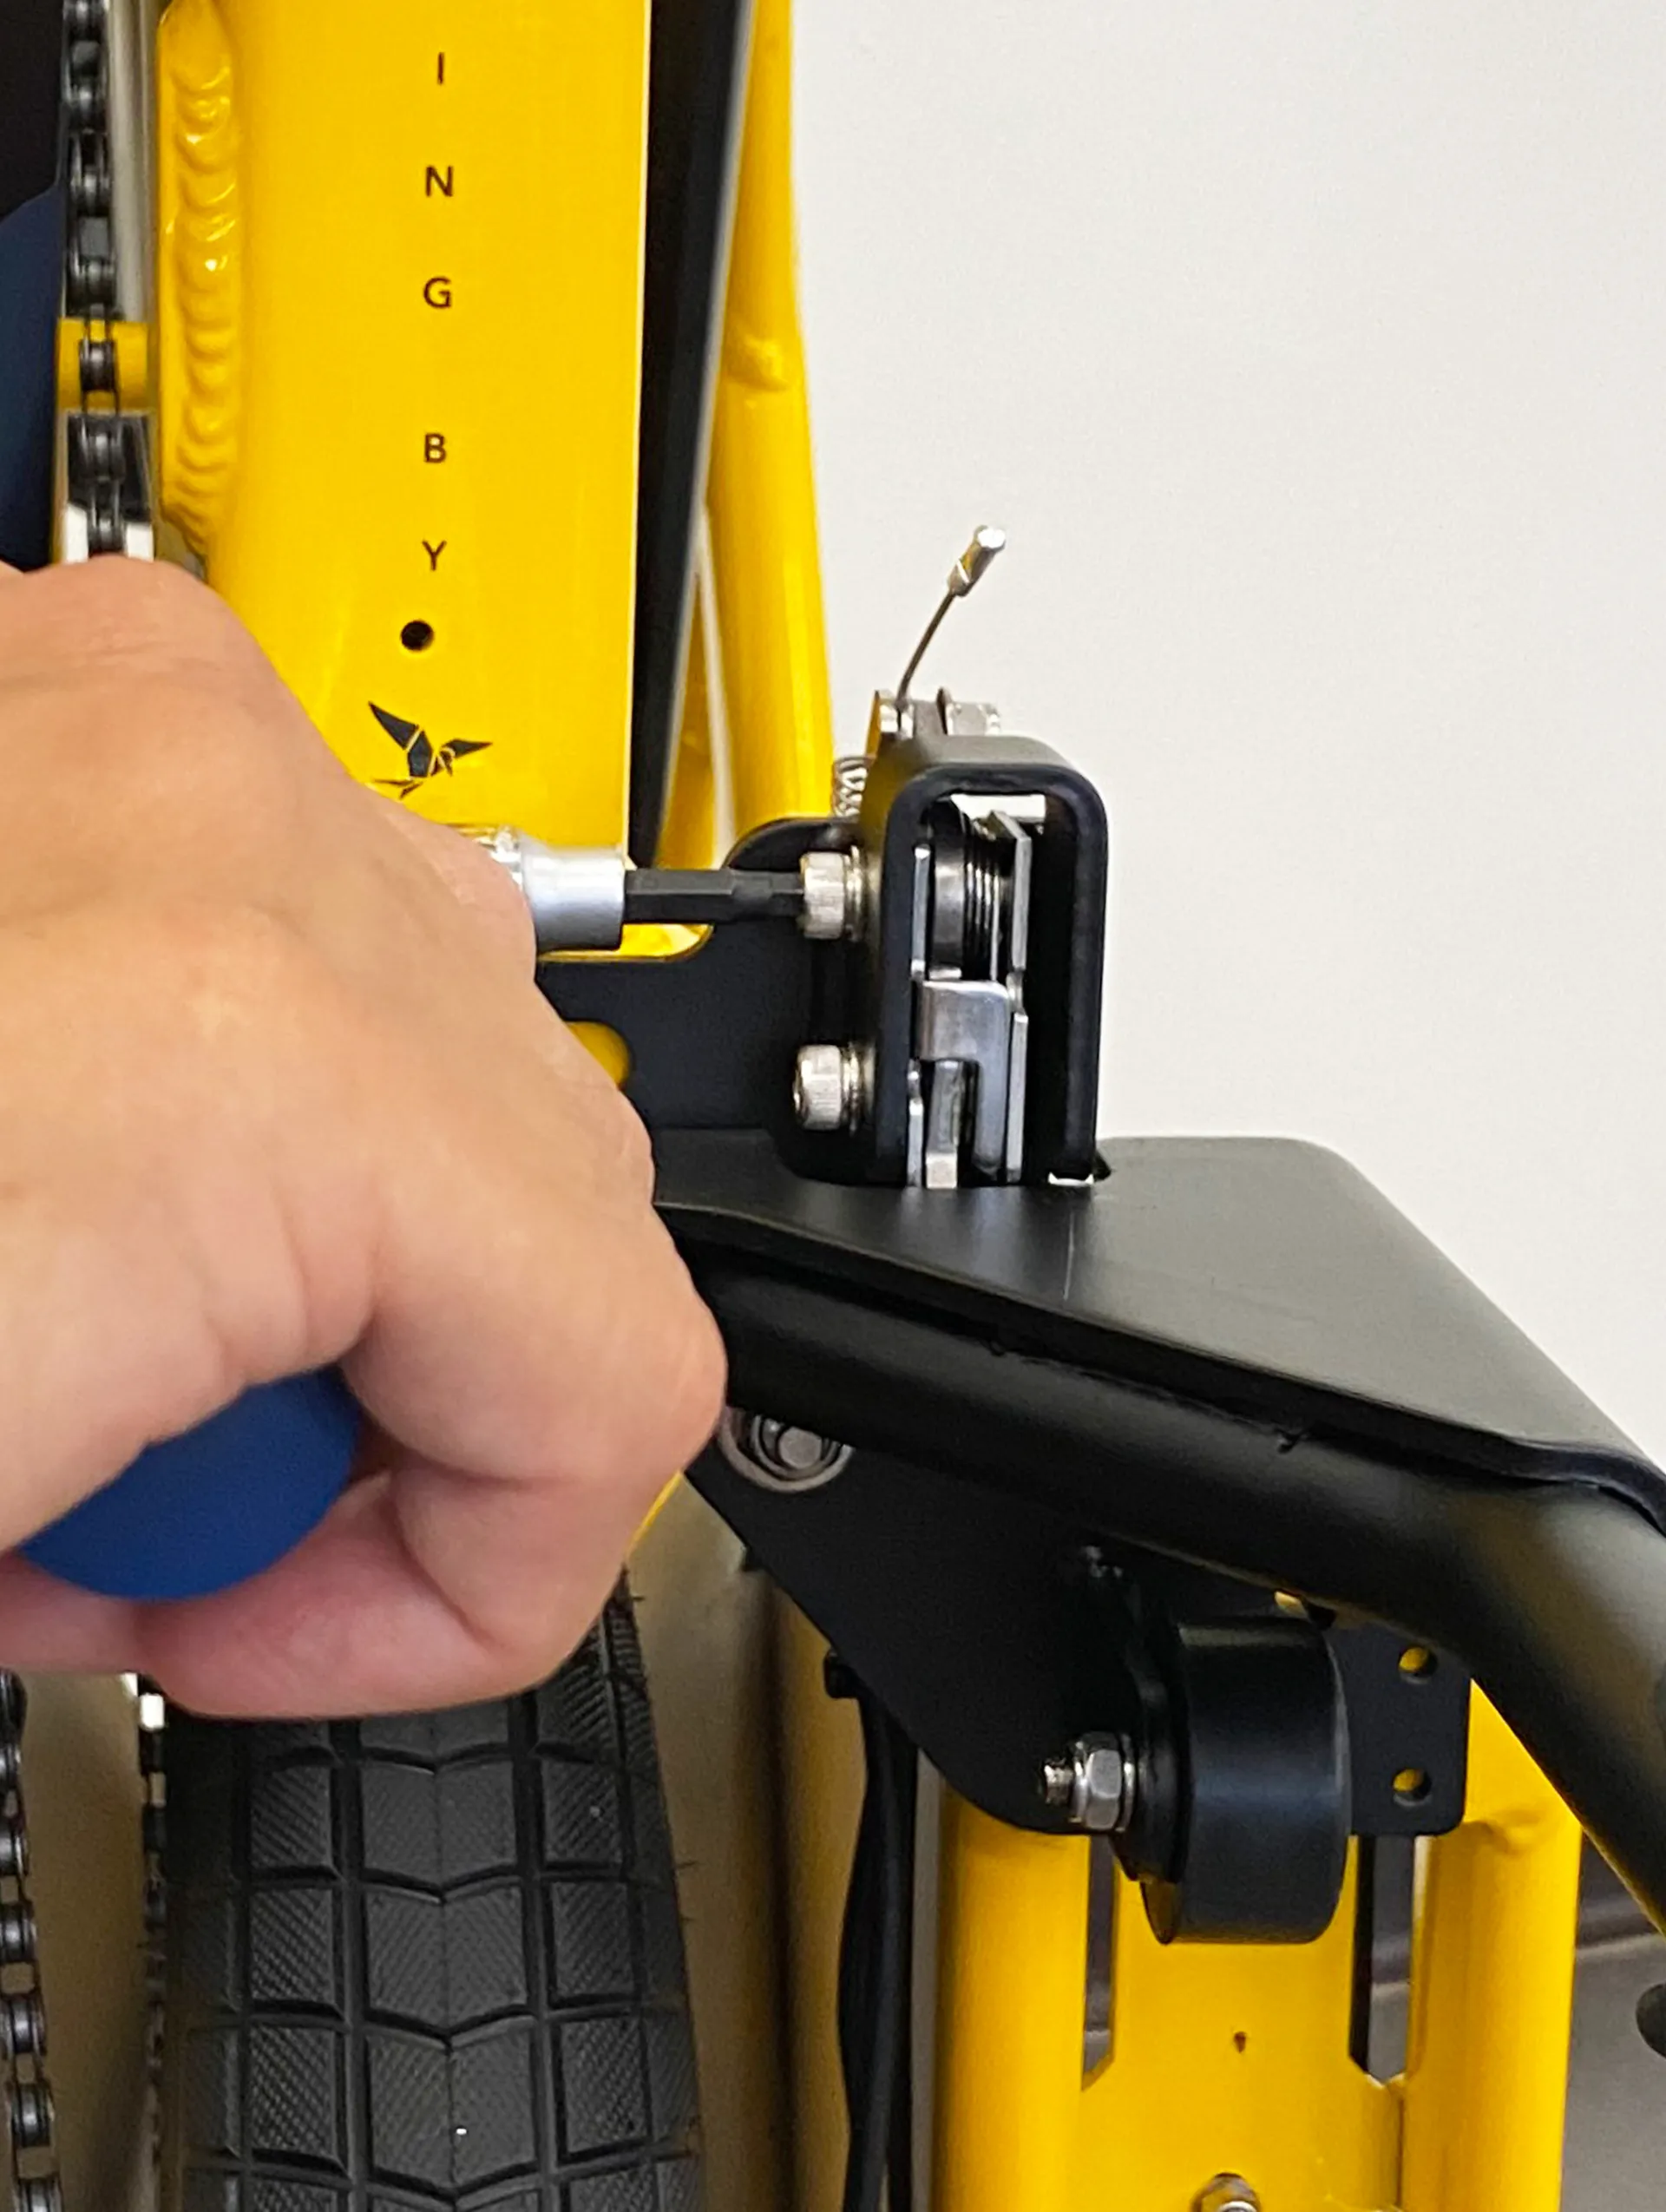
The part you’ll want to focus on during this cleaning is the locking mechanism. The locking mechanism is made up of two parts:
- A trigger, and
- A stand latch.
Clean Your Lockstand: Step-by-Step Directions
- Remove all cargo from your GSD and empty the panniers. Fold the panniers flat against the bike and secure them closed. If you have the Clubhouse+ with the Child Seat Expansion Bar installed, you'll need to remove the Child Seat Expansion Bar now.
- Press the Remote Unlock lever and put up the Atlas Lockstand. To prevent injury, be sure to perform this step before vertically parking the bike.
Lift your GSD to the vertically parked position. Stabilize the GSD by securing it to something solid using cargo straps. This reduces the risk that your GSD will fall over while you’re working on it, which could cause injury to you or damage to your bike or accessories.

- Clean the locking mechanism’s internals using either a brush and water or a pressurized sprayer. Here’s how to make sure all the parts get clean:
- Press and hold the trigger. Clean while holding down the trigger.
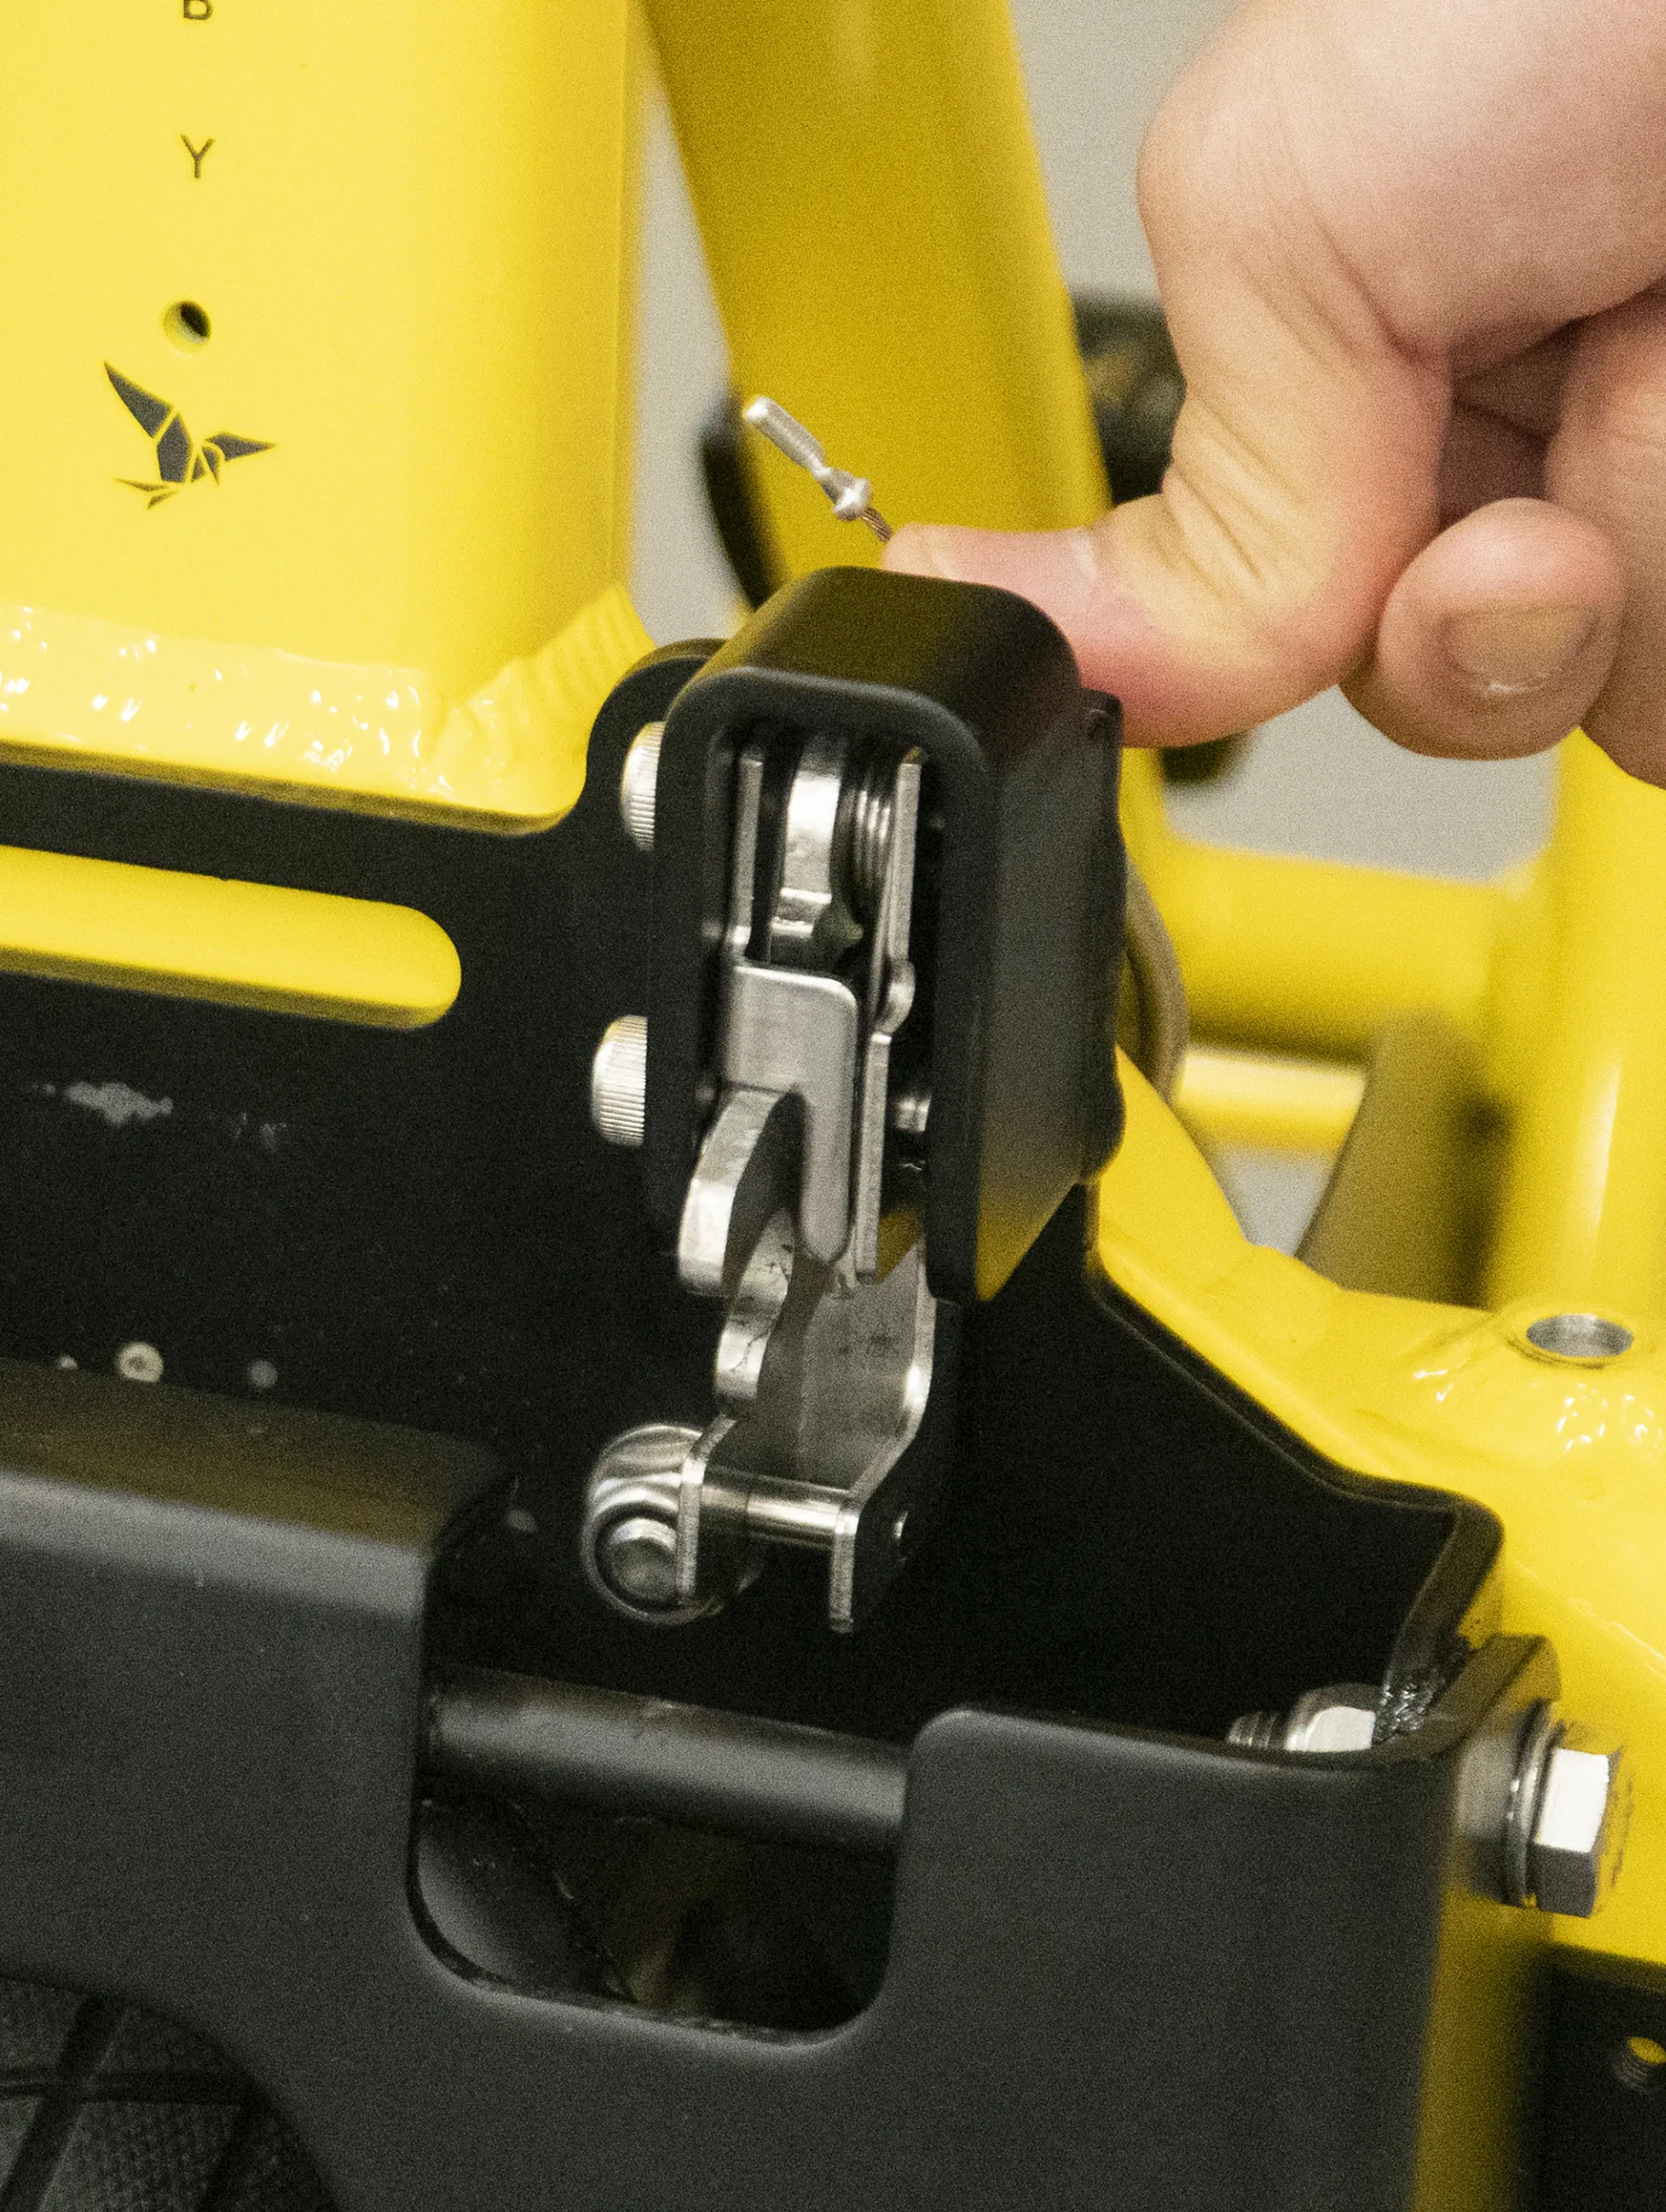
- While continuing to hold down the trigger, use your thumb to press the stand latch. Clean while holding down both the trigger and stand latch.

- Release the trigger and stand latch. Make sure both parts can move freely.
5. Wait for the locking mechanism to dry completely. Then, apply a small amount of light lubricant to the mechanism’s internals.
Keep Your Lockstand Clean with a Lockstand Protector
If you frequently ride on debris-filled surfaces or if your Lockstand keeps getting stuff stuck in it, request a FREE Atlas Lockstand Protector from your friendly neighborhood dealer to cover the locking mechanism and protect it from debris. Check out these articles for installation instructions:
Solution #2: Fix Recurring Loose Bolts with Spring Washers
The bolts on the Lockstand’s latch must be securely tightened for the stand to engage. Environmental and use factors may cause the bolts to loosen.
If this happens repeatedly, the easiest solution is to add spring washers to the bolts on the latch. A spring washer is a special kind of curved washer that can help prevent vibrational forces from loosening the bolts. You don’t have to add them—they’re not “missing”—but if the bolts keep loosening, it’s a good idea.
Here’s how:
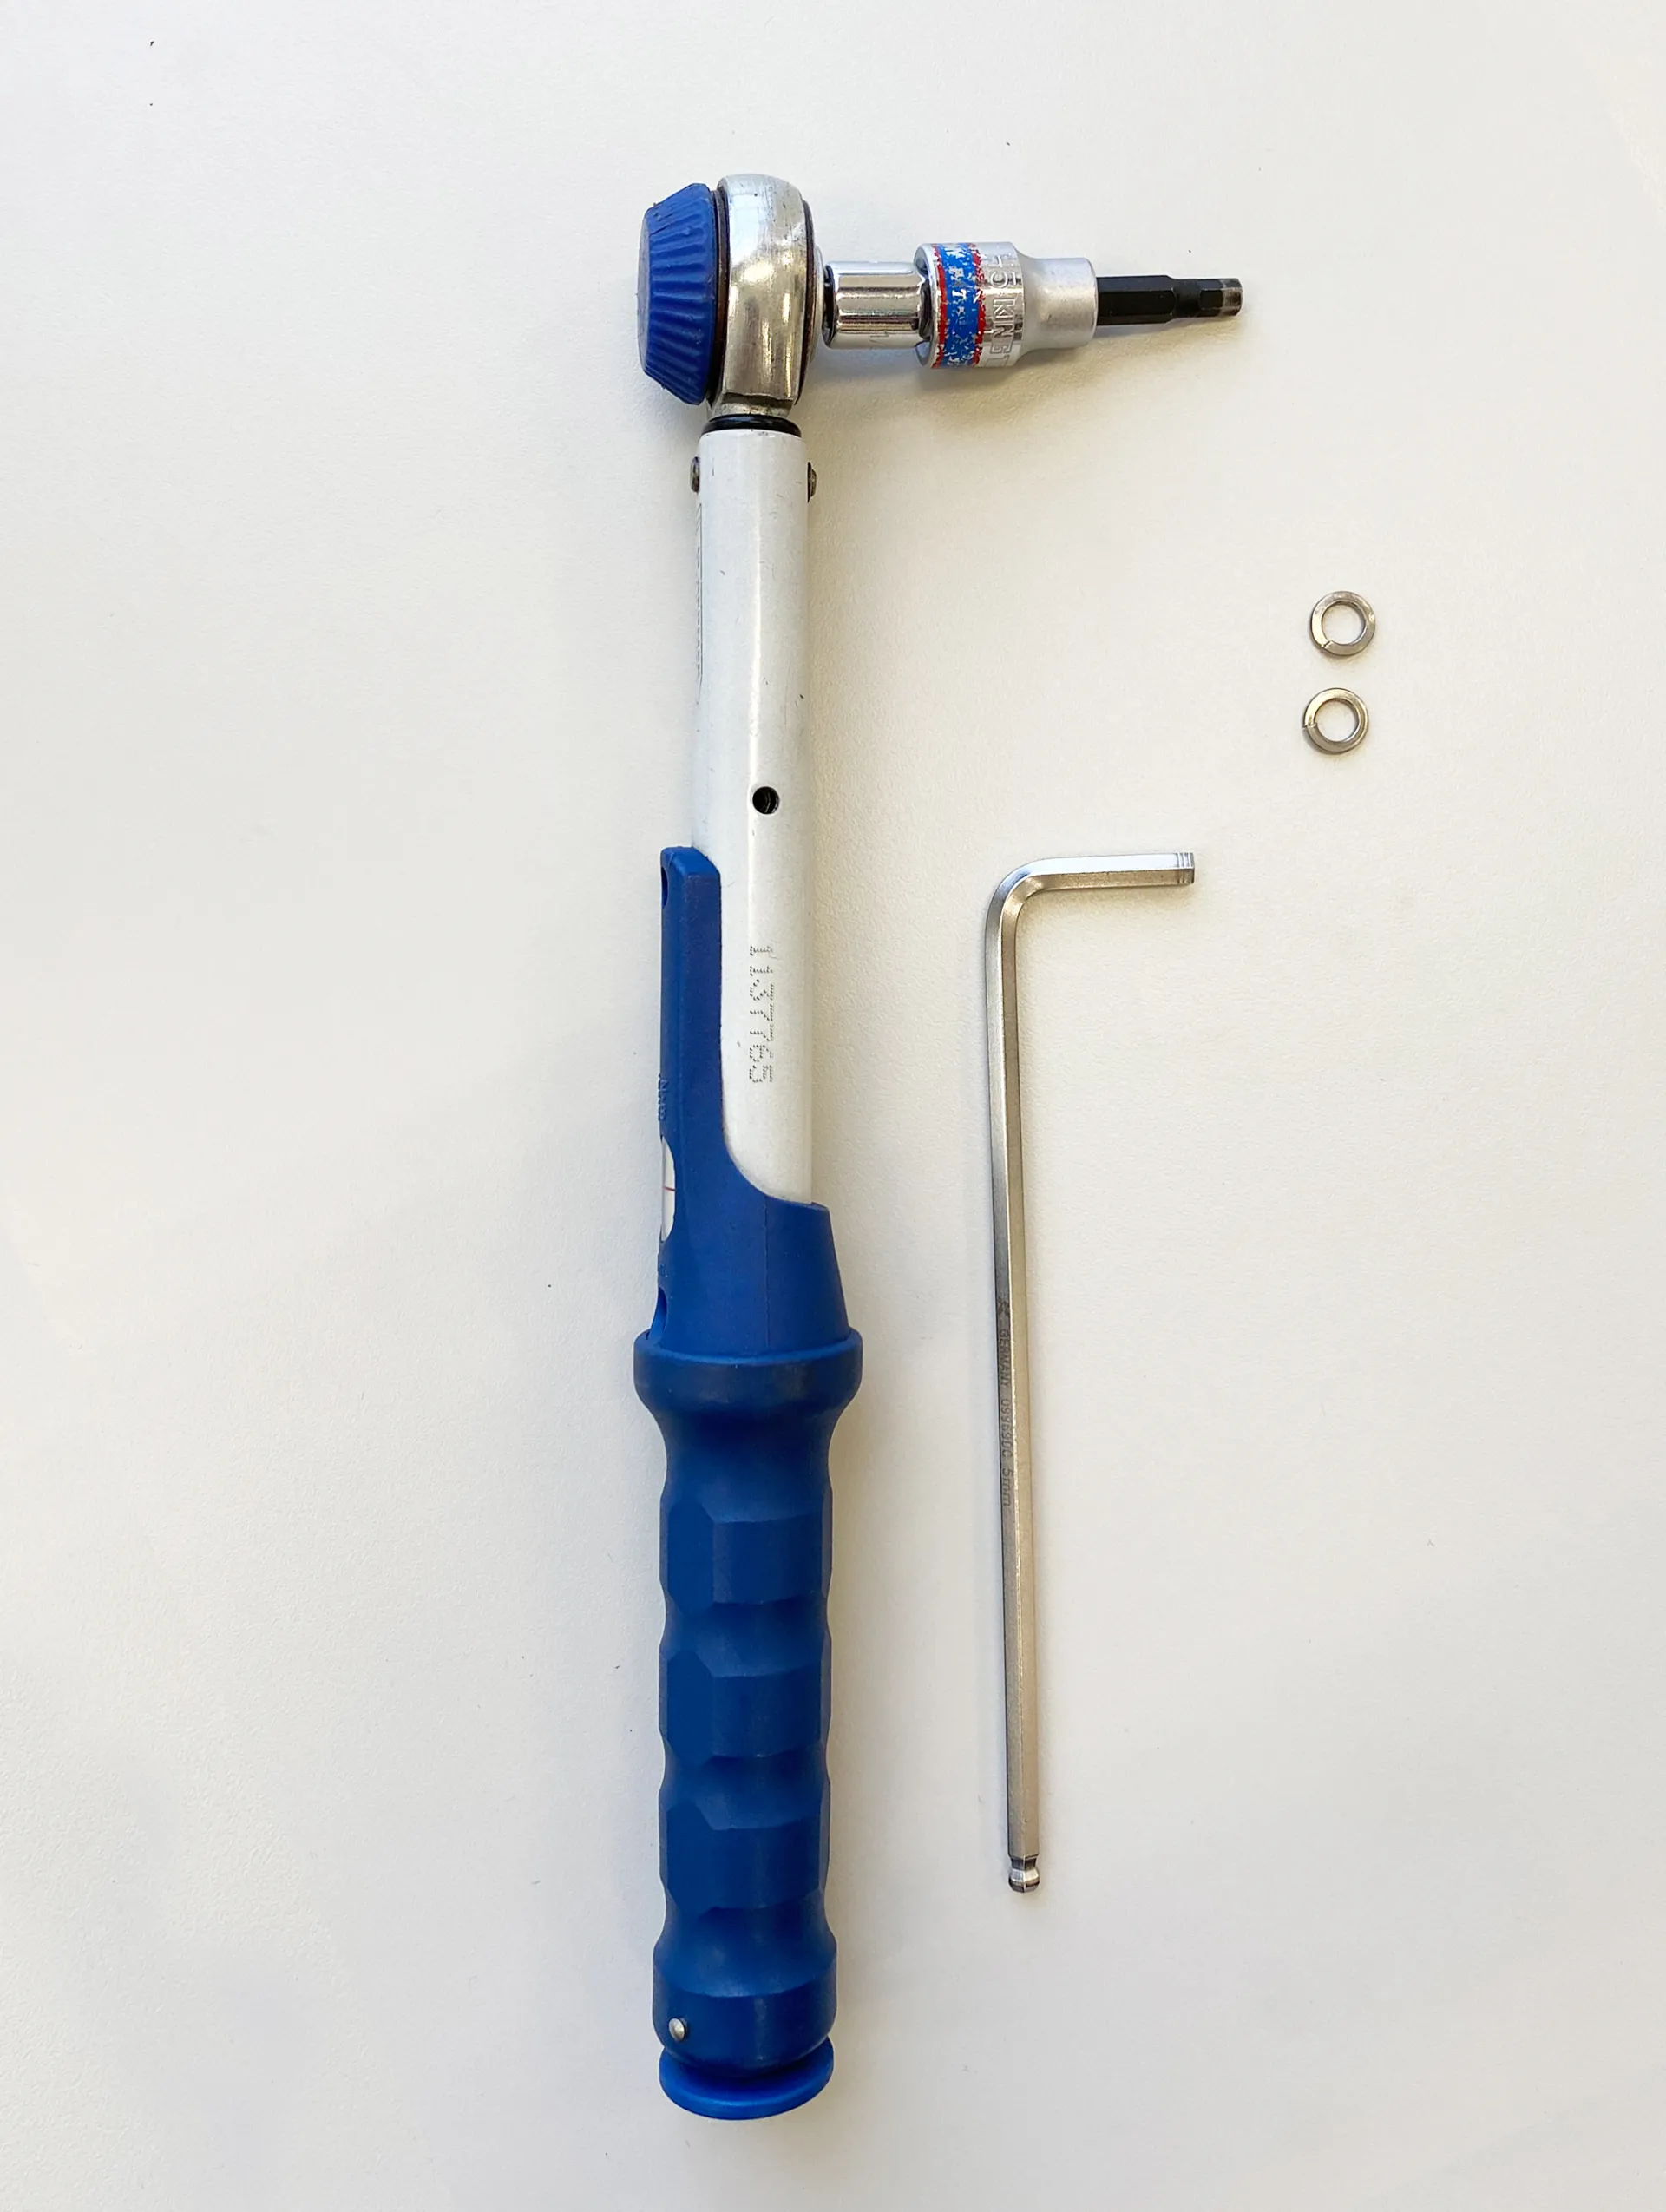
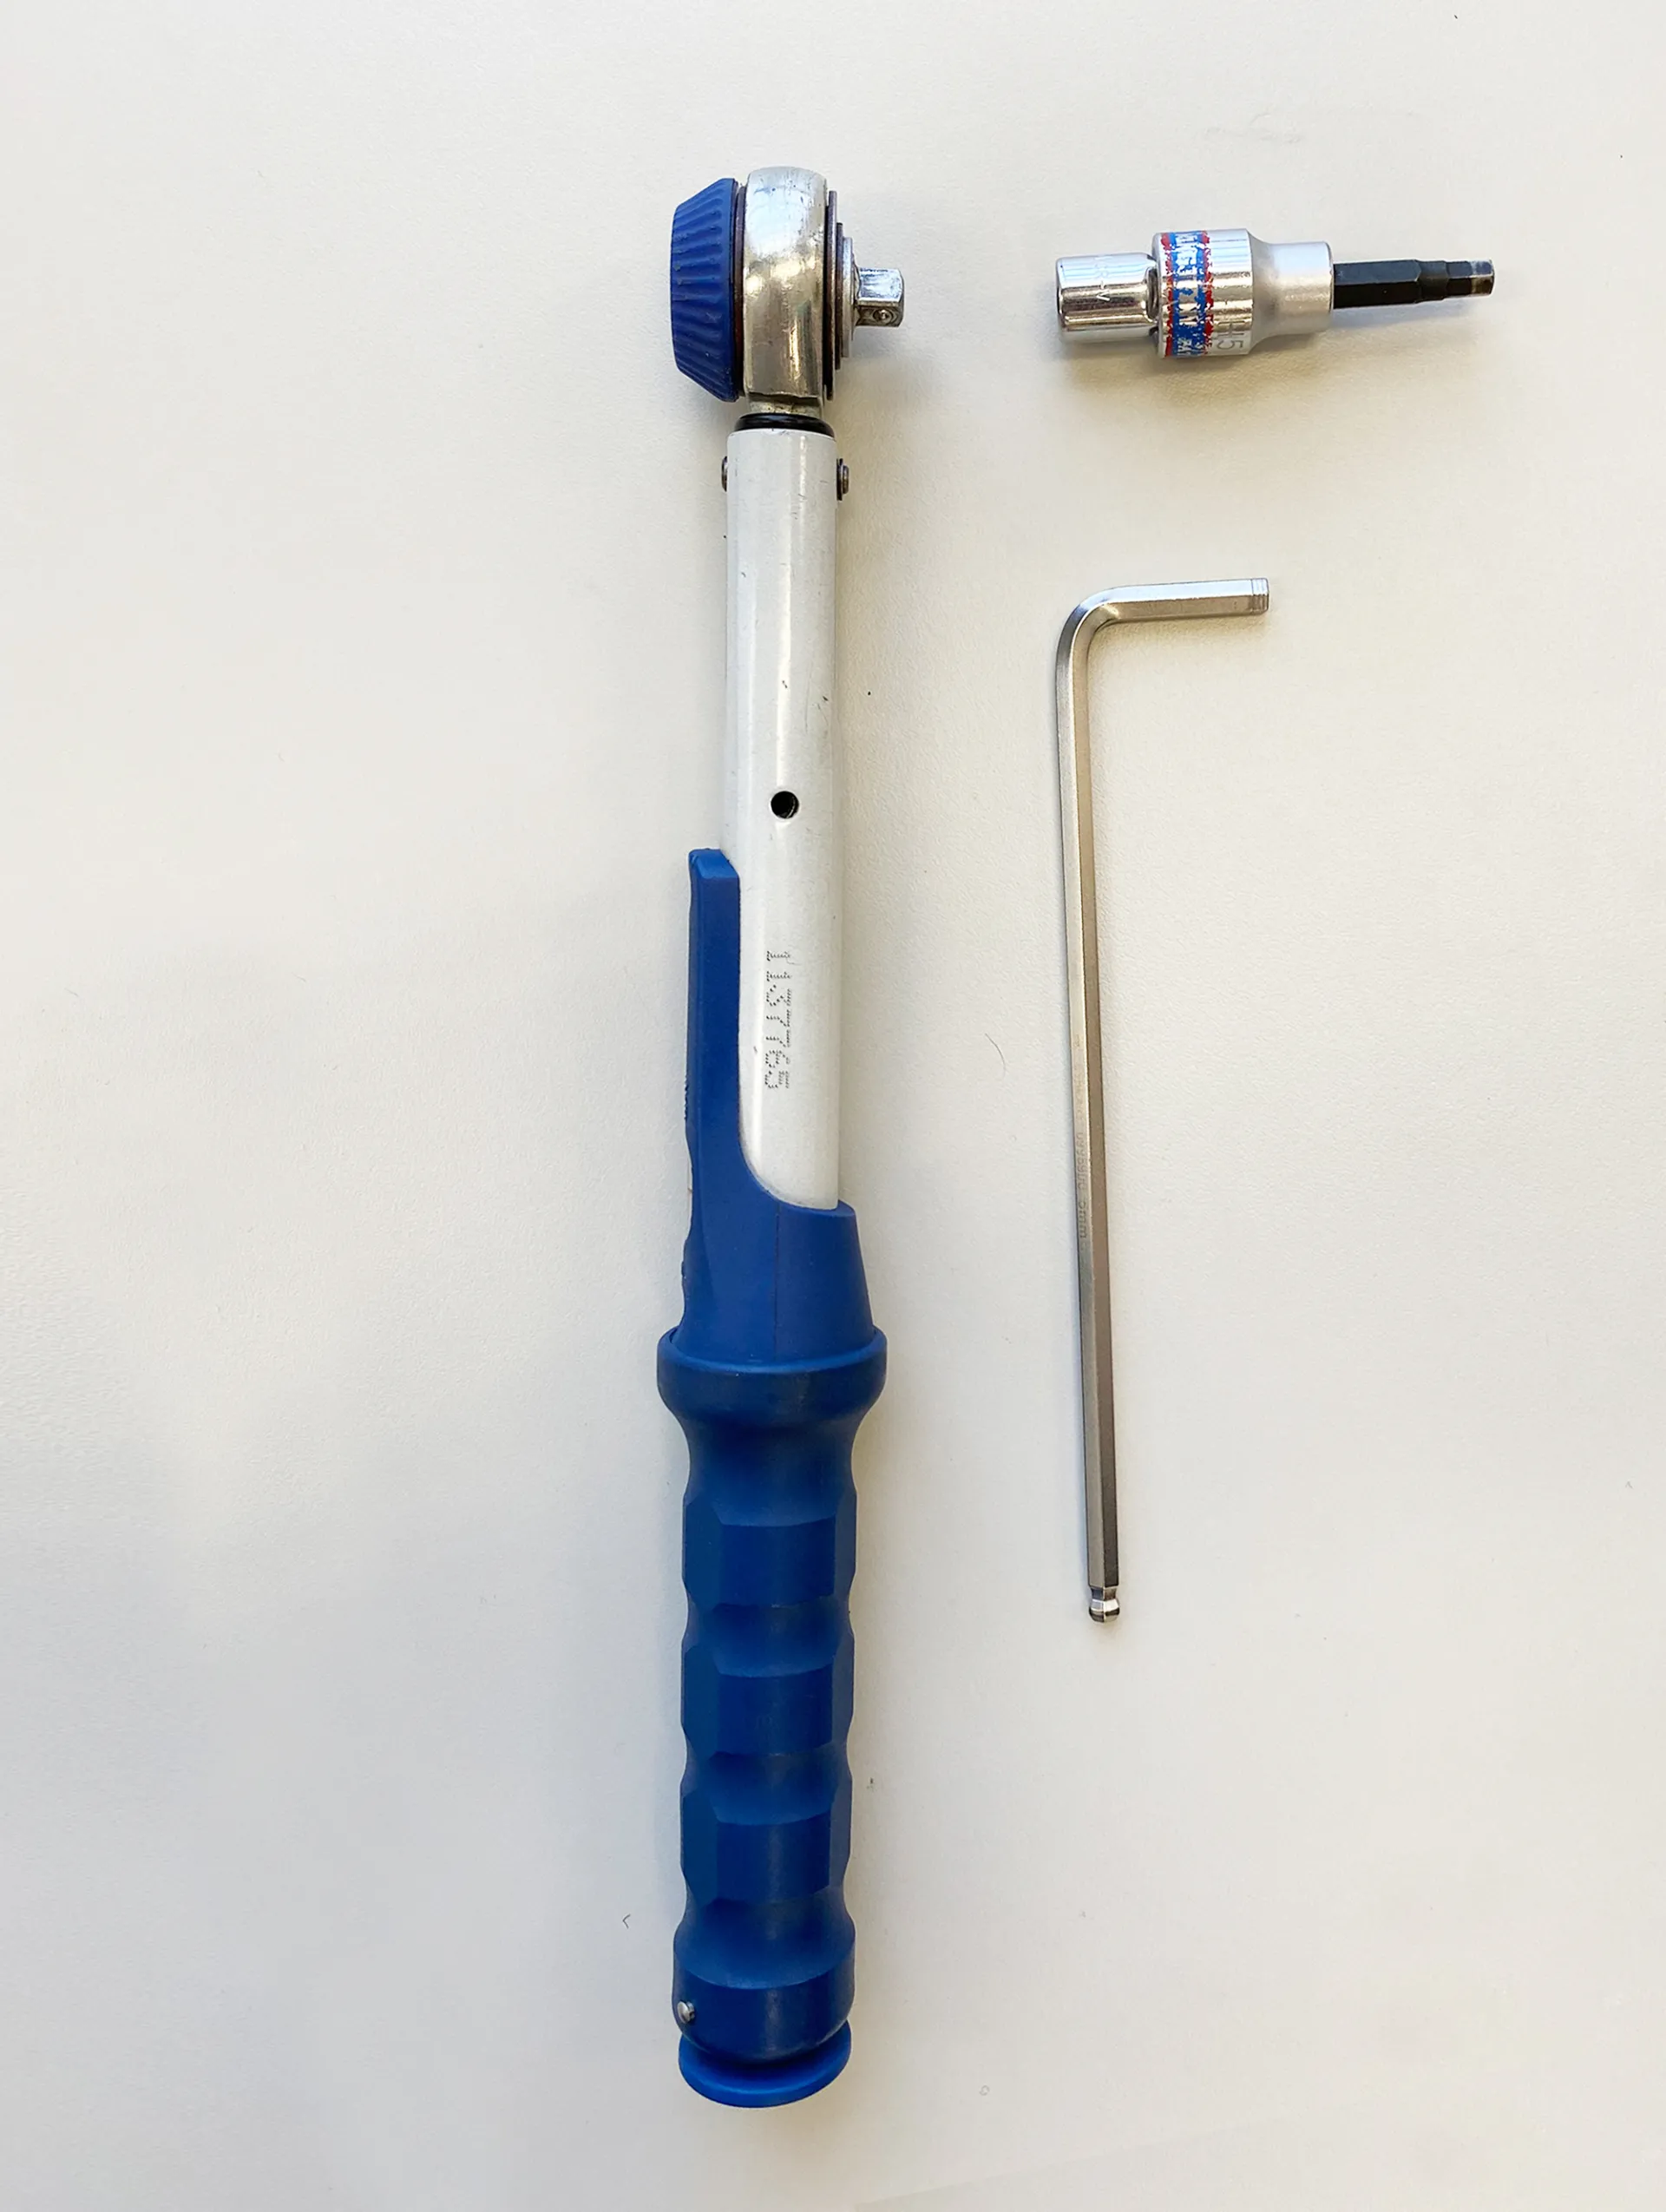
What You’ll Need:
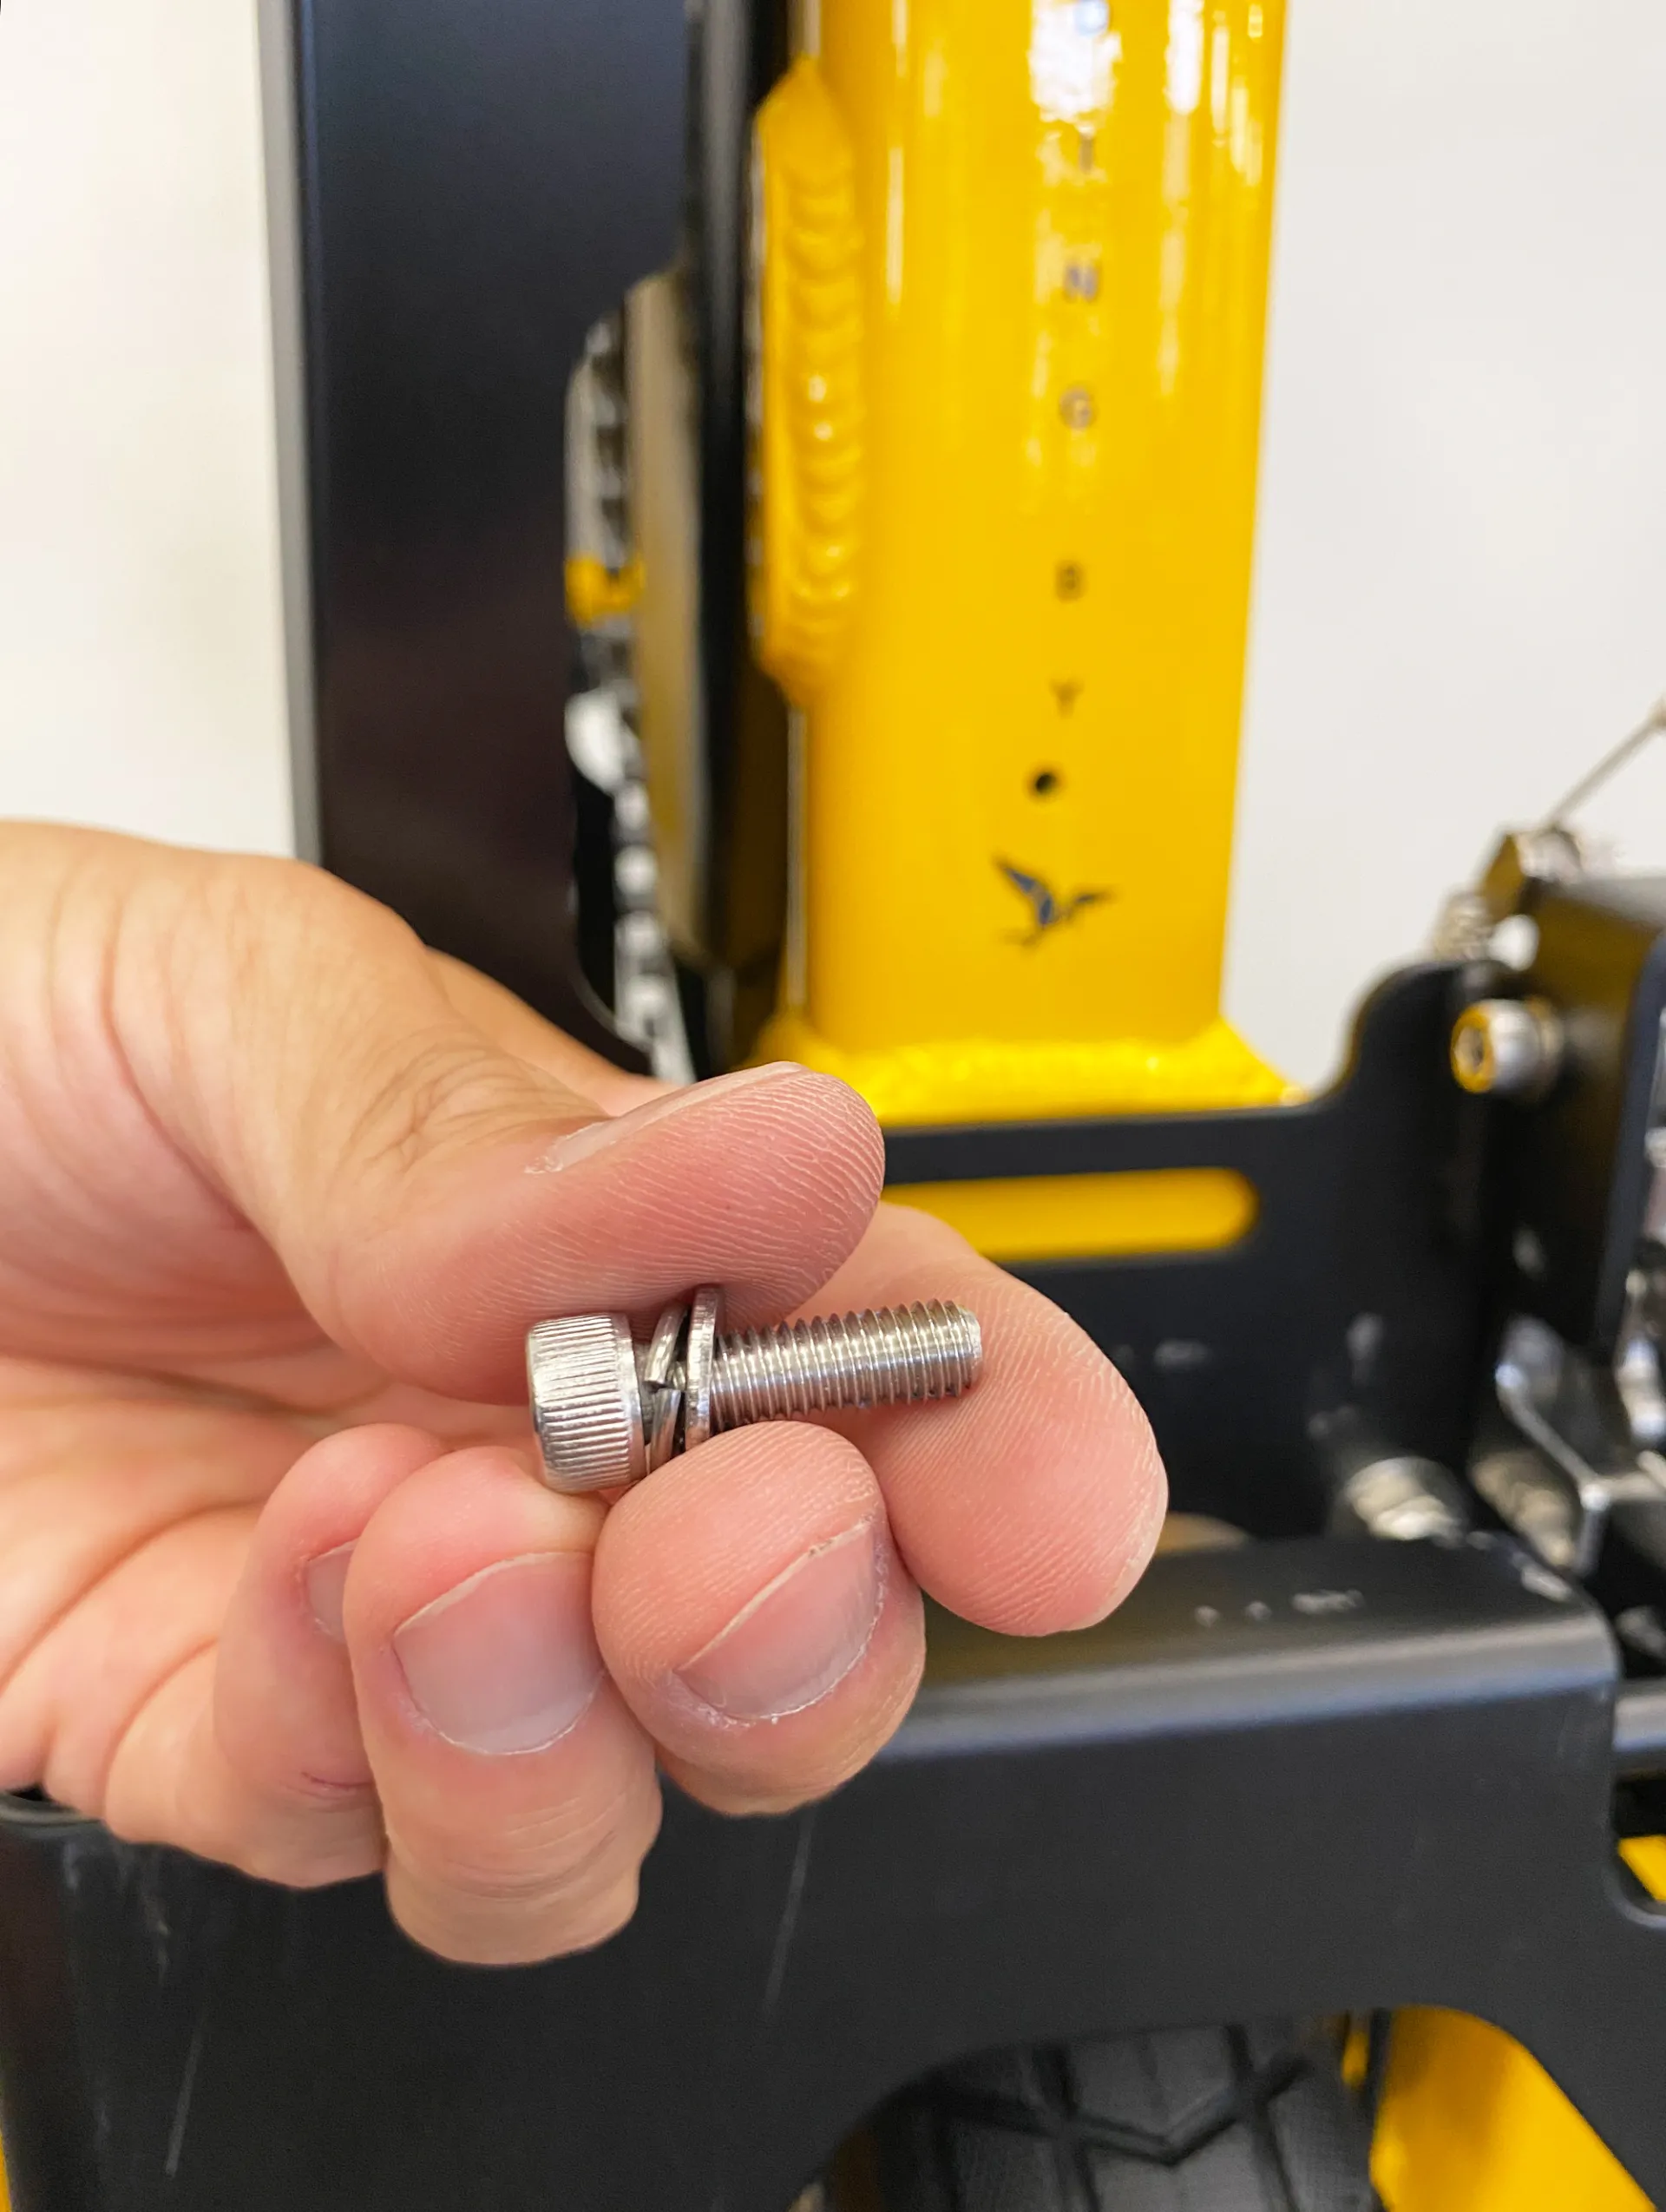
- M6 spring washers x 2
- Torque wrench
- 5mm hex socket
- 5mm Allen key
Safety Warning
Before you get started, make sure to re-read the Safety Warning from the beginning of the article.
Add Spring Washers: Step-by-Step Directions
- Remove all cargo from your GSD and empty the panniers. Fold the panniers flat against the bike and secure them closed. If you have the Clubhouse+ with the Child Seat Expansion Bar installed, you'll need to remove the Child Seat Expansion Bar now.
- Press the Remote Unlock lever and put up the Atlas Lockstand. To prevent injury, be sure to perform this step before vertically parking the bike.
Lift your GSD to the vertically parked position. Stabilize the GSD by securing it to something solid using cargo straps. This reduces the risk that your GSD will fall over while you’re working on it, which could cause injury to you or damage to your bike or accessories.

Use a 5mm Allen key to remove the bolts from the latch.
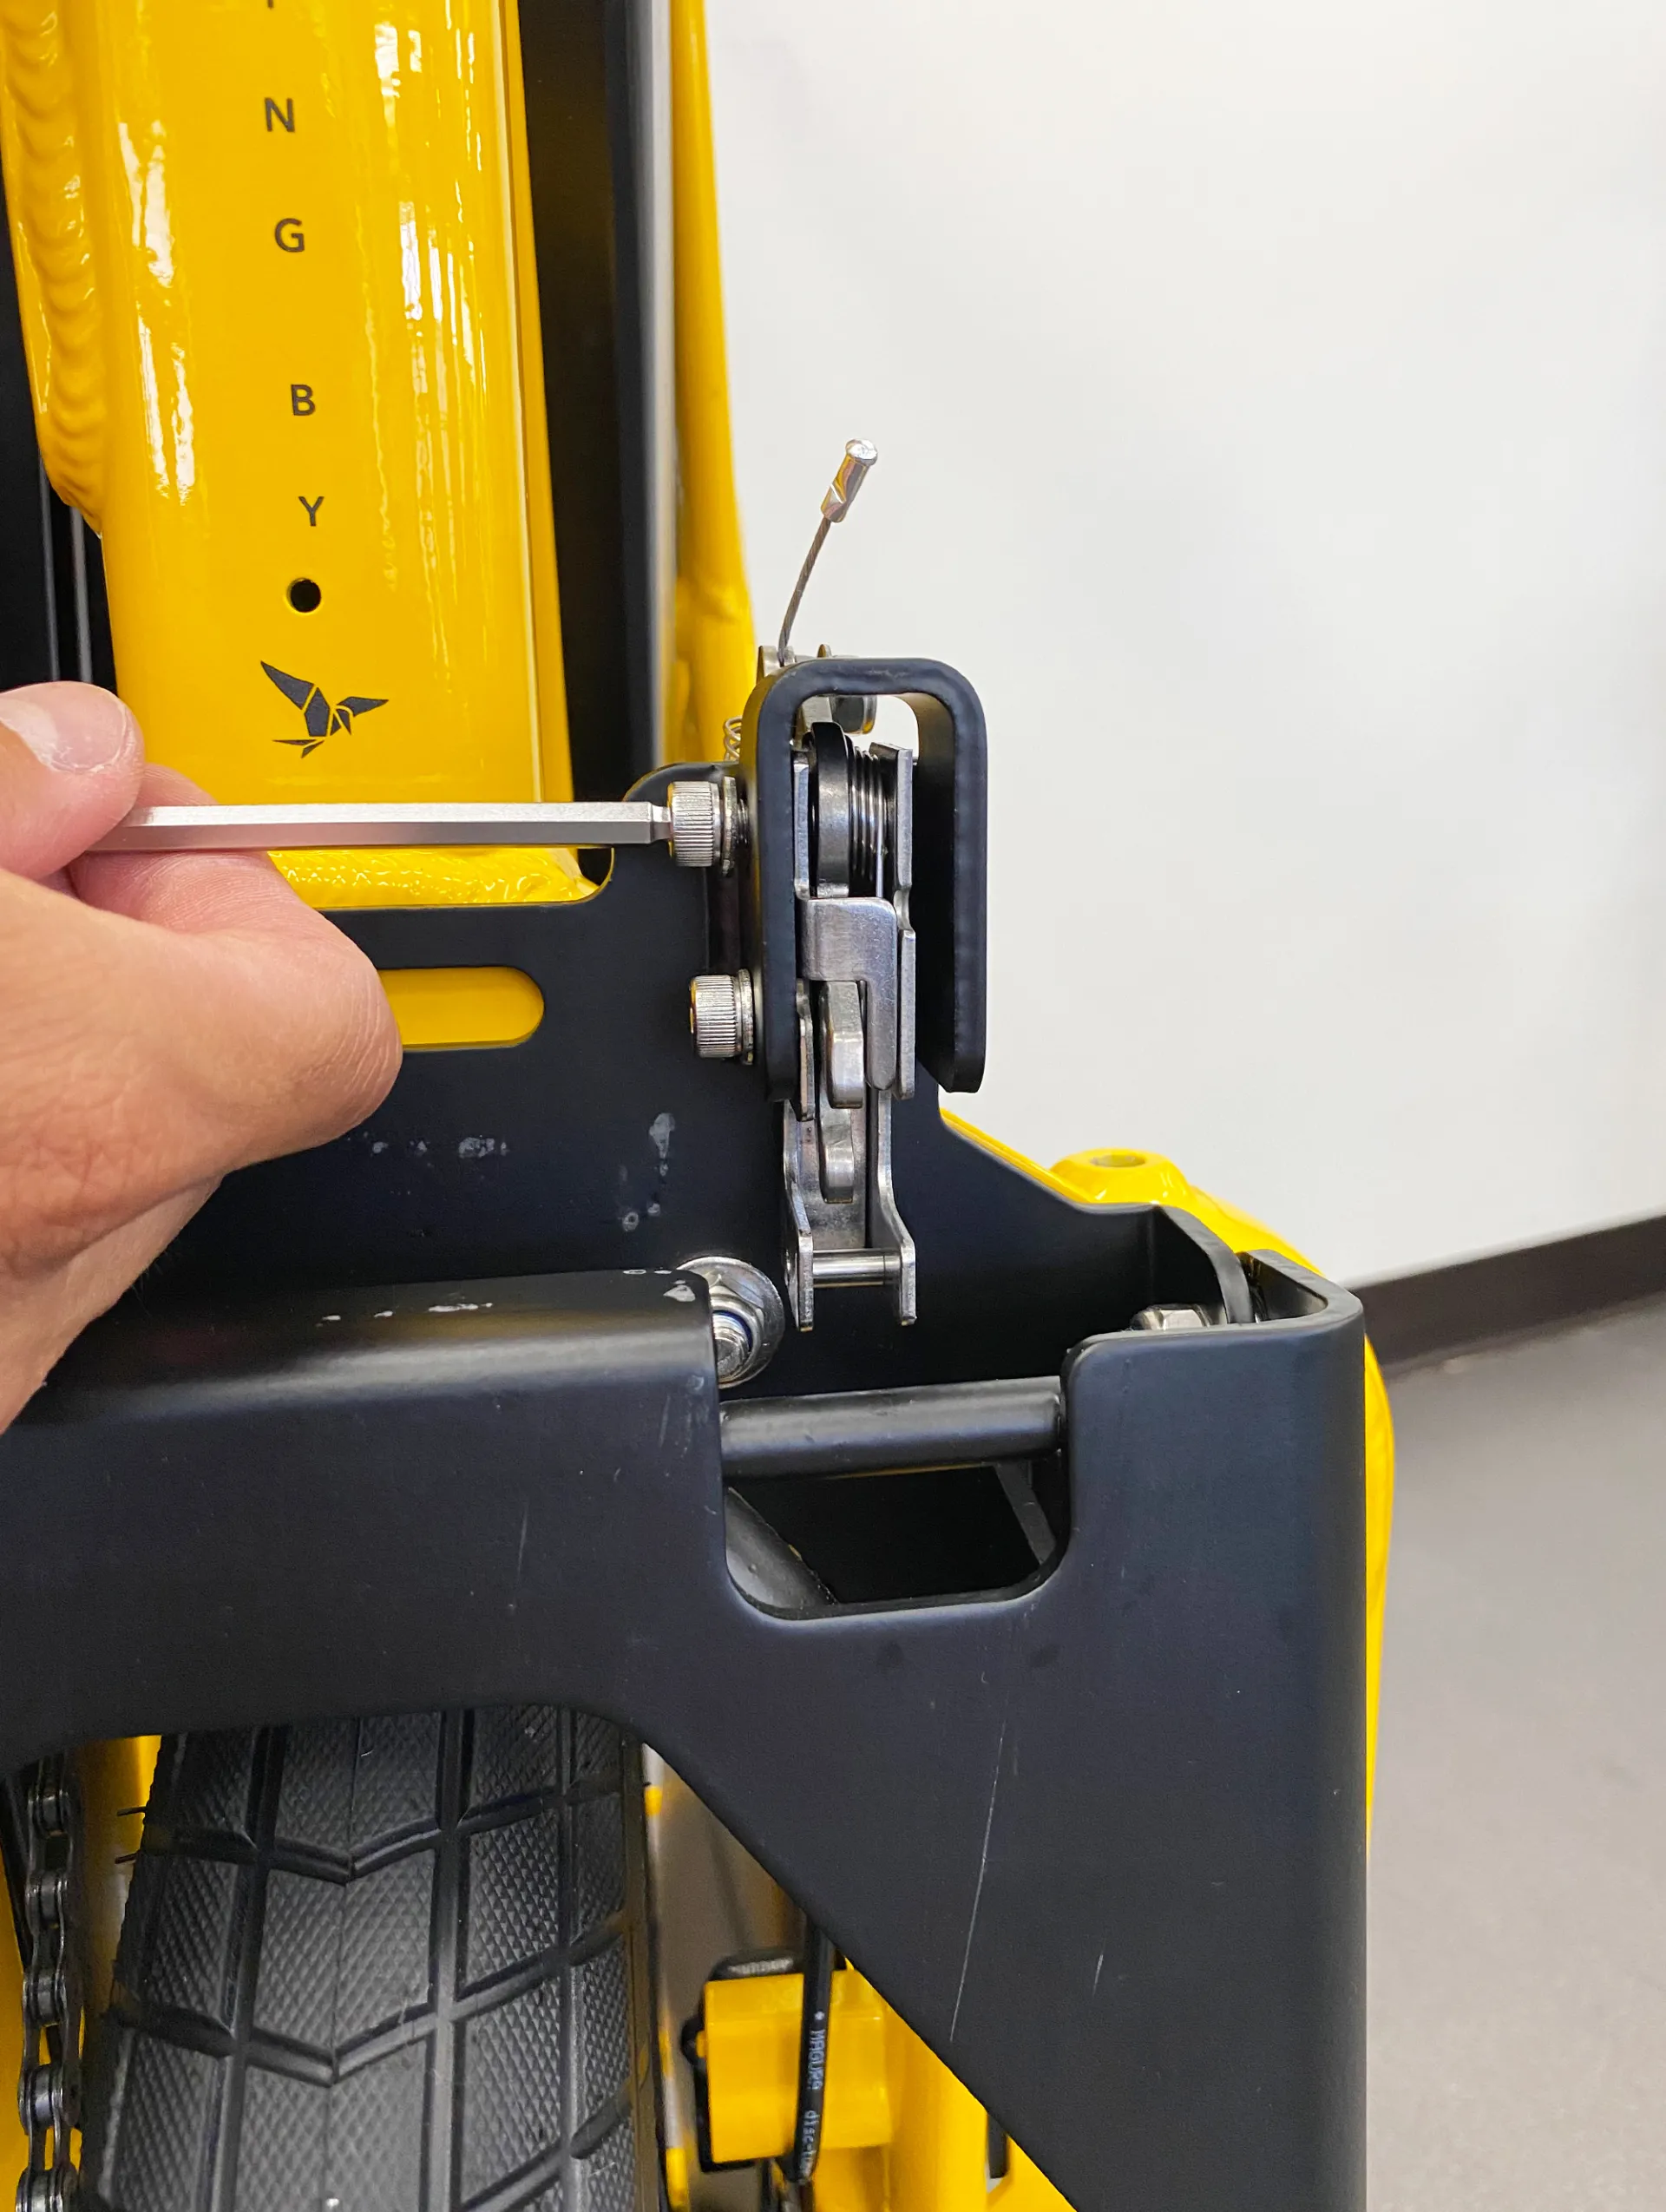
On each side of the latch, place a spring washer between the bolt and the original washer. Use a 5mm Allen key to bolt in.
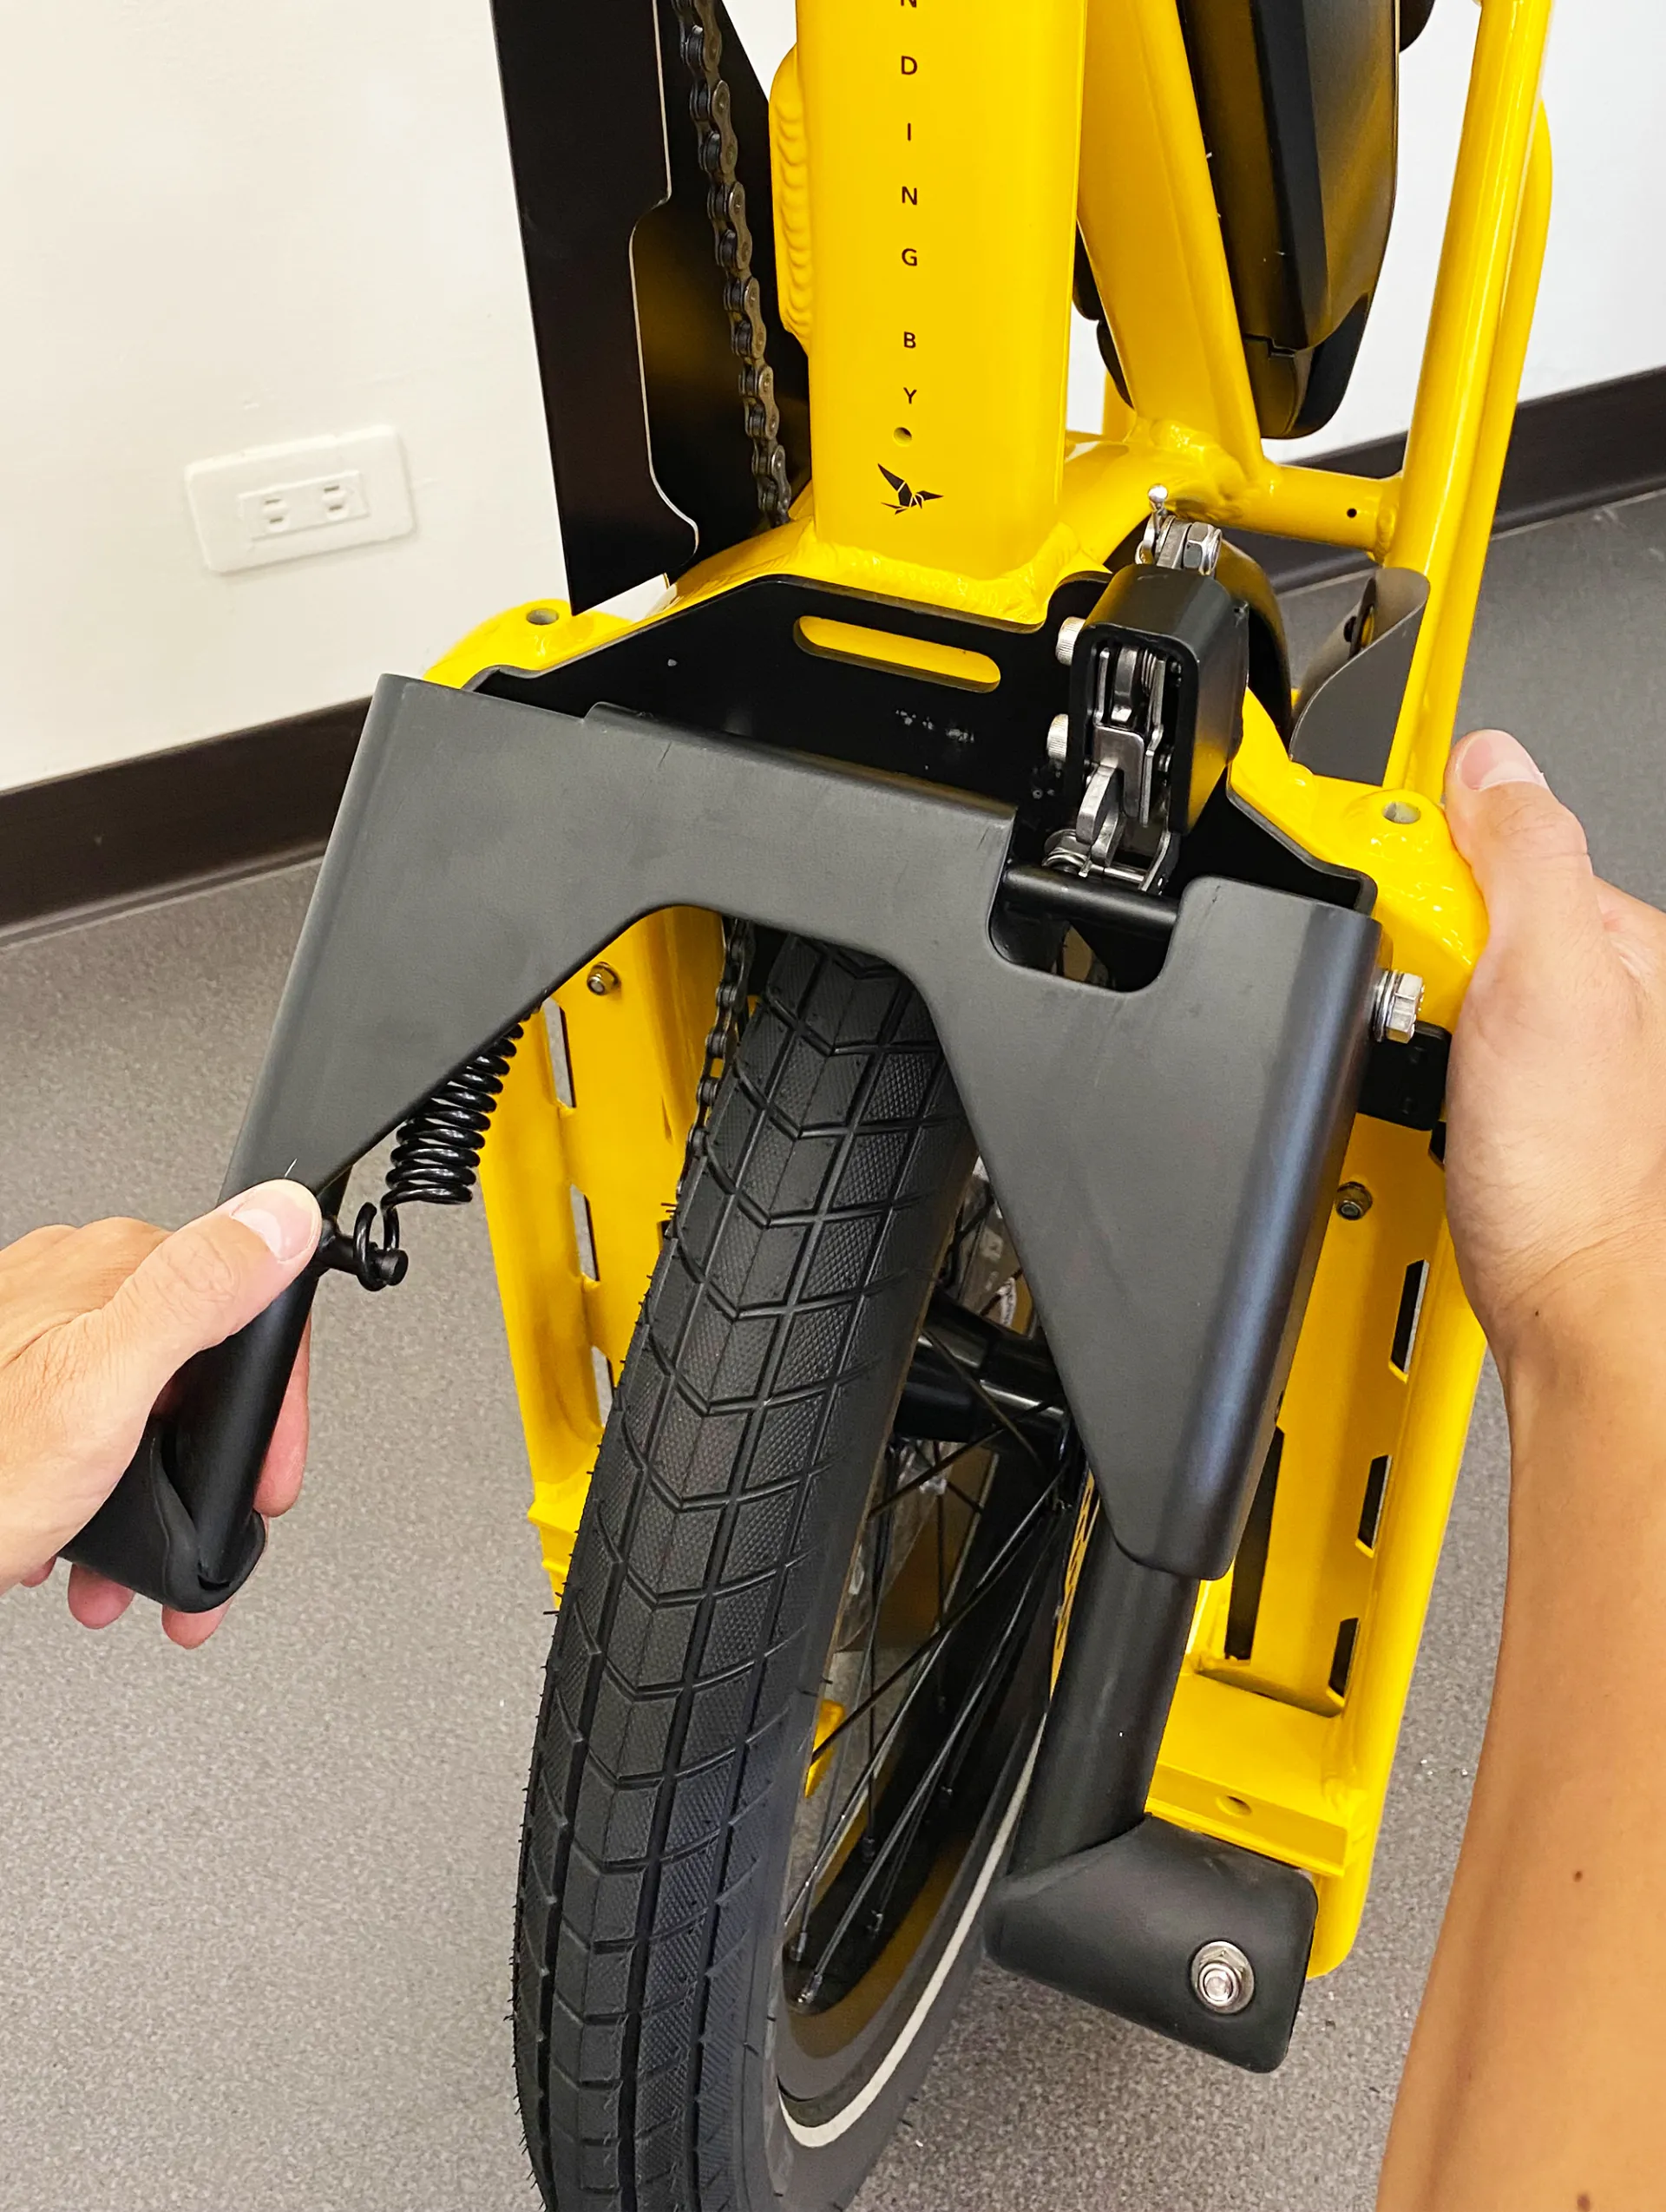
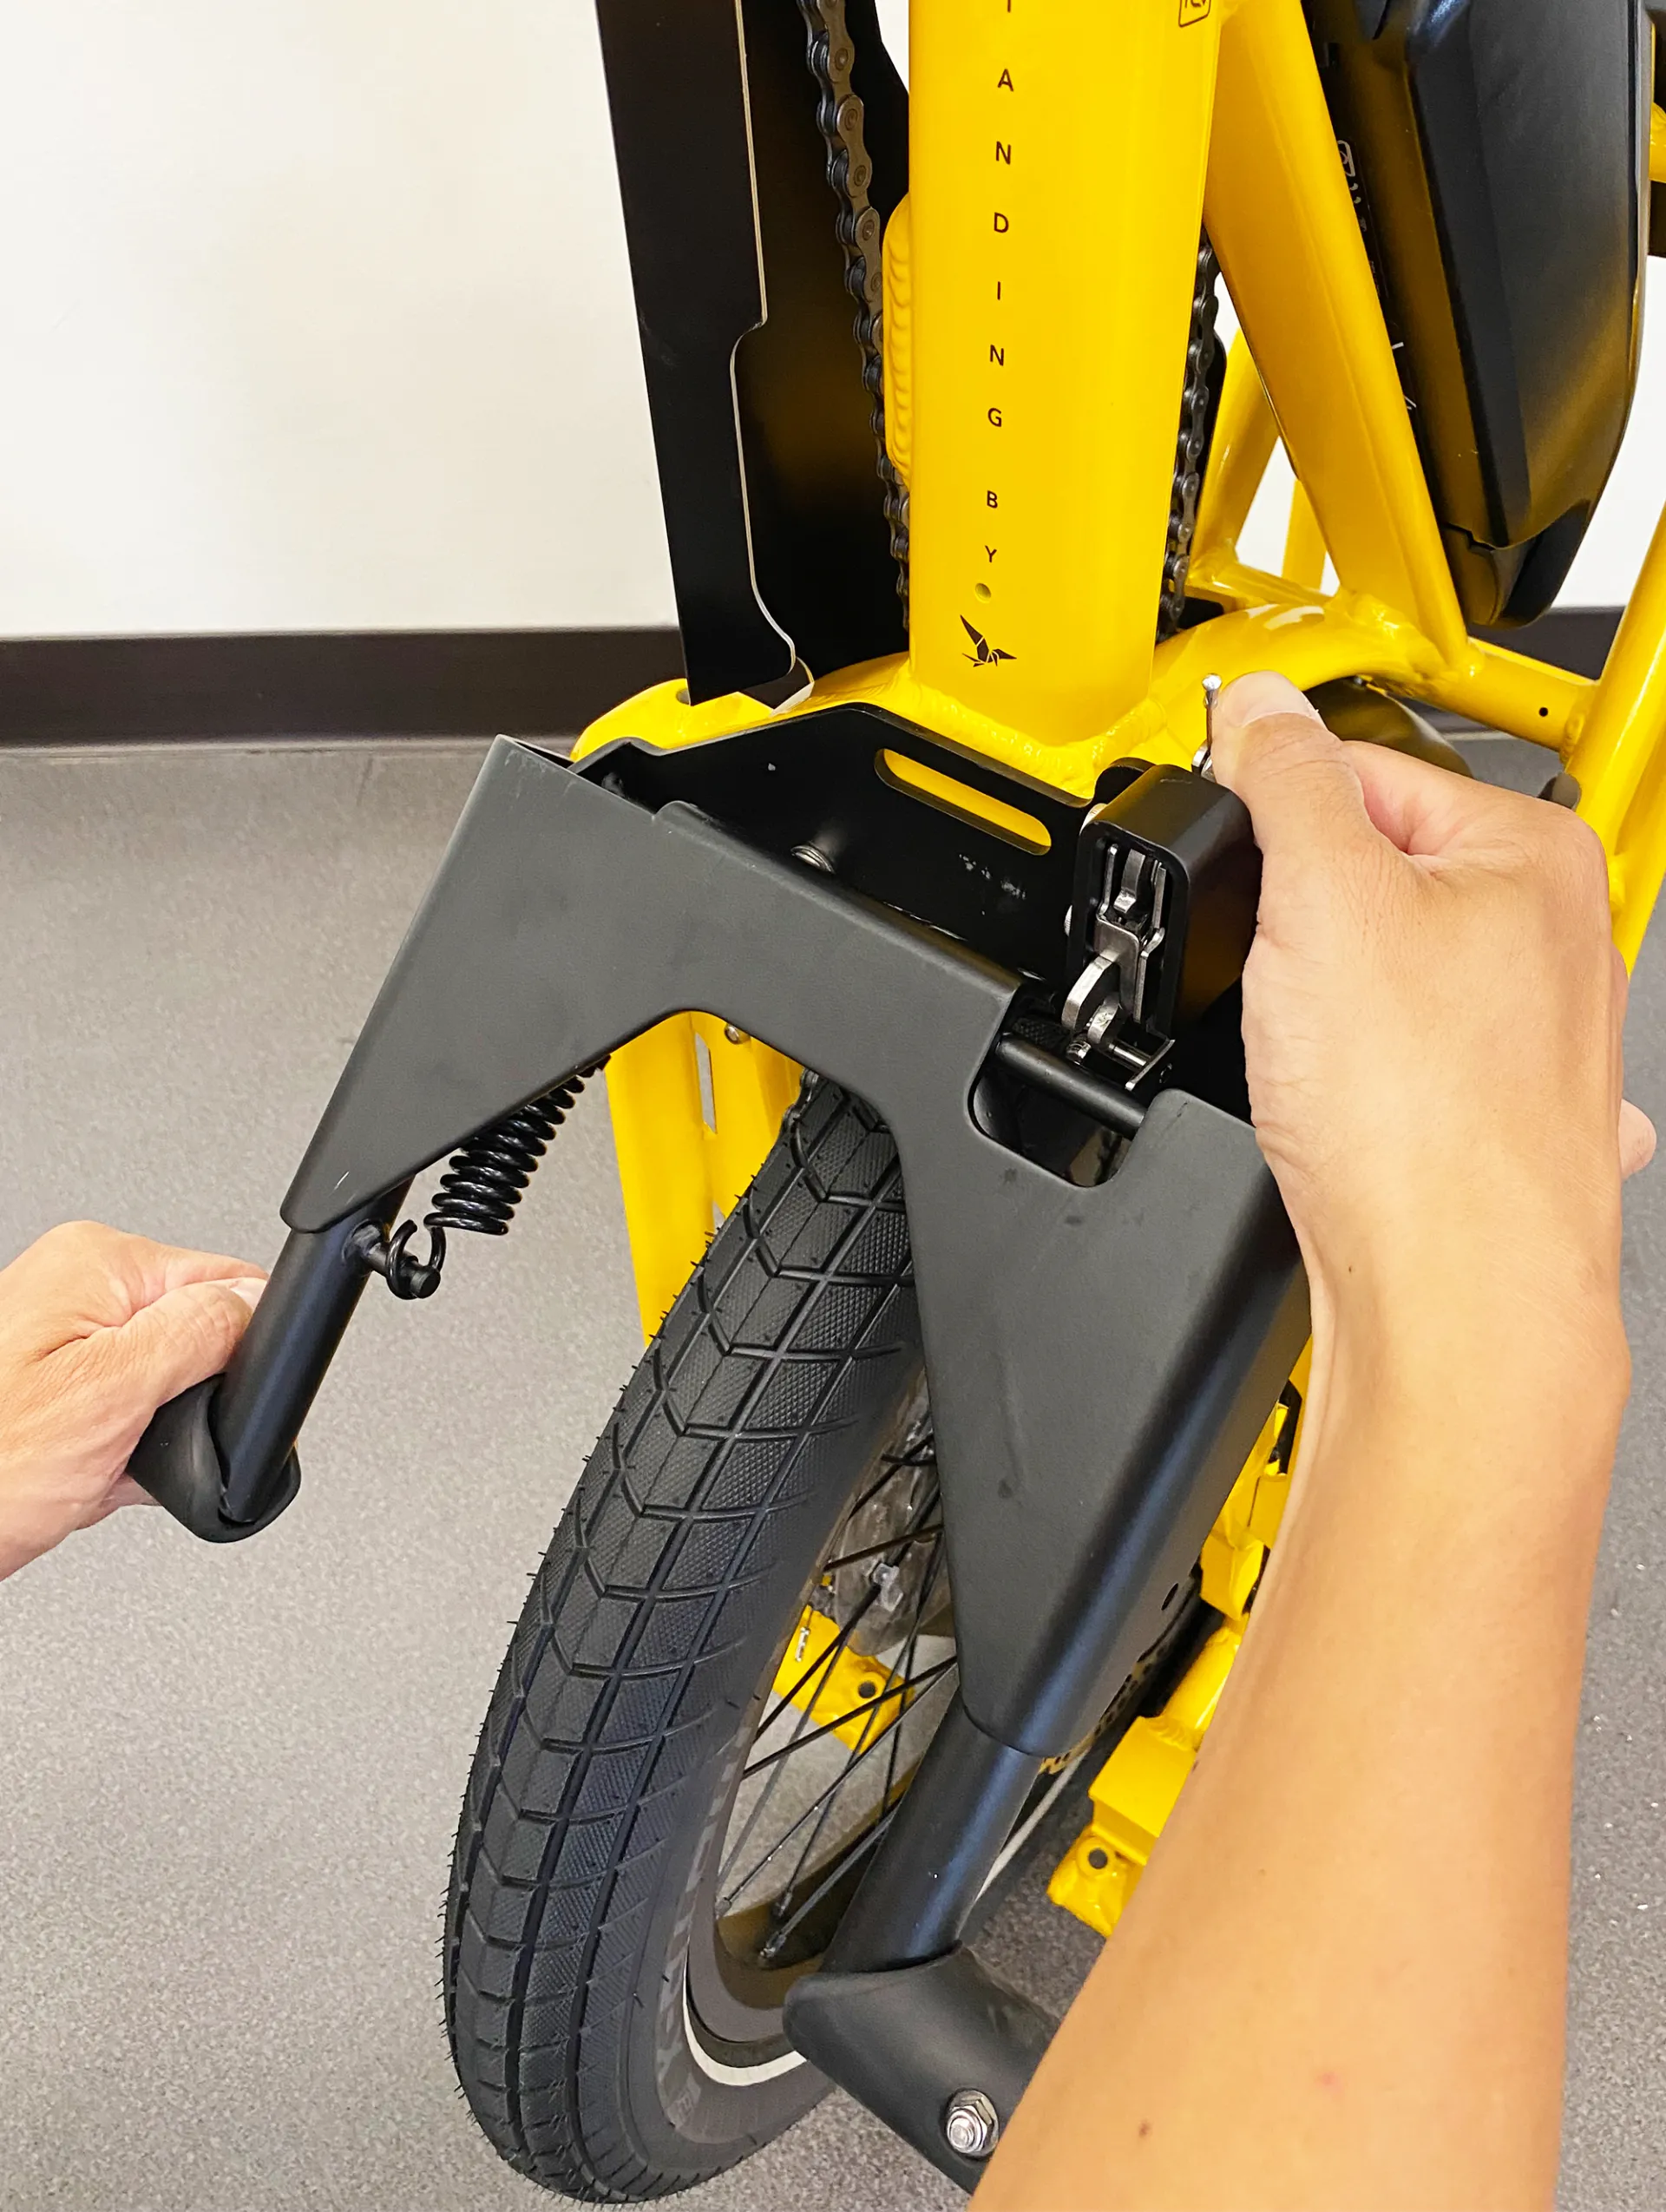
Use your hand to grab one of the Lockstand’s legs and pull upwards to ensure the stand is locked.
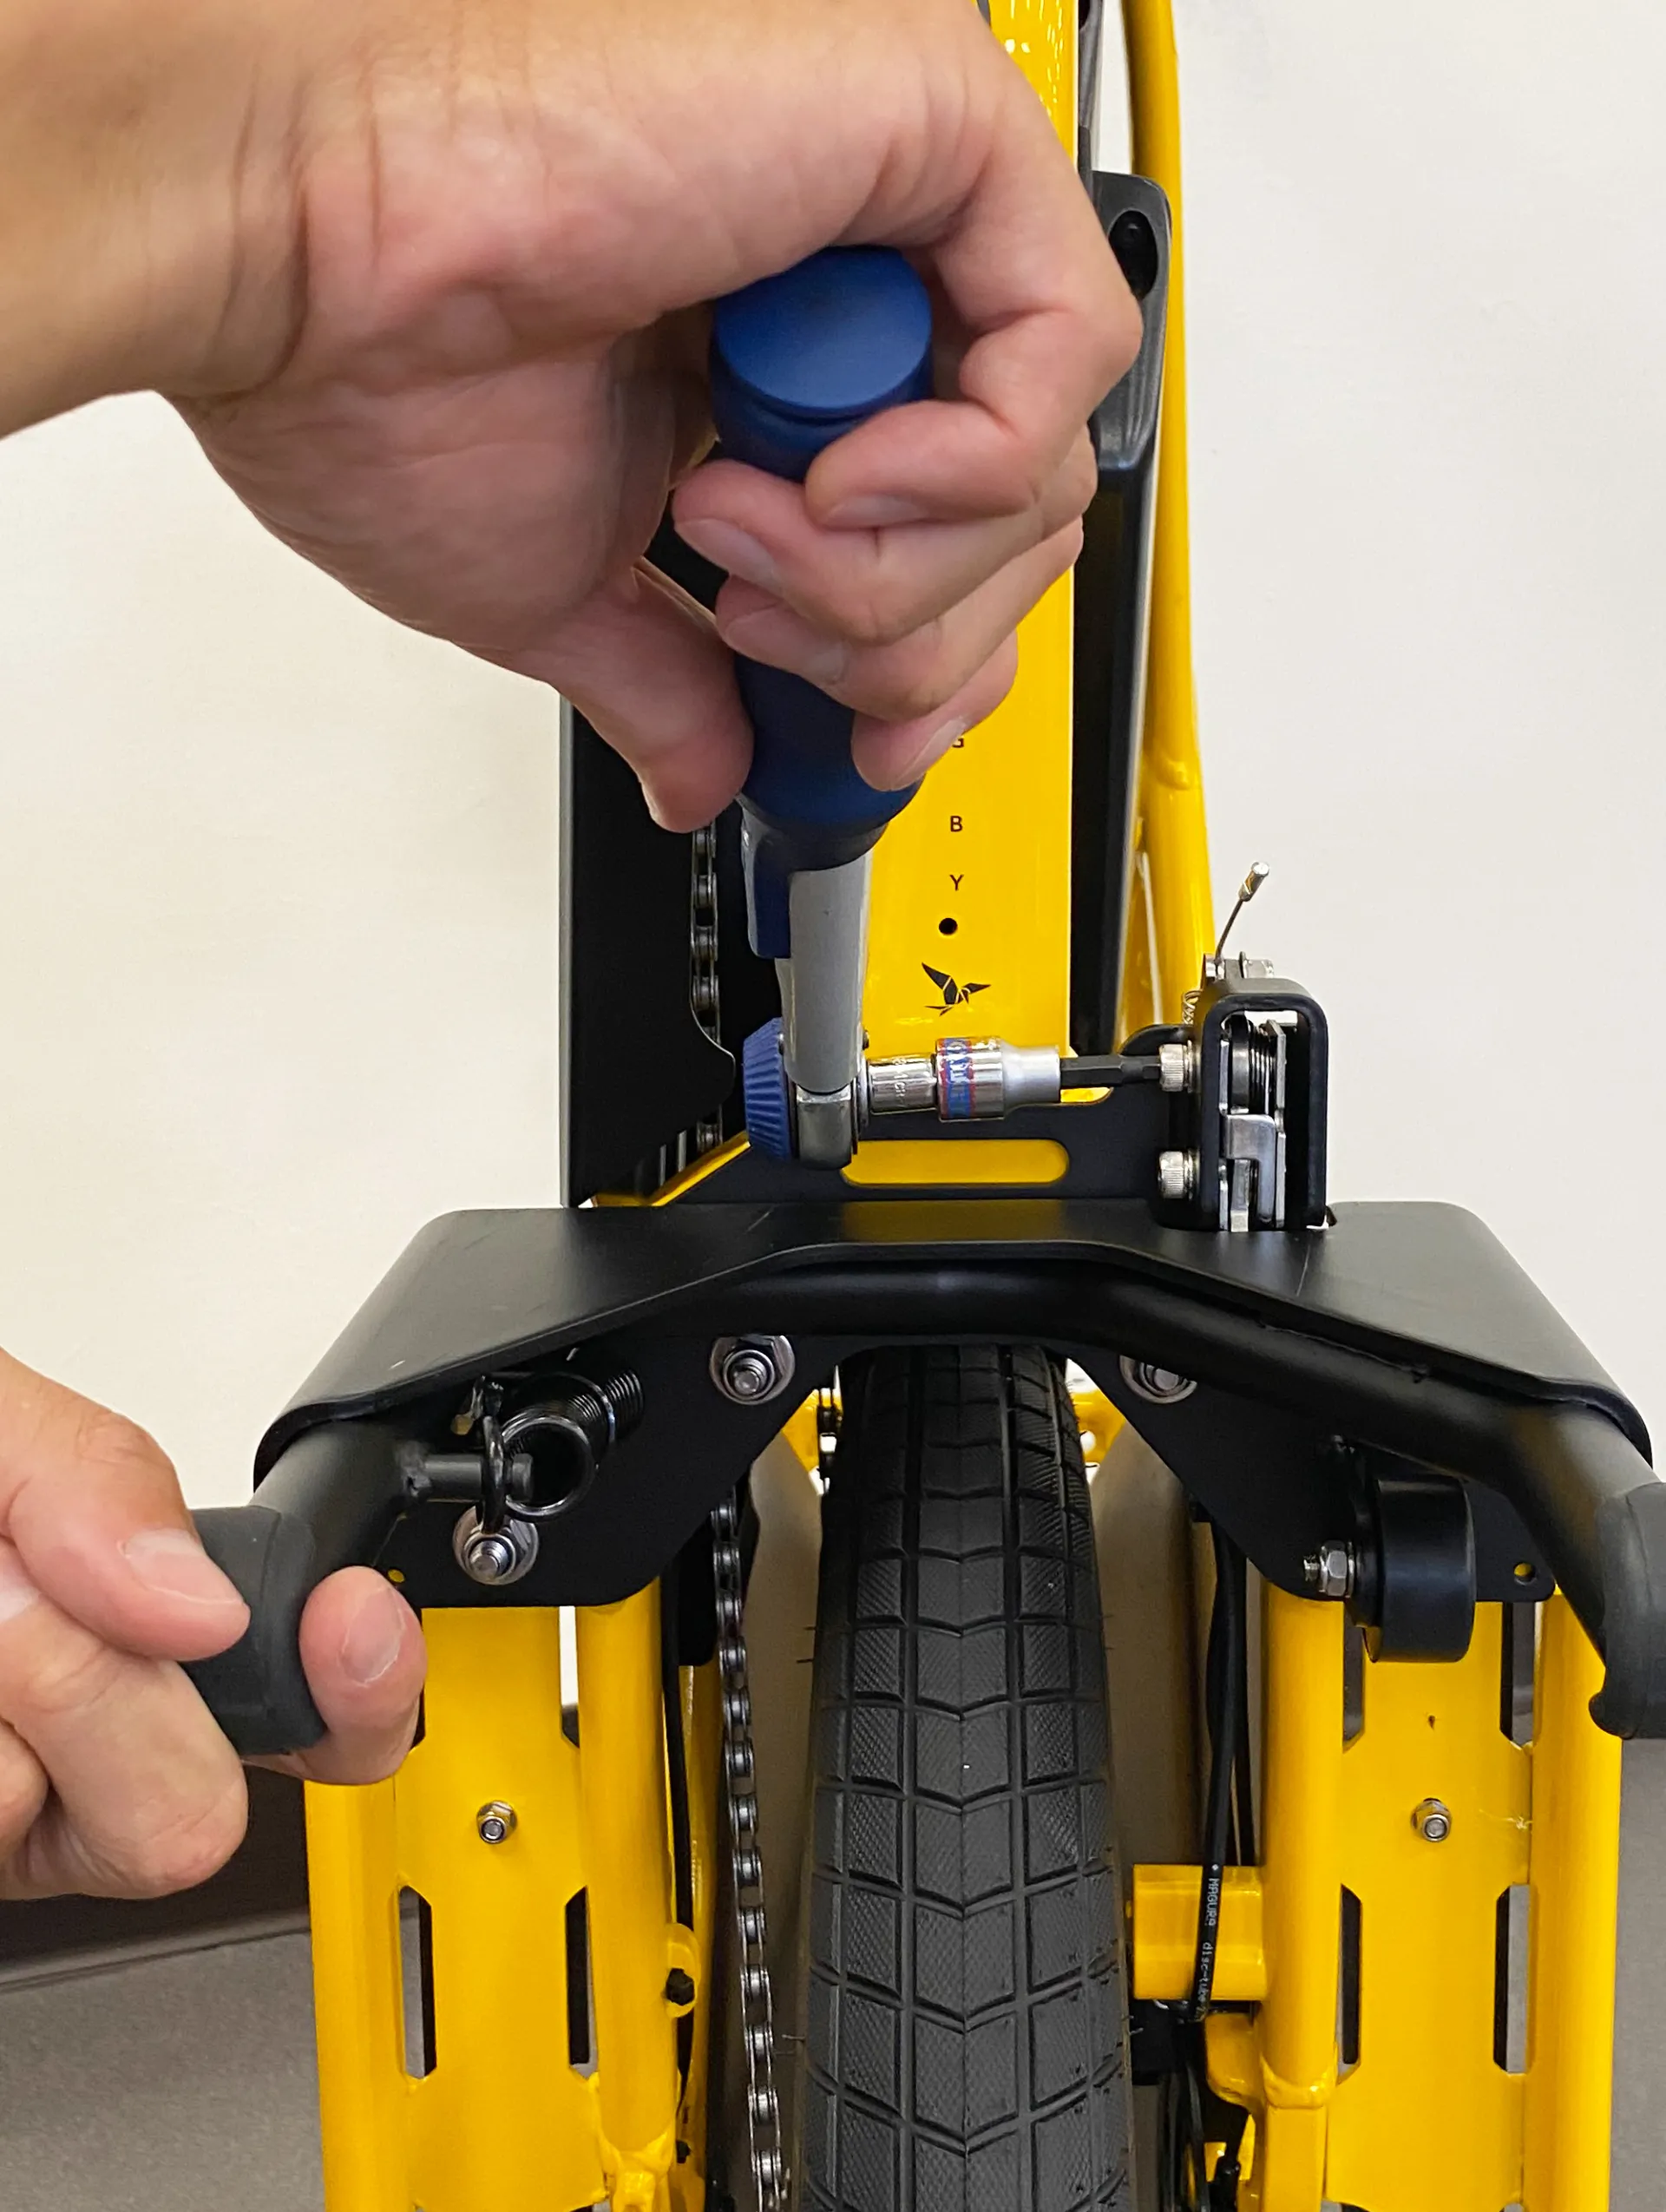
While maintaining a moderate lifting force on the stand with one hand, use a torque wrench to tighten the upper bolt to 8 Nm.
Use your hand to grab one of the Lockstand’s legs. At the same time, press and hold the trigger to release the Lockstand. Then, pull the Lockstand’s leg downwards.

Use a torque wrench to tighten the lower bolt to 8 Nm.

Solution #3: Fix a Misaligned Latch
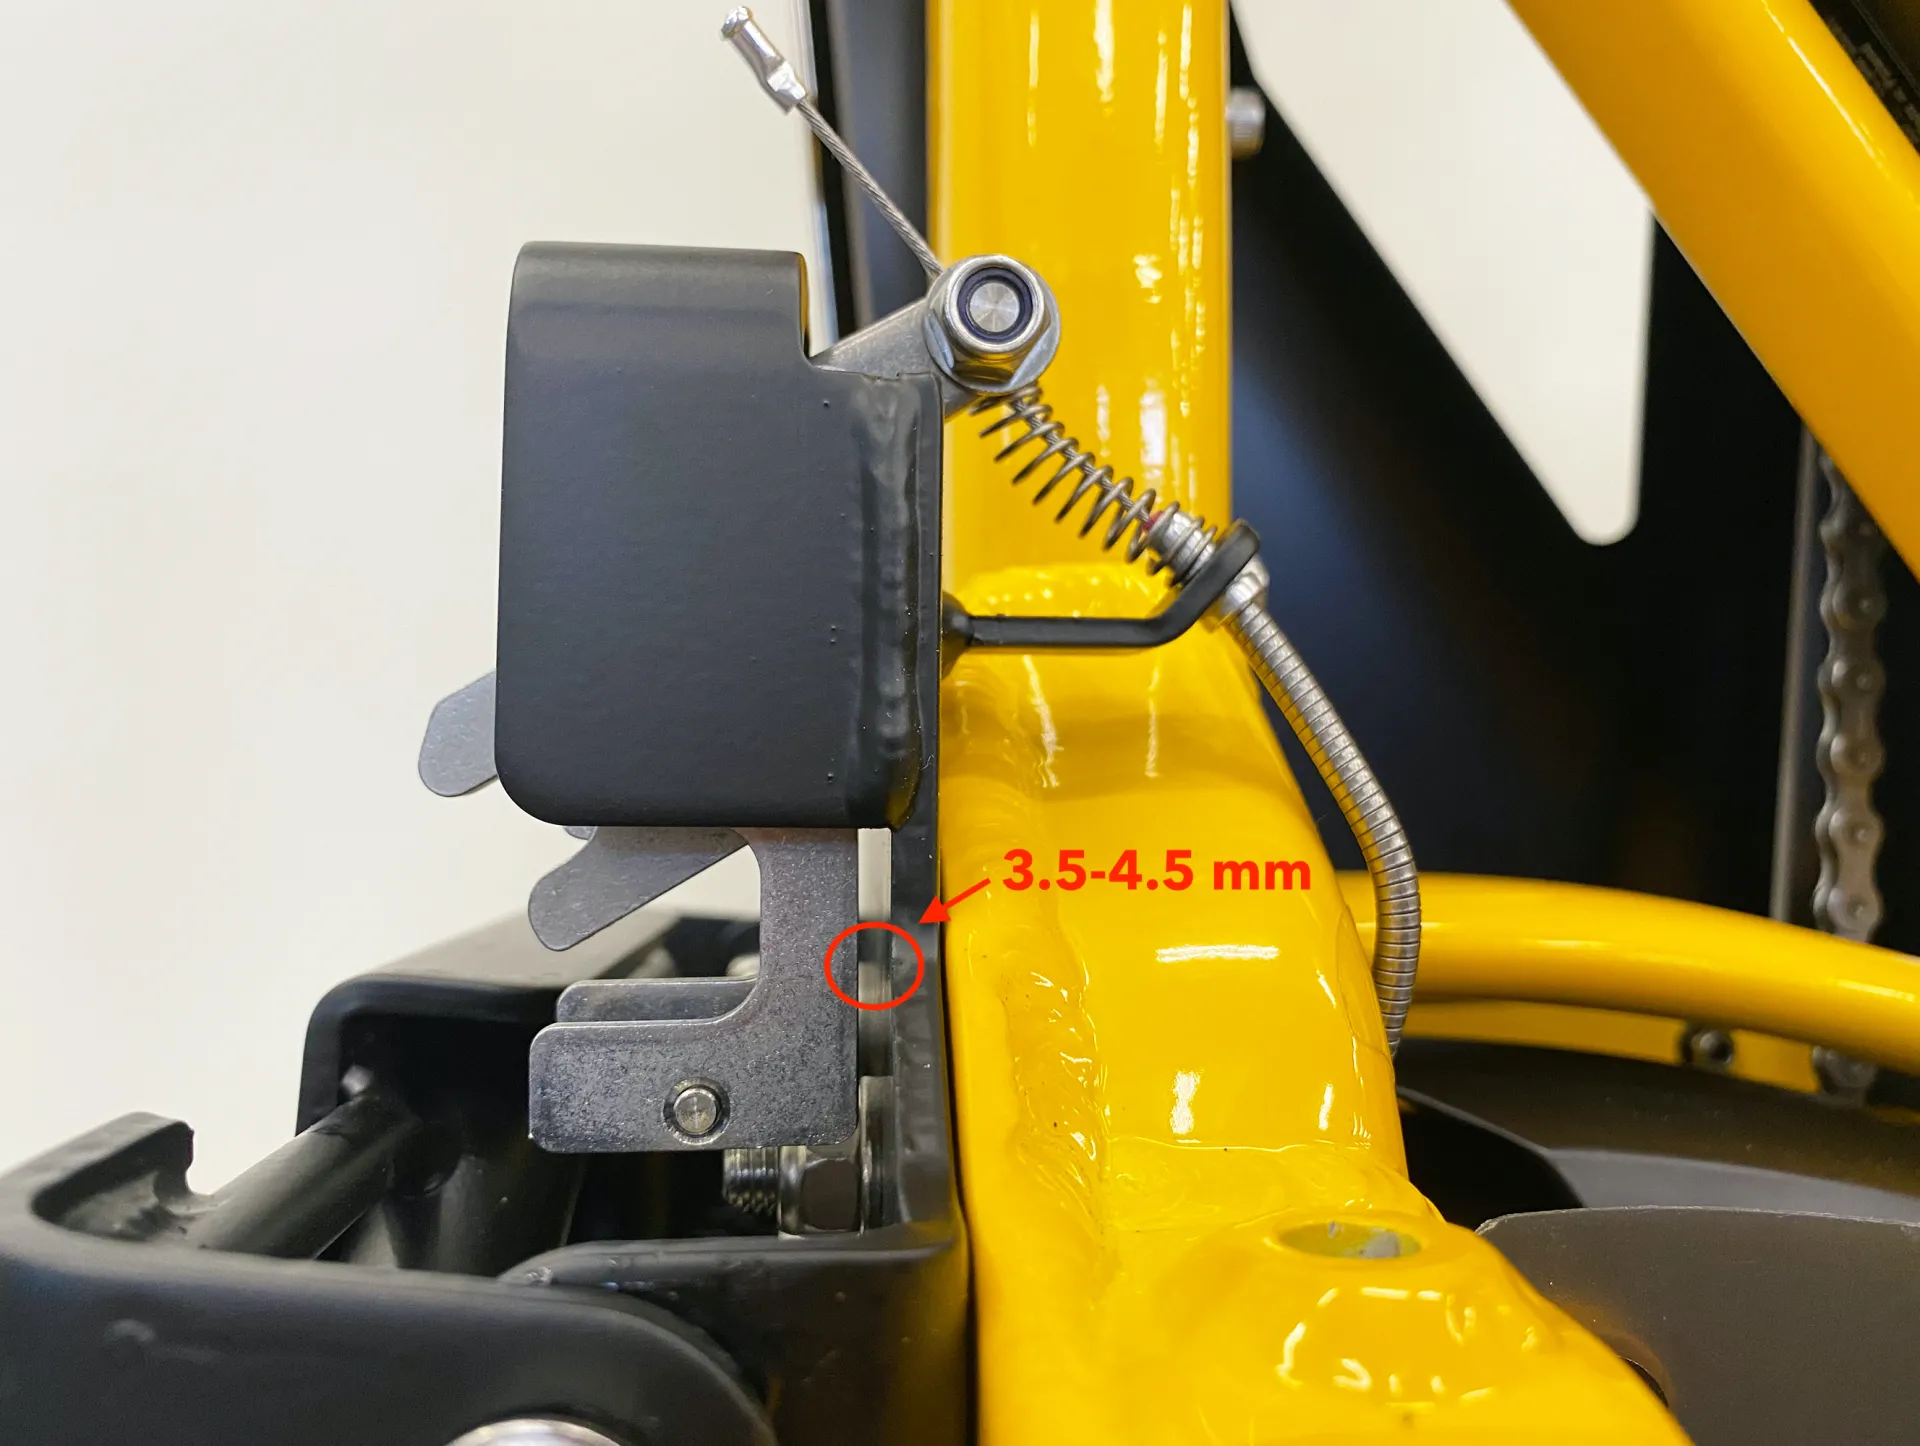
Your Lockstand’s latch must be properly aligned to engage fully. If it’s been knocked around a bit during shipping, riding, or some other event, it could become misaligned.
The correct position for the Lockstand’s latch is 3.5-4.5 mm from the Lockstand’s base, like this:
If you’re experiencing problems with your Lockstand, check whether your latch is aligned correctly. If not, here’s how to fix it:
What You’ll Need
- 5 mm hex/Allen key
- Torque wrench
- 5 mm hex socket
Safety Warning
Before you get started, make sure to re-read the Safety Warning from the beginning of the article.
Fix a Misaligned Latch: Step-by-Step Directions
- Remove all cargo from your GSD and empty the panniers. Fold the panniers flat against the bike and secure them closed. If you have the Clubhouse+ with the Child Seat Expansion Bar installed, you'll need to remove the Child Seat Expansion Bar now.
- Press the Remote Unlock lever and put up the Atlas Lockstand. To prevent injury, be sure to perform this step before vertically parking the bike.
Lift your GSD to the vertically parked position. Stabilize the GSD by securing it to something solid using cargo straps. This reduces the risk that your GSD will fall over while you’re working on it, which could cause injury to you or damage to your bike or accessories.

Use a 5mm Allen key to loosen the bolts on the latch.

Use your hand to grab one of the Lockstand’s legs and pull upwards to ensure the stand is locked.

While maintaining a moderate lifting force on the stand with one hand, use a torque wrench to tighten the upper bolt to 8 Nm.
Use your hand to grab one of the Lockstand’s legs. At the same time, press and hold the trigger to release the Lockstand. Then, pull the Lockstand’s legs downwards.
Use a torque wrench to tighten the lower bolt to 8 Nm.

- Note: This procedure should realign the latch so that the gap between the latch and the Lockstand’s base is 3.5-4.5 mm. Before finishing, confirm that this is true.
- Caution: Avoid over-tightening the bolts. Having too much tension on either side of the latch may restrict latch engagement.