How to Install the Cache Box on an HSD E-Bike
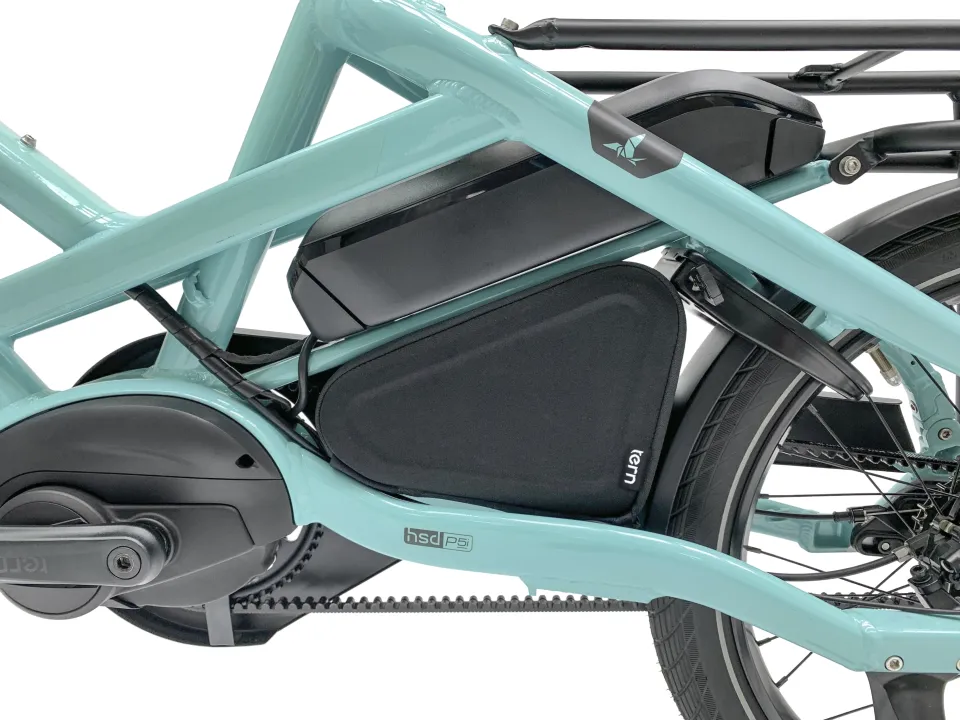
The Cache Box is a discreet yet handy frame bag that’s made for carrying items you may need while out and about on your HSD e-cargo bike, such as a chain lock, hand pump, pocket tools, and more. Made of water-resistant material to keep its contents dry, the Cache Box bolts securely onto the bike frame under the seatstay, and holds up to 2 kg (4 lb) of your bike essentials.
Although the Cache Box is designed for the HSD, the instructions for installing it on HSD Gen 2 bikes are slightly different from those for HSD Gen 1 bikes. But don’t worry—it’s just as simple! This article will provide all the necessary information you need for a smooth installation.
Contents
- Before you begin
- Installing the Cache Box on the HSD Gen 1
- Installing the Cache Box on the HSD Gen 2
Before you begin
Unpack the goodies. Your Cache Box comes with several components, as listed below:
- Cache Box
- Cable tie
- M5 x 12 mm screws (3 pieces)
- M5 washers (3 pieces)
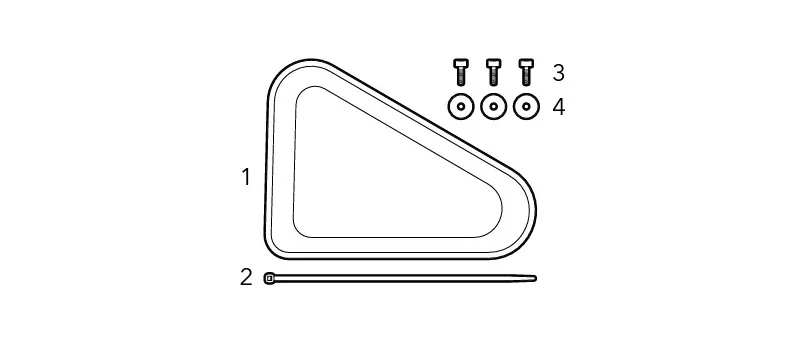
You’ll also need a few tools for installation. Grab a 4 mm Allen wrench (otherwise known as the L-shaped wrench) and a pair of scissors.
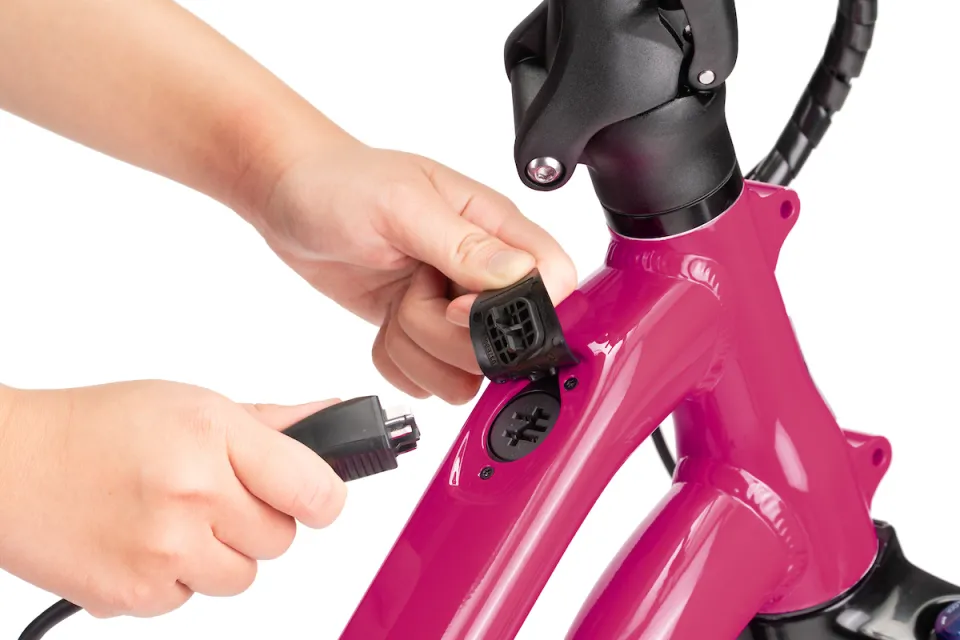
Not sure if you have an HSD Gen 1 or Gen 2? There's an easy way to spot all Gen 2 bikes, and that's the charging port located on the top tube. If there's no charging port on the top tube, you have a Gen 1 bike.
Installing the Cache Box on the HSD Gen 1
For detailed instructions on how to install the Cache Box on an HSD Gen 1 bike, download the user manual here.
If you’re the owner of an HSD Gen 2 bike, continue reading to learn the step-by-step process of installing the Cache Box on your bike.
Installing the Cache Box on the HSD Gen 2
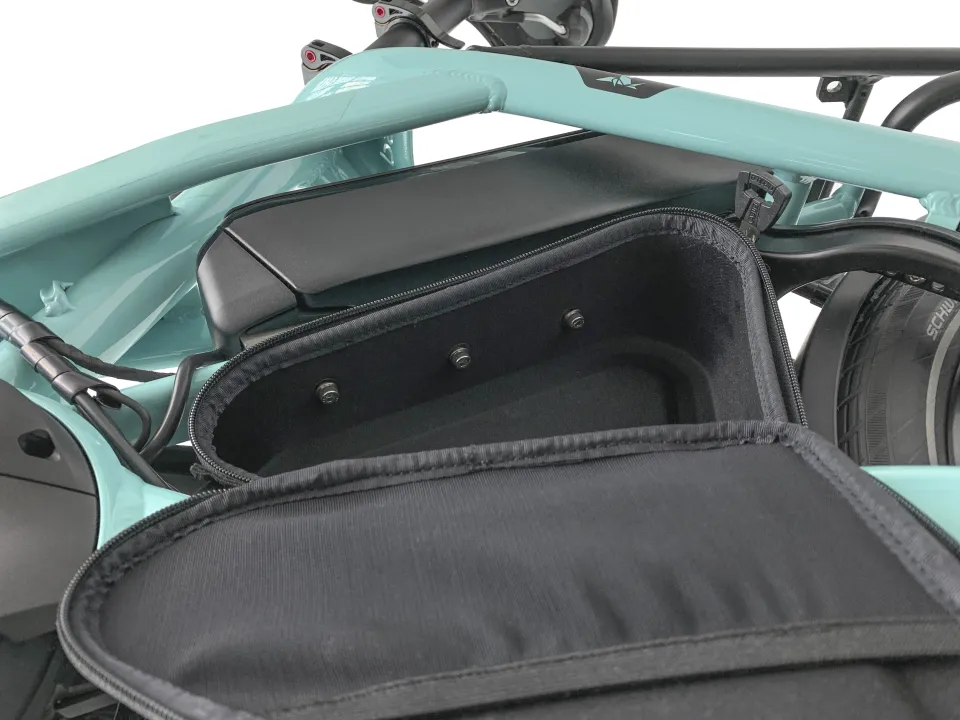
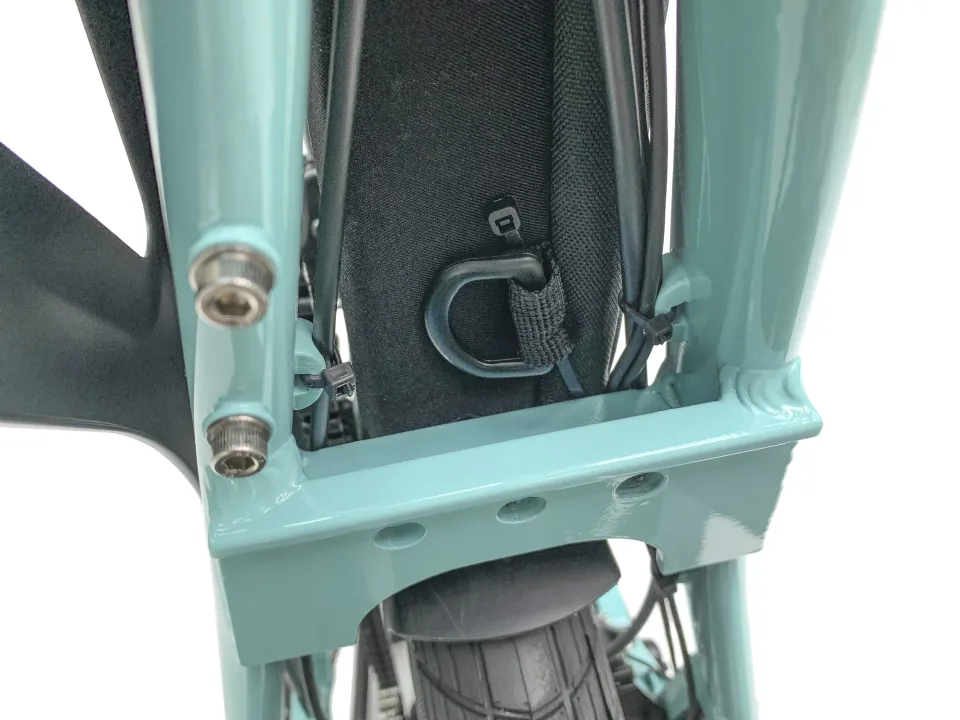
1. Insert the cable tie into the Cache Box’s webbing loop. We’ll ignore the plastic D ring.

2. Locate the 3 mounting holes of the Cache Box and align them to the mounting points on the bike frame. Using your Allen wrench, fasten the Cache Box to the bike frame with the screws and washers through the mounting holes.
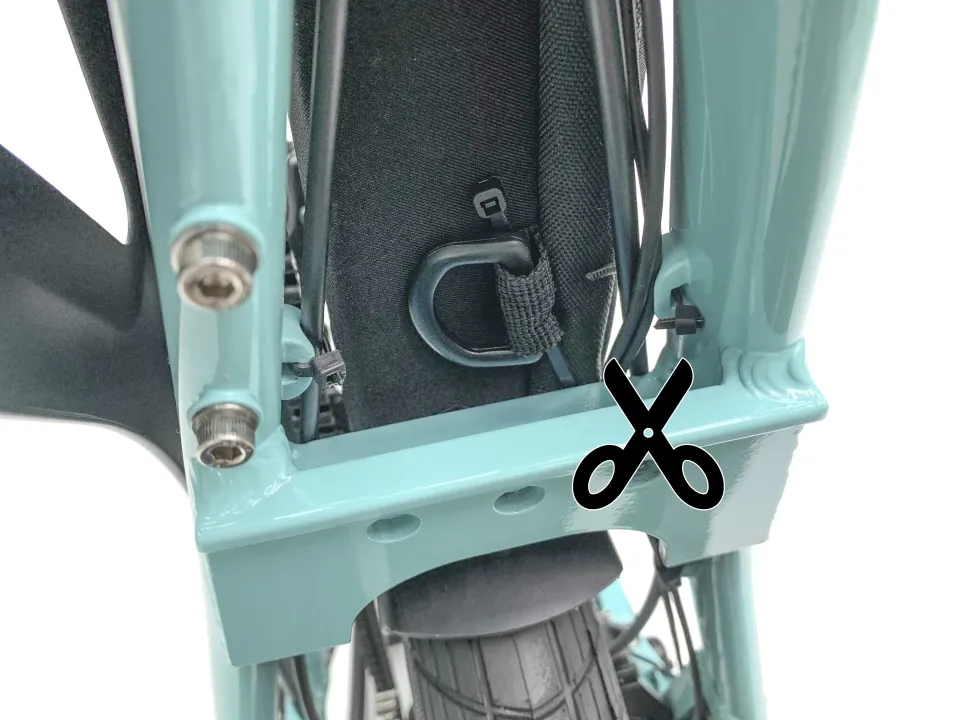
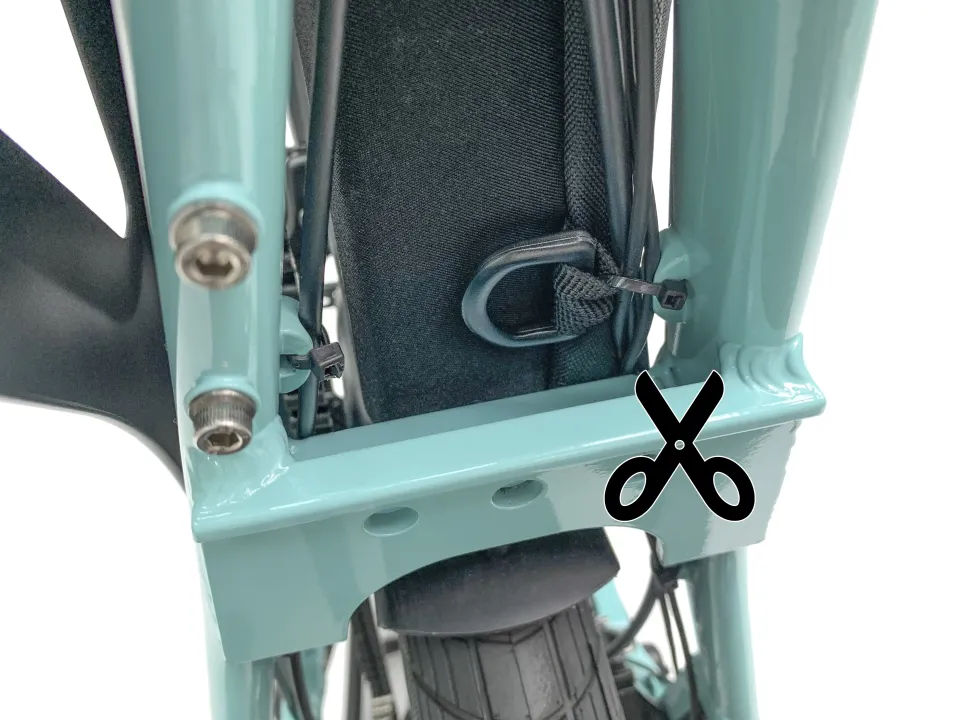
3. Using your scissors, snip and remove the original cable tie that's currently fastened to the bike frame’s cable guide.
Before
After
4. While the cable tie you’ve inserted into the Cache Box's webbing loop in Step 1 stays in the webbing loop, direct its tail through the cable guide opening. You’ll need to bend the cable tie a little for this.
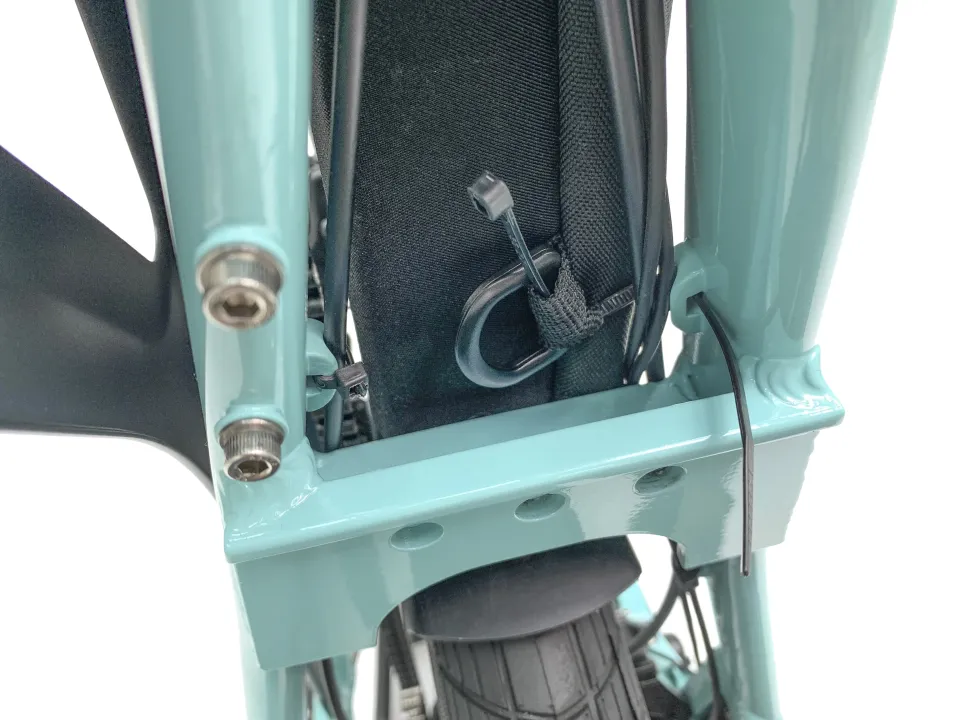
5. Making sure the cable tie still passes through the Cache Box’s webbing loop, gather the bike cables and securely fasten them with the cable tie to the cable guide.
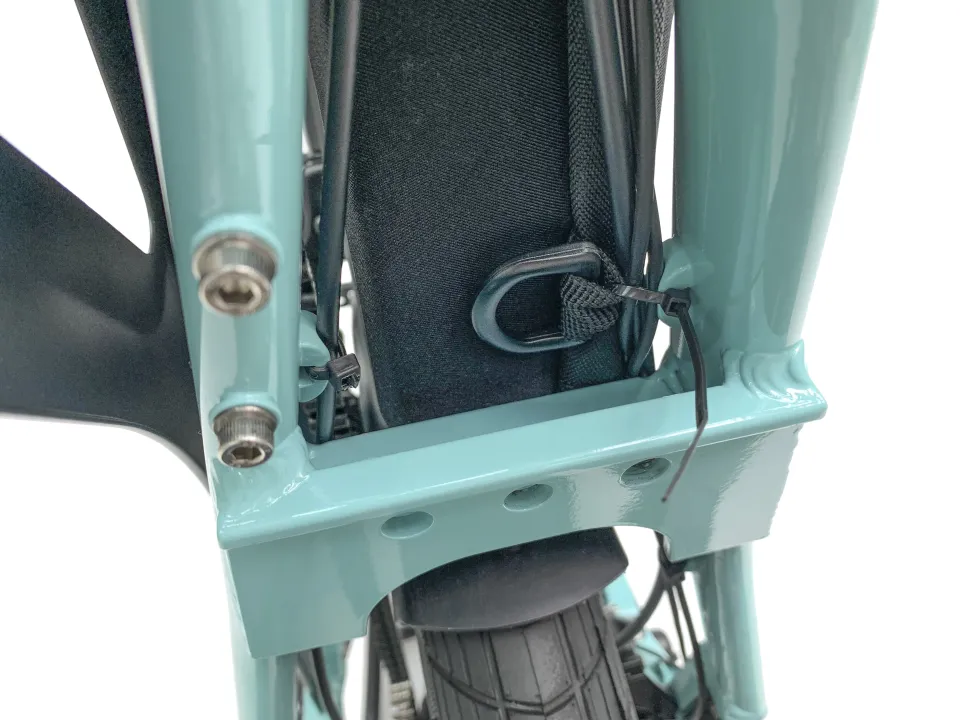
6. Lastly, use your scissors to trim the cable tie’s tail so everything is neat and tidy.
Your Cache Box is now secured to your HSD Gen 2 bike, and ready to carry your gadgets. Enjoy!